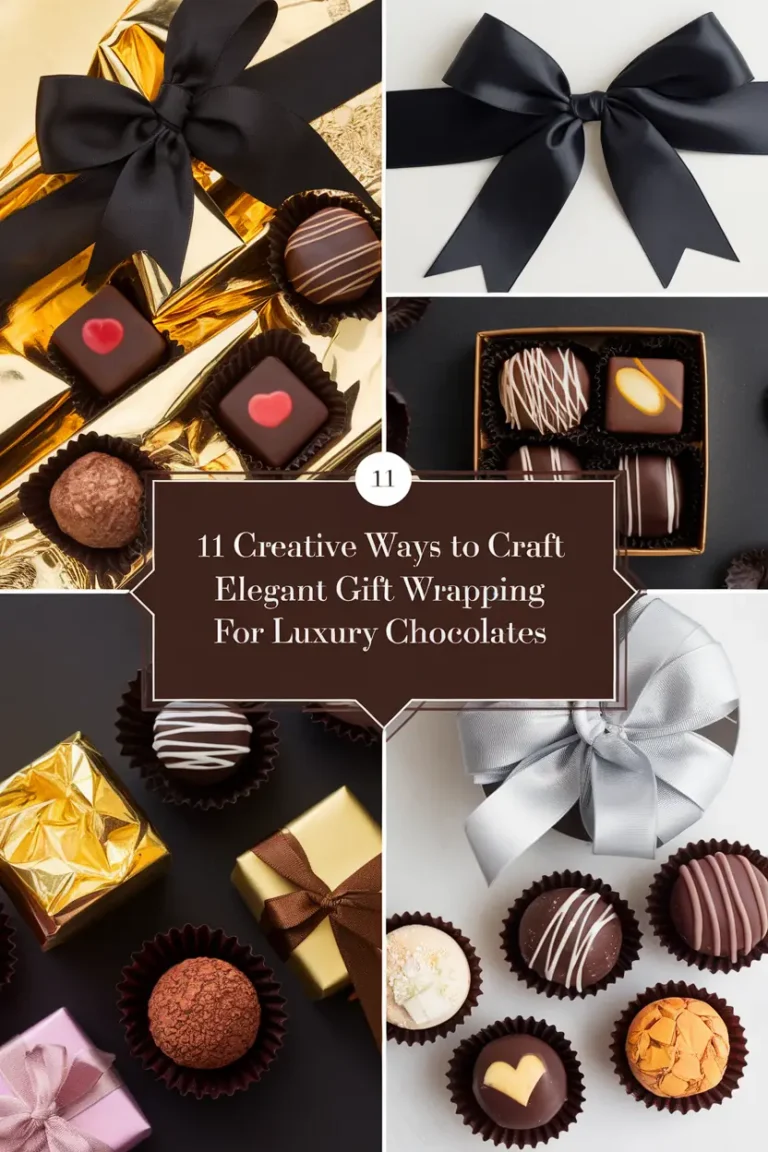
Luxury chocolates deserve wrapping as stunning as their flavors. Whether you’re preparing a gift for someone special or elevating your holiday treats, these 11 ideas will help you create beautiful, handcrafted wrapping that’s both elegant and personal. Let’s get crafty!
1. Gold Foil Accents
Gold foil wrapping screams sophistication and timeless elegance. It’s perfect for turning even the simplest of chocolate boxes into a dazzling gift. Here’s how you can achieve this look:
- Materials: Kraft paper, adhesive gold foil, scissors, and a bone folder (optional).
- Steps:
- Cut a sheet of kraft paper large enough to wrap your chocolate box.
- Decide on a design, such as polka dots, stripes, or a monogram. Use a template or stencil for precision.
- Apply adhesive gold foil to the kraft paper, ensuring smooth application by pressing down with a bone folder. Peel off the backing paper to reveal the shiny gold details.
- Wrap the chocolate box as usual and secure with double-sided tape.
- Example: Use polka dots for a modern look or add the recipient’s initials for a personal touch.
Gold foil accents make your gift look luxurious and thoughtful, ensuring it stands out among the rest.
2. Velvet Ribbon Wrap
Velvet ribbons bring an aura of softness and grandeur. They are a simple yet effective way to elevate your chocolate gift. Here’s how to make it work:
- Materials: Velvet ribbon (1-2 inches wide), scissors, and hot glue (optional).
- Steps:
- Choose a ribbon color that complements the chocolate box—deep red for romance or emerald green for festive occasions.
- Wrap the ribbon horizontally around the box, securing it underneath with hot glue or double-sided tape.
- Cut another piece of ribbon to tie a large, elegant bow. Place the bow on top or slightly off-center for a contemporary feel.
- Add embellishments like a small charm or dried flower for extra flair.
- Example: Use navy velvet ribbon with a gold charm for a gender-neutral, classy look.
A velvet ribbon wrap guarantees your gift feels as luxurious as the chocolates inside.
3. Handmade Paper Sleeves
Transforming ordinary chocolate boxes into pieces of art has never been easier than with handmade paper sleeves. This method lets your creativity shine:
- Materials: Handmade paper, a cutting mat, ruler, and double-sided tape.
- Steps:
- Measure the dimensions of the chocolate box and cut the handmade paper to fit as a sleeve, leaving a small overlap for gluing.
- Choose papers with pressed flowers, embossed textures, or watercolor patterns for a unique appearance.
- Wrap the paper snugly around the box, securing the ends with double-sided tape.
- Add a small tag or wax seal to finish.
- Example: Use floral-patterned handmade paper for a spring-themed gift or metallic paper for a holiday vibe.
Handmade paper sleeves bring a personal and artisanal feel to your gift, making it truly unforgettable.
4. Stamped Kraft Paper
Stamped kraft paper is the perfect solution for adding a personal touch without a lot of effort. Here’s how to create unique designs:
- Materials: Kraft paper, rubber stamps, ink pads, and a pencil.
- Steps:
- Roll out a sheet of kraft paper and secure it to your work surface.
- Choose chocolate-themed stamps, like truffle shapes or cocoa beans, and ink them evenly.
- Stamp the paper in a repeating pattern, ensuring consistent spacing. Use a pencil and ruler to lightly mark a grid if needed.
- Once dry, wrap your chocolate box and tie it with jute twine for a rustic finish.
- Example: Use white ink for a winter wonderland theme or metallic ink for a luxe appearance.
Stamped kraft paper turns your wrapping into a one-of-a-kind masterpiece, ensuring it’s as thoughtful as the gift inside.
5. Transparent Acetate Boxes
For chocolates that look as good as they taste, transparent acetate boxes are a stunning option. Let’s put the spotlight on your delicious treats:
- Materials: Acetate sheets, a cutting tool, scoring tool, and metallic tissue paper.
- Steps:
- Cut acetate sheets into panels based on the dimensions of your chocolate box. Use a scoring tool to create neat folds.
- Assemble the box by folding and securing the edges with clear tape or adhesive.
- Line the bottom of the box with metallic tissue paper for a glamorous touch.
- Place the chocolates inside, ensuring they’re arranged neatly.
- Finish with a ribbon or tag.
- Example: Use gold tissue paper for a New Year’s gift or pastel paper for Easter chocolates.
Transparent acetate boxes offer a professional finish that lets the chocolates themselves take center stage.
6. Floral Embellishments
Dried flowers are a delightful way to enhance your gift’s aesthetic, adding natural elegance and charm. Here’s how to do it:
- Materials: Kraft paper or solid wrapping paper, dried flowers, and twine.
- Steps:
- Wrap the chocolate box in plain kraft paper or pastel wrapping paper.
- Select dried flowers like lavender, eucalyptus, or baby’s breath. Arrange them into a small bouquet.
- Tie the bouquet onto the box with twine or ribbon, ensuring it’s centered or slightly off-center for visual interest.
- Optional: Add a small handwritten tag for a personalized touch.
- Example: Use lavender for a soothing theme or poinsettias for Christmas gifts.
Floral embellishments add a graceful, fragrant finishing touch to your gift presentation.
7. Wax Seal Elegance
Wax seals exude timeless luxury and can instantly elevate any wrapping. Here’s how you can master this classic look:
- Materials: Sealing wax, a wax seal stamp, and a ribbon.
- Steps:
- Wrap your chocolate box with paper and ribbon as desired.
- Melt the sealing wax onto the center of the ribbon or corner of the box.
- Press the wax seal stamp into the melted wax and hold for a few seconds before lifting.
- Let the seal cool and harden completely.
- Example: Use a snowflake seal for winter holidays or initials for a monogrammed effect.
A wax seal adds an old-world charm to your gift, making it feel truly special.
8. Calligraphy Tags
Custom calligraphy tags make your wrapping feel personal and elegant. Here’s how to create them:
- Materials: Cardstock, calligraphy pen, and ribbon.
- Steps:
- Cut small tags out of cardstock in shapes like circles, ovals, or rectangles.
- Use a calligraphy pen to write the recipient’s name, a short message, or a chocolate-themed pun (e.g., “You’re Sweet!”).
- Punch a hole in the tag and thread it onto a ribbon tied around the box.
- Example: Pair metallic ink with black cardstock for a sophisticated touch.
Calligraphy tags add a refined, personal touch to your chocolate gift.
9. Luxury Fabric Wrapping
Fabric wrapping is a sustainable and chic alternative to traditional wrapping paper. Here’s how to make it shine:
- Materials: Silk or satin fabric, scissors, and decorative accents (optional).
- Steps:
- Cut the fabric into a square large enough to wrap the chocolate box completely.
- Place the box in the center and bring opposite corners together, tying them in a knot.
- Repeat with the remaining corners or tuck them under the knot for a neat finish.
- Add embellishments like a brooch or small sprig of greenery.
- Example: Use red silk for Valentine’s Day or metallic satin for a glamorous holiday gift.
Fabric wrapping offers a touch of luxury and eco-consciousness, making your gift doubly thoughtful.
10. Layered Vellum
Vellum wrapping layers add softness and sophistication to your chocolate gift. Here’s how to incorporate it:
- Materials: Vellum paper, double-sided tape, and embossing tools (optional).
- Steps:
- Wrap the chocolate box in plain white or pastel paper as a base layer.
- Cut a sheet of vellum paper slightly smaller than the base layer and secure it on top with double-sided tape.
- Use embossing tools to create raised designs on the vellum for added texture.
- Tie a thin ribbon around the box to secure the layers.
- Example: Use vellum with embossed snowflakes for winter gifts.
Layered vellum wrapping adds a unique, ethereal quality that’s perfect for elegant occasions.
11. Themed Chocolate Boxes
Themed wrapping lets your creativity shine and sets the tone for your gift. Here’s how to create one:
- Materials: Plain wrapping paper, markers or paint pens, and glitter (optional).
- Steps:
- Choose a theme, like hearts for Valentine’s Day or stars for New Year’s Eve.
- Draw or stencil designs onto the wrapping paper using markers or paint pens.
- Add glitter or metallic accents to enhance the theme.
- Wrap the chocolate box and finish with a ribbon in a complementary color.
- Example: Create a starry night design for a dreamy, celestial gift.
Themed chocolate boxes make your gift unique and tailored to the occasion, leaving a lasting impression.


