Let’s be honest: December is busy.
Between gift wrapping, baking, and playing Santa, finding time to decorate can feel impossible.
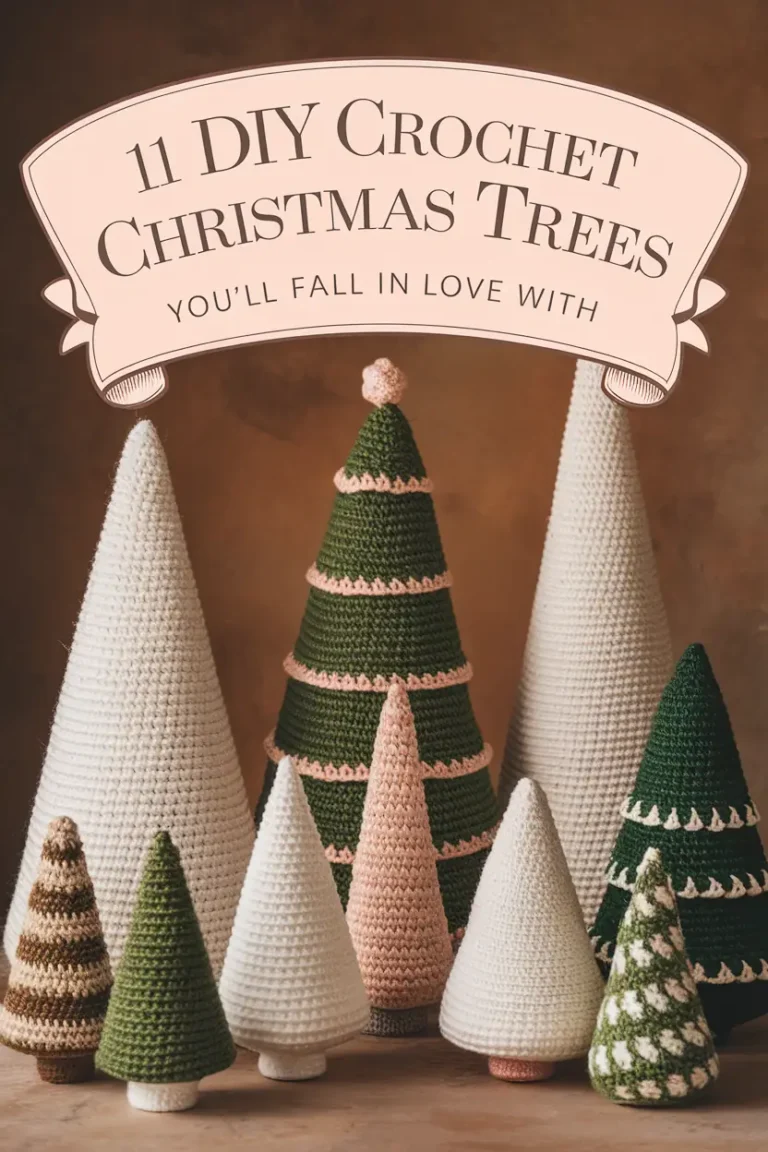
But what if I told you these 11 Crocheted Christmas trees could be your holiday lifesaver?
Quick, simple, and oh-so-cute, these Crochet Quick Christmas Decorations will make your home look like a Pinterest dream without the stress.
From easy-to-follow Free Crochet Christmas Tree Patterns to adorable Crochet Puff Stitch Christmas Trees, this list has something for everyone.
These Cute Christmas Crochet Patterns are great for whipping up on a cozy evening with your favorite holiday movie—and they’re perfect for gifting too!
Why You’ll Love This Article:
- Super-fast projects like the Crochet Bobble Trees for last-minute decor
- Fun ways to create meaningful Crochet Projects For Christmas Gifts
- Budget-friendly ideas using leftover Christmas Crochet Cotton Yarn
- Inspiring patterns that double as decor and Xmas Crochet Ornaments
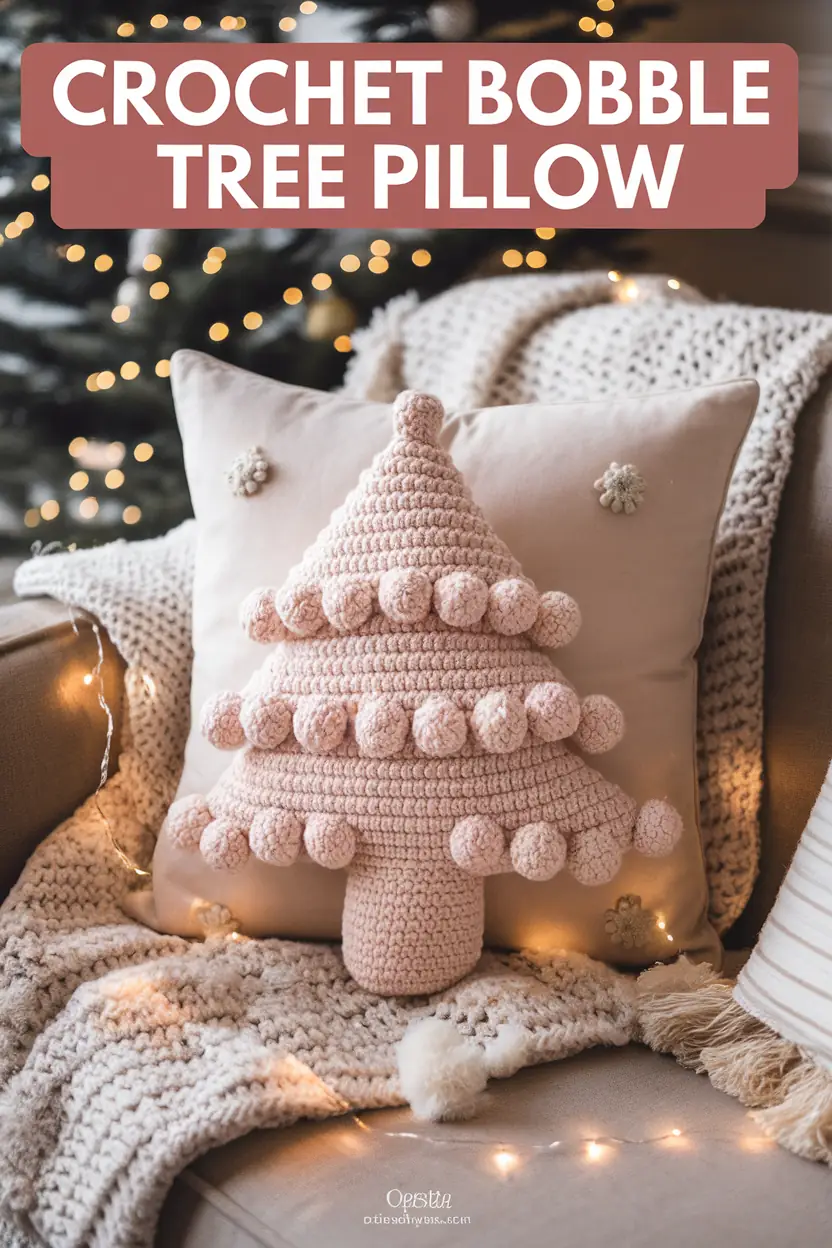
1. Make a Cozy Crochet Bobble Tree Pillow
A Crochet Bobble Tree Pillow is the ultimate combination of festive and functional decor. It’s soft, textured, and perfect for cozying up on chilly winter evenings. This huggable pillow adds a playful yet stylish touch to your couch or favorite chair. Best of all, it’s a beginner-friendly project that works up quickly!
Pros/Features:
- Adds a unique, tactile element to your home decor.
- Perfect for snuggling during holiday movie nights.
- Customizable with your favorite colors and yarns.
-
Materials Needed:
- Chunky Christmas Crochet Cotton Yarn in your desired color (around 3-4 skeins depending on size).
- Crochet hook (size recommended for your yarn, typically 6.5mm to 8mm for chunky yarn).
- Pillow stuffing or fiberfill.
- Tapestry needle for sewing pieces together.
- Scissors.
- Stitch markers (optional).
Step-by-Step Instructions:
Step 1: Create the Tree Shape
- Start with the base of the tree. Use a Crochet Simple pattern to create a triangular shape, working from the bottom up.
- Begin with a chain (the width of your tree’s base).
- Work single crochet (SC) stitches across, decreasing 1 stitch at the beginning and end of each row until you reach the top.
- This forms the front panel of the tree.
- Repeat the same process to make an identical back panel. This will ensure your pillow is plush and evenly shaped.
Step 2: Add the Bobble Stitches
- Use the Bobble Tree Crochet technique to add texture. The bobble stitch is made by:
- Yarn over (YO), insert your hook into the stitch, YO again, pull through.
- Repeat this process five times into the same stitch.
- YO once more and pull through all loops on your hook.
- Place the bobbles evenly across the front panel to mimic the look of ornaments. For added flair, try using contrasting colors for the bobbles!
Step 3: Create the Tree Trunk
- Crochet a rectangular piece for the trunk using the same Crochet Simple stitches.
- Chain 8-10 stitches (depending on the width of your trunk) and work SC rows until you reach your desired height.
- Make a second matching piece for the back of the trunk.
Step 4: Assemble the Pillow
- Lay the front and back tree panels together with the right sides facing out.
- Use single crochet or whip stitch to join the panels, starting at the bottom edge of one side.
- Leave the bottom edge open to attach the trunk.
- Attach the trunk panels to the base of the tree using the same joining technique.
- Before completely closing the pillow, stuff it generously with pillow stuffing or fiberfill.
Step 5: Finish and Embellish
- Once the pillow is fully stuffed, close the final opening securely with SC or whip stitch.
- Use a tapestry needle to weave in any loose ends for a clean finish.
- Optional: Add embellishments such as embroidered snowflakes, sequins, or even tiny Crocheted Xmas Decorations to make your pillow extra festive!
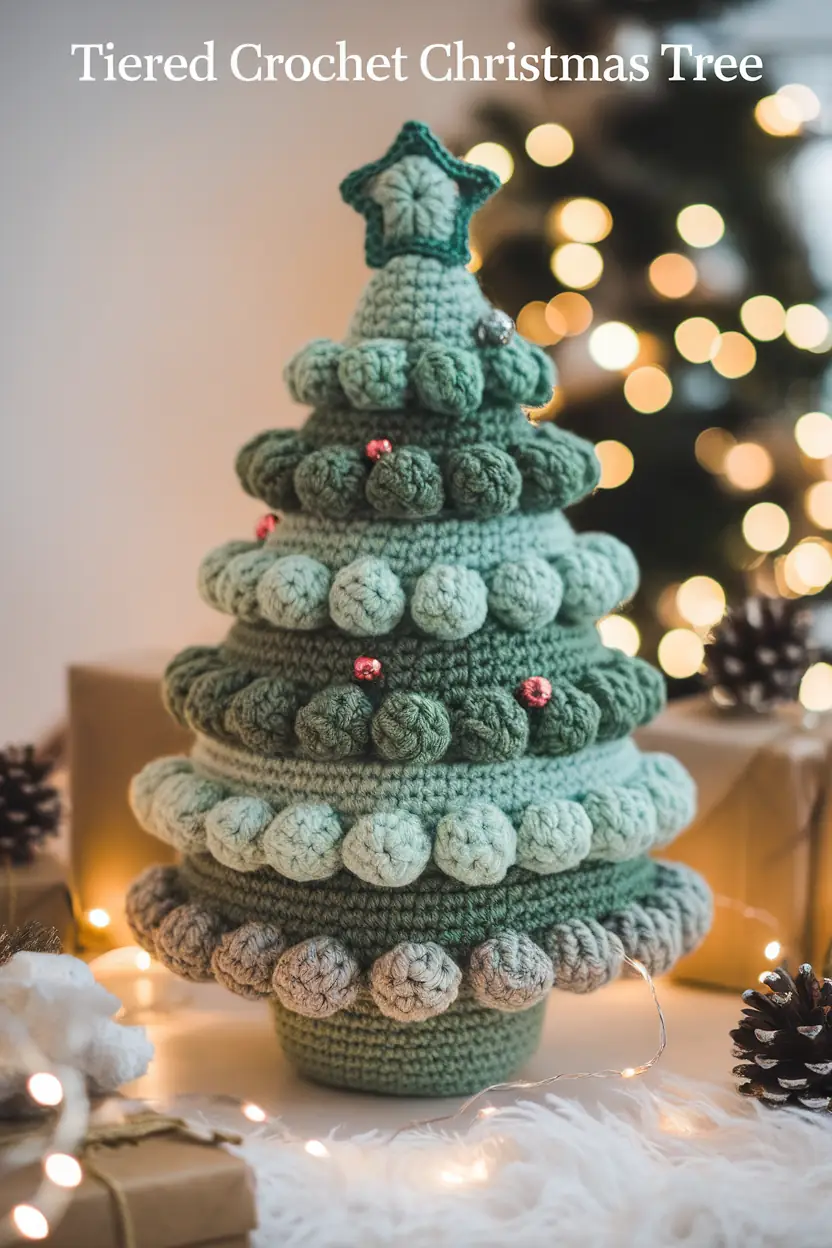
2. Create a Tiered Crochet Puff Stitch Christmas Tree
This Crochet Puff Stitch Christmas Tree brings dimension and charm to your holiday decor. The tiered design makes it look elegant and handcrafted, yet it’s simple enough for beginners. These trees are perfect for tabletops, mantles, or even as festive gifts!
Pros/Features:
- Eye-catching, multi-dimensional design.
- Works beautifully with Christmas Crochet Cotton Yarn.
- Great for creating a coordinated holiday theme.
-
Materials Needed:
- Christmas Crochet Cotton Yarn in varying shades of green (or colors of your choice for the tiers).
- Crochet hook (size 4.5mm–5mm recommended, depending on your yarn).
- Fiberfill stuffing (optional, for stability).
- Small beads, bells, or sequins for decoration.
- A star pattern for the tree topper (Crochet Simple star or Knit Tree Pattern).
- Tapestry needle for sewing.
- Scissors.
Step-by-Step Instructions:
Step 1: Create the Tree Base
- Begin with the cone-shaped base of the tree, starting at the bottom and working your way up.
- Chain 4 and join into a circle with a slip stitch.
- Work in rounds, increasing evenly to form a cone. For example:
- Round 1: 6 single crochets (SC) into the ring.
- Round 2: Increase (2 SC in each stitch) around for 12 SC.
- Round 3: 1 SC in the next stitch, 2 SC in the following stitch, repeat around for 18 SC.
- Continue increasing each round until your base is the desired width.
- Switch to regular single crochet (without increases) to build the cone upward, tapering to a point. Decrease as needed near the top.
Step 2: Make the Puff Stitch Tiers
- Create several Crochet Puff Stitch Christmas Tree tiers to give your tree its layered look:
- For each tier, crochet a circular base with increases (similar to the tree base).
- Work puff stitches in alternating rows to create the texture:
- Insert hook, pull up a loop, yarn over, and repeat this three more times in the same stitch. Yarn over, pull through all loops on the hook to complete the puff.
- Make 4-5 tiers in varying sizes, starting with the largest at the bottom and gradually making smaller ones for the top.
- Each tier should fit snugly around the cone base. Test-fit them as you go to ensure proper sizing.
Step 3: Assemble the Tree
- Slide each puff stitch tier onto the cone base, starting with the largest at the bottom.
- Sew or lightly glue the tiers in place to keep them secure. Leave slight gaps between tiers for a more defined layered look.
- If your tree feels unstable, add a small amount of fiberfill stuffing between the base and tiers for support.
Step 4: Make and Attach the Tree Topper
- Use a Crochet Simple pattern or a Crochet Design Pattern to make a small star for the top.
- Stuff the star lightly if desired, and attach it securely to the tip of the cone with a tapestry needle.
Step 5: Add Finishing Touches
- Decorate your tree with beads, sequins, or mini bells for a festive touch. Use embroidery floss or glue to attach them.
- Optional: Add a Crochet Christmas Garland around the tiers for extra flair.
Extra Tips for Success:
- Use gradient shades of green yarn for a natural, ombre effect.
- Mix in metallic or glittery yarn for a magical holiday sparkle.
- If you prefer a sturdy base, create a small, weighted stand using a cup filled with beans or pebbles.
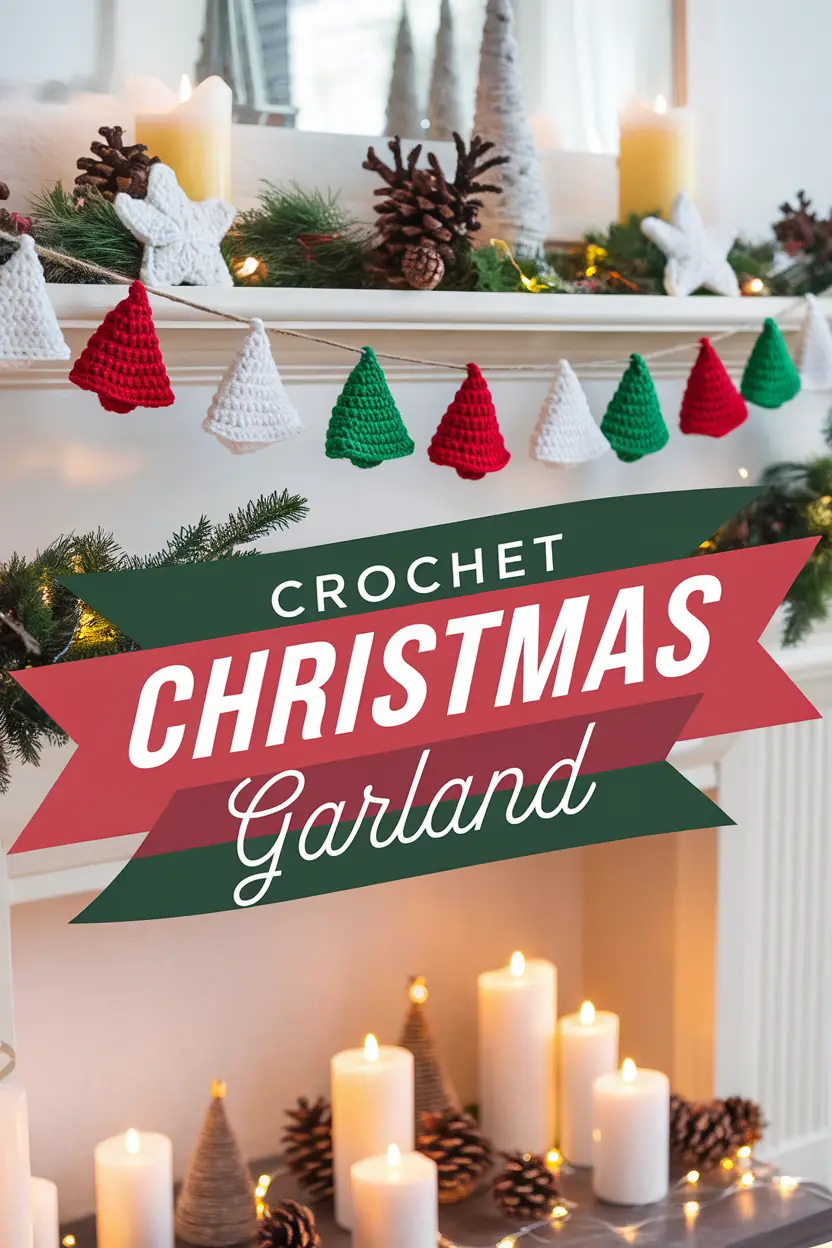
3. DIY a Crochet Christmas Garland
Transform your space with a cheerful Crochet Christmas Garland! String together mini trees in bright, festive colors to hang across your mantle, staircase, or doorway. It’s a simple way to bring a burst of holiday cheer into any room.
Pros/Features:
- Customizable length and color scheme.
- Lightweight and easy to store for future holidays.
- Doubles as a fun project for group crafting.
Materials Needed:
- Christmas Crochet Cotton Yarn in red, green, and white (or any colors you like).
- Crochet hook (recommended size: 4mm or 4.5mm).
- Twine, string, or ribbon for the garland base.
- Tapestry needle for sewing and weaving in ends.
- Scissors.
- Optional: Small bells or beads for decoration.
Step-by-Step Instructions:
Step 1: Crochet the Mini Trees
- Start with the base of each tree.
- Create a magic ring (or chain 4 and join with a slip stitch to form a ring).
- Round 1: Work 6 single crochets (SC) into the ring.
- Round 2: Increase evenly by working 2 SC into each stitch (12 SC total).
- Build the triangular shape of the tree:
- Round 3: 1 SC in the next stitch, 2 SC in the following stitch, repeat around (18 SC).
- Round 4: Work SC evenly around without increases.
- Round 5: SC in the next 2 stitches, 2 SC in the following stitch, repeat around (24 SC).
- Continue alternating increase rounds and plain SC rounds until your tree reaches the desired size.
- Finish the top of the tree by tapering:
- Begin decreasing by working SC in the next 2 stitches, SC2tog (single crochet two together) until you have 6 SC.
- Close the top of the tree with a slip stitch and weave in the ends.
Step 2: Make the Garland Base
- Measure the length of twine, string, or ribbon to fit your desired garland size.
- Leave extra length at both ends for tying or hanging.
- Use a tapestry needle to attach each mini tree to the twine, spacing them evenly.
Step 3: Assemble and Secure
- To attach the trees, sew the top of each tree directly onto the twine using matching yarn.
- Alternatively, crochet a small loop at the top of each tree and thread the twine through the loops.
- Ensure all the trees are facing the same direction and are evenly spaced for a balanced look.
Step 4: Add Decorative Elements (Optional)
- Attach small bells, beads, or mini pom-poms to the top or bottom of each tree for extra flair.
- You can also intersperse crocheted stars, snowflakes, or other shapes to add variety.
Extra Tips for Success:
- Use a mix of Crochet Simple techniques for beginners or add textured stitches for a unique twist.
- Experiment with ombre-colored yarns to create a gradient effect across your garland.
- For a sturdier garland, lightly starch the trees to keep their shape over time.
4. Try a Free Crochet Tree Ornament Pattern
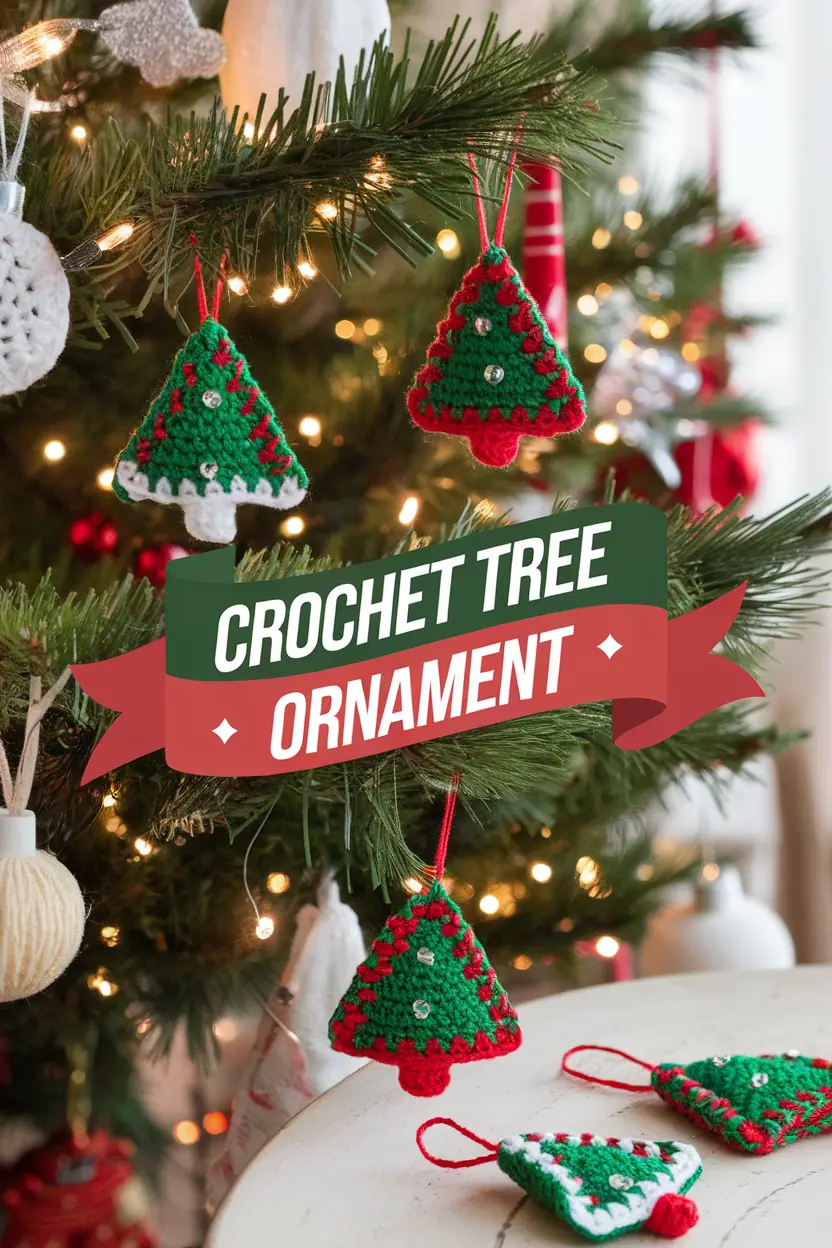
Why buy ornaments when you can make them? These Crocheted Xmas Decorations are small, quick to make, and completely adorable. They’re perfect for adding a handmade touch to your tree or gifting to friends.
Pros/Features:
- Compact and ideal for using leftover yarn.
- Great for personalized gifts or stocking stuffers.
- Easy to customize with colors and embellishments.
Materials Needed:
- Christmas Crochet Cotton Yarn in green, red, and white.
- Crochet hook (size 3.5mm–4mm).
- Tapestry needle for weaving in ends.
- Scissors.
- Small sequins, beads, or mini bells for decoration.
- Red or white ribbon or yarn for hanging loops.
- Optional: A small amount of stuffing for a puffed look.
Step-by-Step Instructions:
Step 1: Crochet the Front Panel of the Tree
- Start with the base of the tree:
- Create a magic ring (or chain 4 and join into a circle with a slip stitch).
- Round 1: Work 6 single crochets (SC) into the ring.
- Build the triangular shape:
- Row 1: Chain 1, turn, SC into each stitch across.
- Row 2: Increase by working 2 SC into the first stitch, SC across, then 2 SC into the last stitch.
- Repeat this process, increasing at both ends of each row, until your triangle is the desired size (approximately 10–12 rows depending on your tree size).
Step 2: Add a Decorative Border
- Switch to red or white yarn to create a festive border.
- Work a round of single crochet evenly around the edge of the tree.
- Use contrasting yarn to create a scalloped edge or add slip stitches for texture.
Step 3: Create the Back Panel (Optional for 3D Trees)
- Repeat Steps 1 and 2 to create an identical back panel if you want a double-sided ornament.
- If you prefer a flat ornament, you can skip this step.
Step 4: Assemble the Ornament
- If using two panels, lay them together with the right sides facing out.
- Use single crochet or whip stitch to join the panels, leaving the bottom open.
- If desired, lightly stuff the tree with fiberfill to give it a puffy appearance.
- Close the bottom of the tree using SC or whip stitches.
Step 5: Add a Tree Trunk
- Using red or brown yarn, crochet a small rectangular piece for the trunk:
- Chain 4 and work SC into each stitch for 3–4 rows.
- Attach the trunk to the bottom of the tree using a tapestry needle or crochet stitches.
Step 6: Decorate the Tree
- Sew sequins, beads, or mini bells onto the front panel of the tree to mimic ornaments.
- Use white yarn to add embroidered “garlands” or snow-like details.
Step 7: Add the Hanging Loop
- Cut a 4-inch piece of red or white yarn (or ribbon).
- Fold the yarn into a loop and sew it securely to the top of the tree using the tapestry needle.
Extra Tips for Success:
- For a rustic look, use natural-colored yarn for the trunk or embellish with small wooden beads.
- If you’re making multiple ornaments, try experimenting with different color combinations and Crochet Simple patterns.
- Add a drop of fabric glue to secure sequins and beads more firmly.
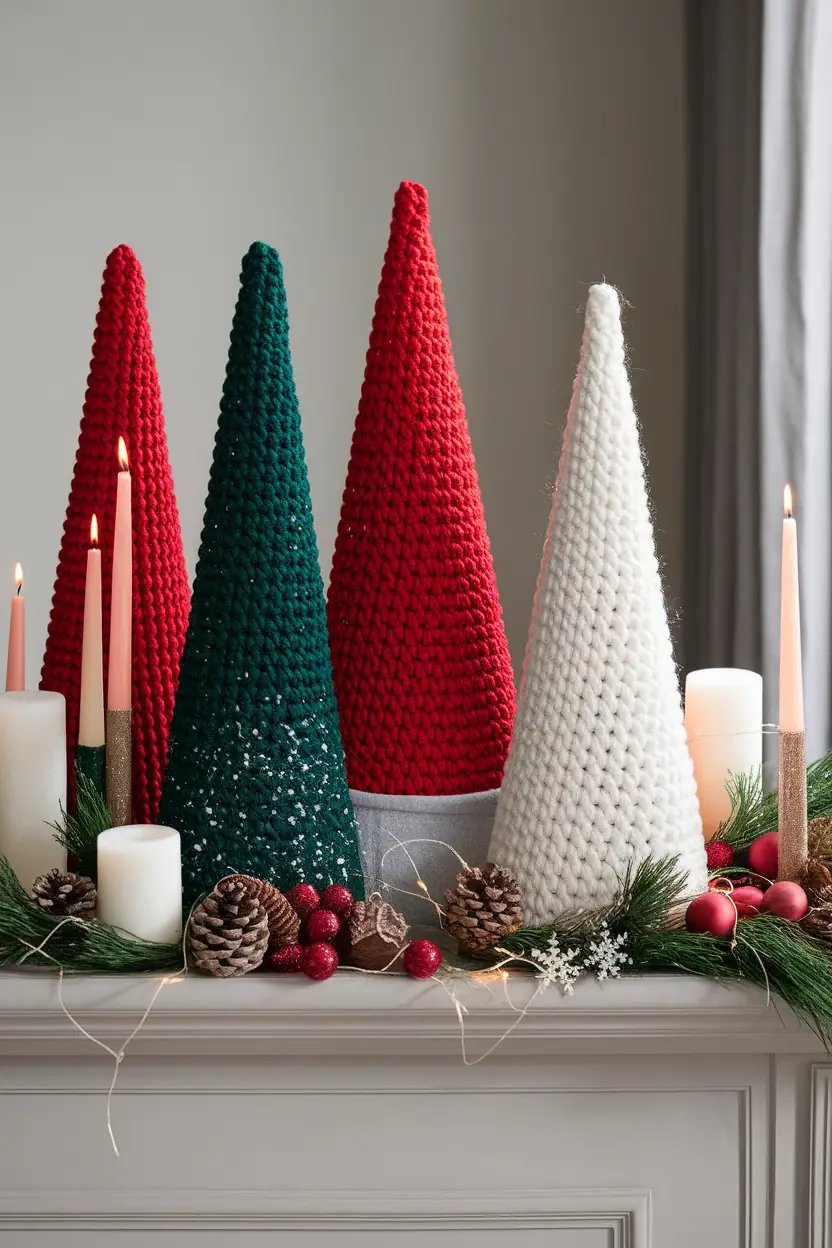
5. Use Chunky Christmas Crochet Cotton Yarn
Chunky yarn isn’t just trendy—it’s a game-changer for Holiday Crochet projects. Use it to create bold, cozy trees that add warmth and texture to your decor. These chunky trees are perfect as statement pieces for your mantle or table.
Pros/Features:
- Makes large trees quicker to crochet.
- Creates a cozy, modern aesthetic.
- Perfect for combining with other Crochet Holiday Home Decor.
Materials Needed:
- Chunky yarn in red, green, and white (or any festive colors).
- Crochet hook (recommended size: 10mm–12mm for chunky yarn).
- Foam cones in various sizes (available at craft stores).
- Tapestry needle for sewing.
- Scissors.
- Optional: Glitter spray or adhesive glitter for added sparkle.
Step-by-Step Instructions:
Step 1: Prepare the Yarn and Cone Base
- Select foam cones in the sizes you want for your trees (small, medium, or large).
- Choose chunky yarn for a soft and bold texture that creates volume.
Step 2: Start Crocheting the Cone Cover
- Begin with a magic ring:
- Create a loop of yarn and secure it with a slip stitch.
- Chain 2 and work 6 single crochets (SC) into the ring.
- Build the cone shape:
- Round 1: 2 SC in each stitch (12 SC total).
- Round 2: SC in the first stitch, 2 SC in the next stitch, repeat around (18 SC).
- Round 3: SC in the next 2 stitches, 2 SC in the following stitch, repeat around (24 SC).
- Continue increasing evenly in each round to create a larger circle, ensuring it fits snugly around the base of the foam cone.
Step 3: Crochet the Length of the Cone
- Once the circle reaches the desired diameter (to cover the cone’s bottom), stop increasing.
- Begin working SC evenly around without adding stitches to create the height of the cone.
- Continue until the piece covers the foam cone entirely, tapering slightly toward the top.
Step 4: Assemble the Tree
- Slip the crocheted cone cover over the foam base.
- Stretch the yarn gently to ensure a snug fit.
- Adjust the top so it sits neatly without gaps.
- If necessary, use a tapestry needle to sew any loose edges or secure the top of the cone.
Step 5: Add Finishing Touches
- Optional: Spray the finished trees with glitter adhesive or lightly dust them with glitter for sparkle.
- Arrange your trees with candles, pinecones, or ornaments to create a festive display.
Extra Tips for Success:
- Experiment with different stitch patterns (e.g., half double crochet or bobble stitch) to add texture.
- Use ombre or multi-colored yarn for a unique gradient effect.
- For added stability, glue the yarn cover directly onto the foam cone.
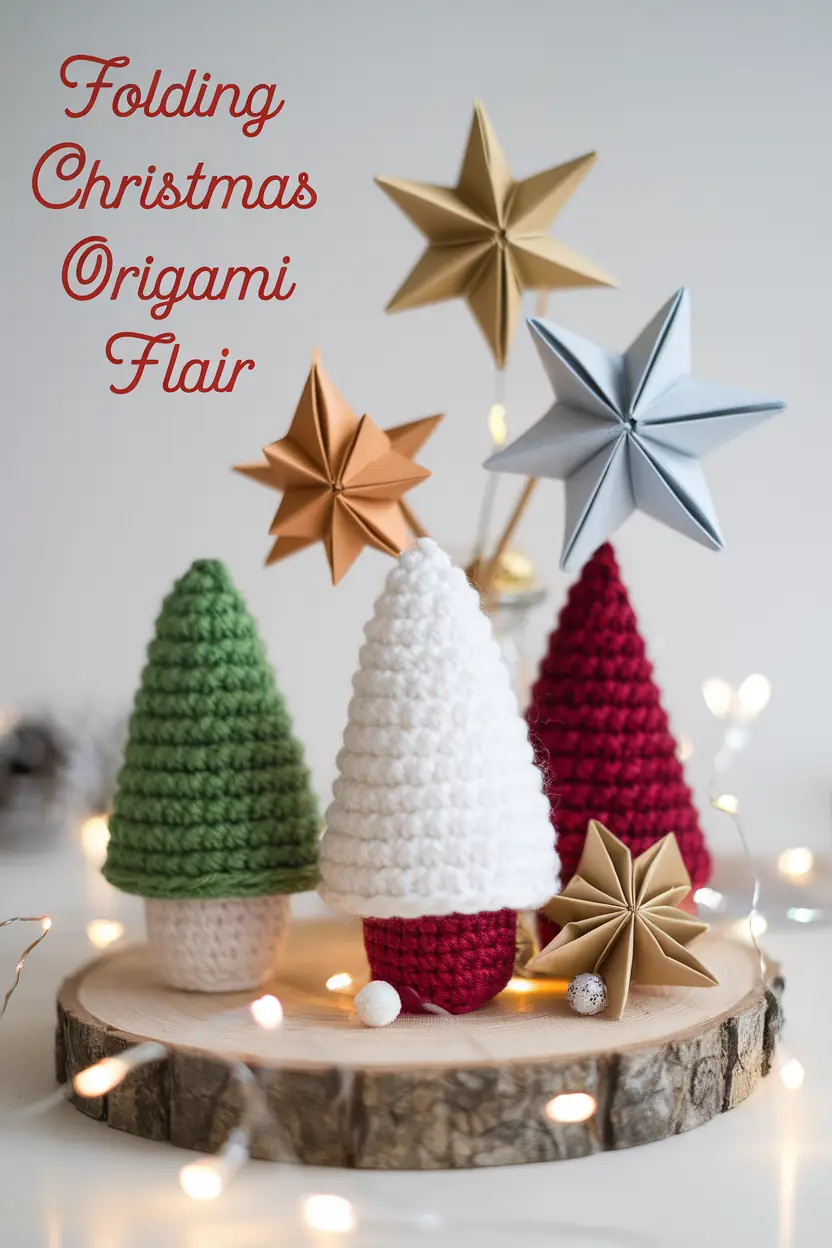
6. Incorporate Folding Christmas Origami Flair
Why choose between crochet and paper crafts when you can mix both? Pair Crochet Simple trees with delicate Folding Origami stars for a modern holiday centerpiece.
This blend of textures and styles brings a unique charm to your decor and is perfect for anyone who loves combining crafts.
Pros/Features:
- Combines the warmth of crochet with the elegance of origami.
- Lightweight and easy to move around or rearrange.
- Perfect for tablescapes or as gift toppers.
Materials Needed:
For Crochet Trees:
- Christmas Crochet Cotton Yarn in green, red, and white.
- Crochet hook (recommended size: 4.5mm or 5mm).
- Tapestry needle for sewing.
- Scissors.
- Fiberfill stuffing or foam cone inserts (optional).
For Origami Stars:
- Square paper sheets in gold, silver, or other festive colors.
- Bone folder (optional, for precise folds).
- String or thin wire for attaching stars to the display.
Step-by-Step Instructions:
Part 1: Crochet the Christmas Trees
- Start with the Cone Base:
- Make a magic ring or chain 4 and join with a slip stitch to form a ring.
- Round 1: Work 6 single crochets (SC) into the ring.
- Round 2: 2 SC in each stitch (12 SC).
- Shape the Cone:
- Round 3: 1 SC in the first stitch, 2 SC in the next stitch, repeat around (18 SC).
- Round 4: Work 1 SC in each stitch around.
- Continue alternating an increase round (add stitches evenly) with a plain round until the base fits the desired size of your cone.
- Build the Height:
- Stop increasing and work single crochet rounds evenly to create the height of the tree.
- Decrease slightly as you near the top for a neat, tapered finish.
- Add a Tree Trunk (Optional):
- Chain 8 and work SC in each chain to form a flat rectangle.
- Sew the trunk piece to the bottom of the tree for a finished look.
Part 2: Create the Origami Stars
- Choose Your Paper:
- Use square sheets of paper in metallic or festive colors. The size of the paper determines the size of the stars.
- Fold the Paper:
- Fold the square in half diagonally both ways, creating an “X” crease.
- Fold the square in half horizontally and vertically to create a “+” crease.
- Form the Star Points:
- Push the diagonal folds inward to form a triangular base.
- Fold each side of the triangle inward to create star points.
- Secure the Stars:
- Use glue or a small piece of tape to hold the folds in place.
- Attach string or thin wire to each star for hanging or placing.
Part 3: Assemble the Display
- Position the Crochet Trees:
- Arrange the crocheted trees on a wooden slice or decorative tray. Use stuffing or foam cones inside the trees if they need support.
- Add the Origami Stars:
- Place the folded stars around the trees for a scattered effect or attach them to thin dowels to stand upright.
- Optional: Glue small stars directly onto the trees for extra decoration.
- Finish with Embellishments:
- Add tiny pom-poms, beads, or fairy lights for added sparkle.
Extra Tips for Success:
- Use a mix of Crochet Simple techniques for the trees and experiment with Crochet Design Patterns for added texture.
- Select paper colors that complement your yarn for a cohesive look.
- For added stability, secure the origami stars to wooden picks before placing them in the display.
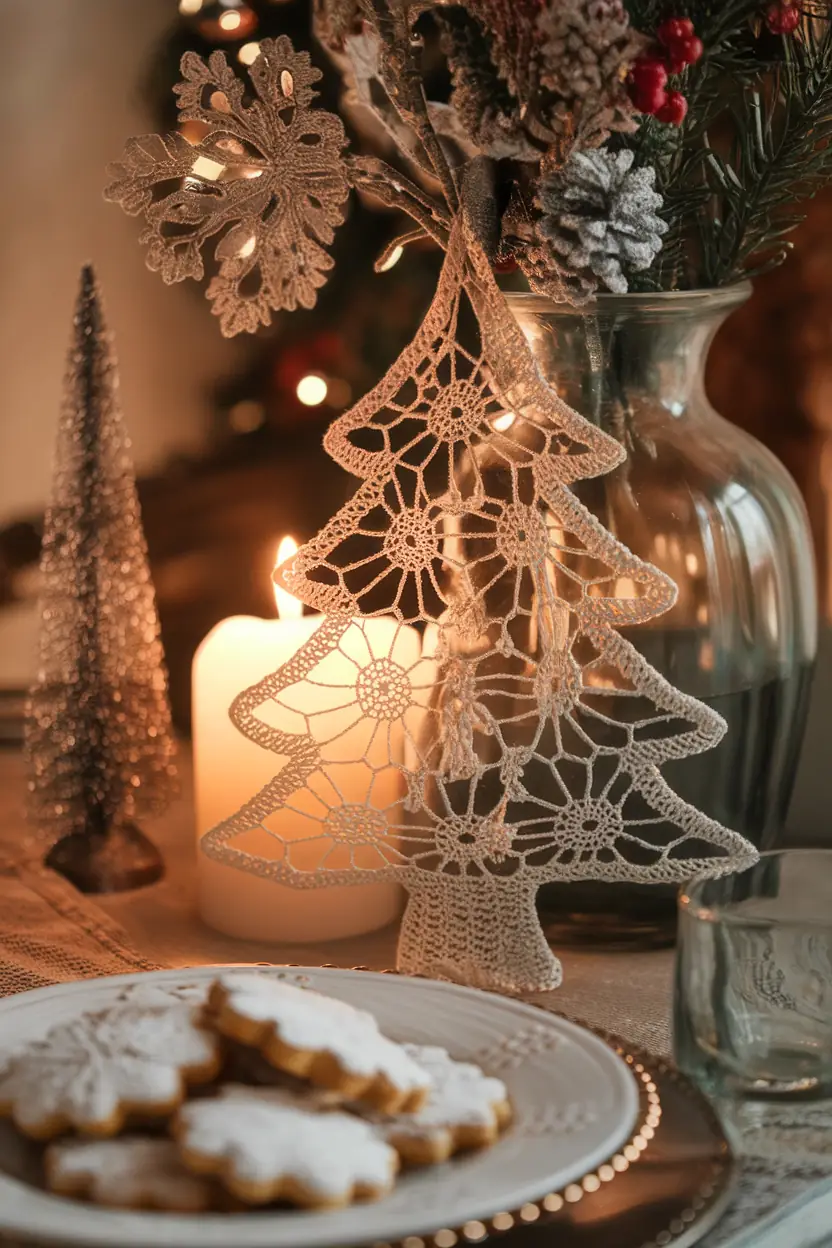
7. Go Vintage with a Crochet Tree Doily
Add a touch of nostalgia to your holiday table with a delicate Crochet Tree Doily. These vintage-inspired decorations bring elegance to any setting, whether placed under candles or as part of your dining setup. Plus, they make wonderful heirloom gifts!
Pros/Features:
- Timeless and elegant design.
- Protects your table from heat or scratches while looking festive.
- Adds charm to any traditional Christmas theme.
Materials Needed:
- Fine crochet thread or Christmas Crochet Cotton Yarn (size 10 recommended).
- Crochet hook (size 1.75mm–2mm).
- Stiffener (such as fabric stiffener or diluted white glue).
- Plastic wrap or wax paper (to protect your workspace).
- Pins and a blocking board or foam board.
- Scissors.
Step-by-Step Instructions:
Step 1: Begin the Lace Motifs
- Start with the First Motif:
- Use a lace Crochet Simple pattern to create circular or floral motifs.
- For example:
- Chain 8 and join with a slip stitch to form a ring.
- Round 1: Work 12 double crochets (DC) into the ring.
- Round 2: Chain 4, skip 1 stitch, SC into the next stitch, repeat around to form loops.
- Continue following your lace pattern to add intricate details.
- Create Additional Motifs:
- Crochet several motifs of varying sizes to fit the tree shape.
- Use the same pattern or mix different designs for variety.
Step 2: Assemble the Lace Motifs into a Tree Shape
- Arrange the Motifs:
- Lay the motifs flat on a blocking board and arrange them in a triangular tree shape.
- Overlap the motifs slightly where they will be joined.
- Join the Motifs:
- Use a tapestry needle and matching thread to sew the motifs together at their points of contact.
- Alternatively, use single crochet or slip stitches to join the motifs as you go.
- Add the Tree Trunk:
- Crochet a small rectangular or trapezoidal piece to serve as the tree trunk.
- Attach it to the bottom of the lace tree using slip stitches or sewing.
Step 3: Stiffen the Lace Tree
- Prepare the Stiffener:
- Mix fabric stiffener or dilute white glue with water (1:1 ratio).
- Apply the Stiffener:
- Place the lace tree on plastic wrap or wax paper.
- Brush the stiffener solution onto the lace evenly, ensuring all areas are coated.
- Block the Tree:
- Pin the tree onto a foam board or blocking board to hold its shape as it dries.
- Stretch and adjust the lace to ensure it forms a crisp triangular tree shape.
- Allow to Dry:
- Let the tree dry completely before removing the pins.
Step 4: Add Finishing Touches
- Optional Embellishments:
- Add small beads, sequins, or glitter to the lace for a festive sparkle.
- Display:
- Use the tree as a standalone decor piece, or attach it to a wooden base or small pot for added stability.
Extra Tips for Success:
- Experiment with different lace patterns for a unique design.
- Use metallic thread for a subtle shimmer that elevates the look.
- Spray the finished tree lightly with glitter spray for a magical touch.
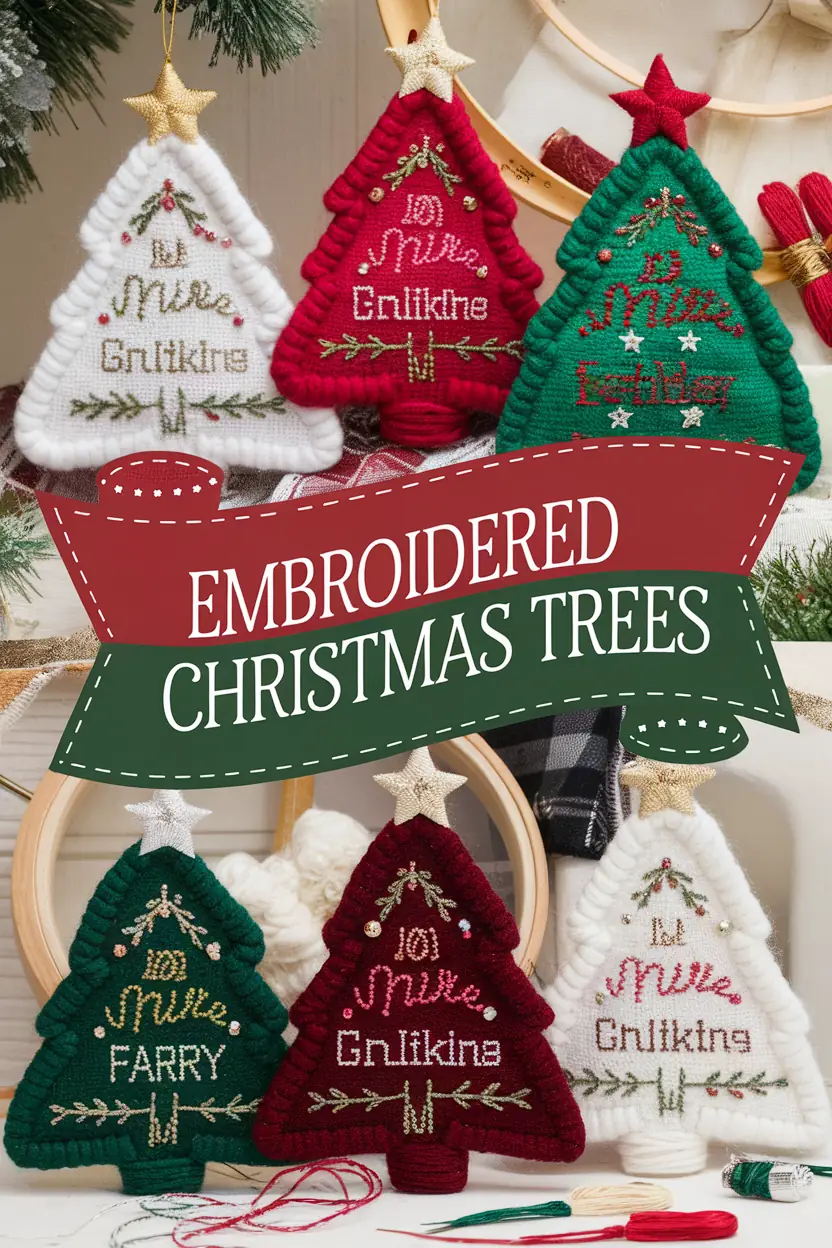
8. Personalize Christmas Trees with Embroidered Details
Take your Cute Christmas Crochet Patterns to the next level by adding embroidered designs. Stitch family initials, tiny stars, or festive messages onto your crocheted trees for a thoughtful and personal touch.
Pros/Features:
- Adds a personalized flair to any project.
- Perfect for gifting or decorating with a family theme.
- Works well with any Crochet Holiday Home Decor.
Materials Needed:
- Christmas Crochet Cotton Yarn in red, green, white, or your preferred colors.
- Crochet hook (4mm–4.5mm recommended).
- Embroidery floss in various colors (metallic floss works beautifully).
- Embroidery hoop (optional, for stability).
- Needle for embroidery and sewing.
- Fiberfill stuffing.
- Tapestry needle.
- Scissors.
- Beads, sequins, or small embellishments (optional).
Step-by-Step Instructions:
Part 1: Crochet the Tree Base
- Start with the Tree Shape:
- Begin with a magic ring or chain 4 and join to form a circle.
- Round 1: Work 6 single crochets (SC) into the ring.
- Round 2: 2 SC in each stitch around (12 SC).
- Shape the Tree:
- Round 3: SC in the next stitch, 2 SC in the following stitch, repeat around (18 SC).
- Round 4: Work SC evenly around.
- Continue alternating between an increase round and a plain SC round, shaping the tree into a triangle.
- Repeat for a Second Panel:
- Create another identical piece to form the back of the tree.
Part 2: Add the Embroidery
- Prepare the Front Panel:
- Lay the front tree panel flat. Secure it in an embroidery hoop if needed to stabilize the fabric.
- Embroider the Design:
- Use metallic or colorful embroidery floss to stitch words like “Merry Christmas” or “Joy.”
- Add decorative elements such as vines, berries, or small snowflakes using simple embroidery stitches like backstitch, satin stitch, or French knots.
- Add Embellishments:
- Sew on beads, sequins, or small bells to mimic ornaments or stars.
Part 3: Assemble the Tree
- Join the Panels:
- Place the front and back panels together with the right sides facing outward.
- Use single crochet or whip stitch to join the edges, leaving a small opening at the bottom.
- Stuff the Tree:
- Fill the tree with fiberfill stuffing to give it a plush look. Be careful not to overstuff, as it might distort the embroidery.
- Close the Opening:
- Sew or crochet the bottom edge closed once stuffed.
Part 4: Add the Finishing Touches
- Attach a Star Topper (Optional):
- Crochet a small star using a Crochet Simple pattern.
- Sew the star to the top of the tree.
- Add a Hanging Loop (Optional):
- Attach a small loop of yarn or ribbon to the top of the tree for hanging.
Extra Tips for Success:
- Use contrasting embroidery floss for designs to make the details pop.
- Experiment with fonts and symbols to personalize your trees further.
- Spray a light adhesive glitter on the finished trees for a magical sparkle.
9. Experiment with Crochet Winter Applique Trees
Flat, decorative Crochet Winter Appliques are incredibly versatile. Sew them onto stockings, holiday quilts, or gift bags for an extra festive touch. These appliques are a great way to use up scrap yarn and try out different stitches.
Pros/Features:
- Flat and lightweight, making them easy to attach.
- Works as embellishments for all kinds of holiday crafts.
- Ideal for experimenting with various patterns and yarns.
Materials Needed:
- Christmas Crochet Cotton Yarn in red, green, white, and other festive colors.
- Crochet hook (recommended size: 3.5mm–4mm).
- Tapestry needle for weaving ends and attaching embellishments.
- Scissors.
- Beads, sequins, or embroidery floss for decorating.
- Optional: Small pom-poms or buttons for added flair.
Step-by-Step Instructions:
Part 1: Crochet the Tree Base
- Create the Tree Shape:
- Start with a magic ring or chain 4 and join to form a circle.
- Round 1: Work 6 single crochets (SC) into the ring.
- Round 2: 2 SC in each stitch around (12 SC).
- Round 3: SC in the first stitch, 2 SC in the next stitch, repeat around (18 SC).
- Continue this pattern of increases until the base is wide enough for your tree.
- Shape the Triangle:
- Once the base is complete, stop increasing and start working SC rows to taper the tree into a triangle.
- Decrease evenly in each row until only 1 stitch remains at the top. Fasten off.
Part 2: Add Layers and Borders
- Crochet Decorative Borders:
- Use a contrasting yarn color to create an outer border.
- Work SC or slip stitches evenly around the edges of the tree for a clean finish.
- Layer Smaller Trees:
- Crochet smaller triangle shapes using a Crochet Simple pattern and sew or crochet them onto the larger tree for a layered look.
- Use different colors to make the layers stand out.
Part 3: Add a Tree Trunk
- Crochet the Trunk:
- Chain 6 and work SC in each chain to create a small rectangle.
- Attach the trunk to the bottom center of the tree using SC or sewing.
- Optional Design Variation:
- For added texture, use a bobble stitch for the trunk.
Part 4: Decorate the Tree
- Embroider Details:
- Use embroidery floss to add snowflake designs, garlands, or ornaments to the tree.
- Try a backstitch or French knots for small, precise details.
- Add Embellishments:
- Sew on beads, sequins, or small pom-poms to mimic ornaments.
- Glue or stitch small stars or buttons at the top of the tree.
Part 5: Assemble and Use the Appliqués
- Attach to Stockings or Gifts:
- Use a tapestry needle to sew the appliqué onto stockings or gift wrap.
- Alternatively, attach a small loop of yarn to the top of the tree and use it as an ornament.
- Create Sets or Themes:
- Make a set of appliqués in different colors and sizes to create a cohesive holiday theme.
Extra Tips for Success:
- Experiment with metallic or glitter yarns for an extra festive touch.
- If layering trees, make sure to block the finished pieces to keep them flat.
- Use leftover yarn scraps for this project—it’s a great stash buster!

10. Craft a Crochet Tree Advent Calendar
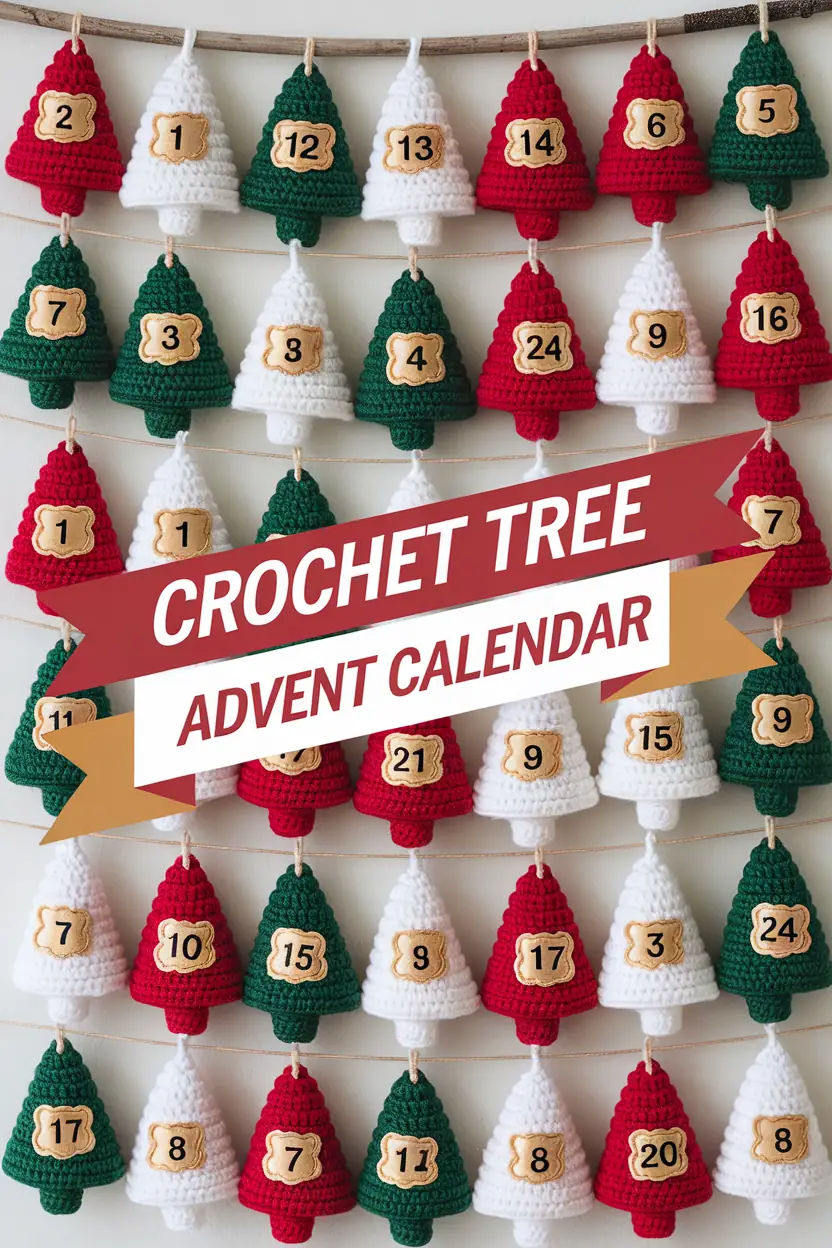
Make your countdown to Christmas extra special with a handmade Crochet Tree Advent Calendar! Create 24 small trees with hidden pockets to fill with treats, toys, or notes. This fun and functional project is perfect for families.
Pros/Features:
- Adds a handmade touch to your holiday traditions.
- Reusable year after year.
- Customizable with different colors and embellishments.
Materials Needed:
- Christmas Crochet Cotton Yarn in red, green, white, or your preferred colors.
- Crochet hook (4mm–4.5mm recommended).
- Embroidery floss in various colors (metallic floss works beautifully).
- Embroidery hoop (optional, for stability).
- Needle for embroidery and sewing.
- Fiberfill stuffing.
- Tapestry needle.
- Scissors.
- Beads, sequins, or small embellishments (optional).
Step-by-Step Instructions:
Part 1: Crochet the Tree Base
- Start with the Tree Shape:
- Begin with a magic ring or chain 4 and join to form a circle.
- Round 1: Work 6 single crochets (SC) into the ring.
- Round 2: 2 SC in each stitch around (12 SC).
- Shape the Tree:
- Round 3: SC in the next stitch, 2 SC in the following stitch, repeat around (18 SC).
- Round 4: Work SC evenly around.
- Continue alternating between an increase round and a plain SC round, shaping the tree into a triangle.
- Repeat for a Second Panel:
- Create another identical piece to form the back of the tree.
Part 2: Add the Embroidery
- Prepare the Front Panel:
- Lay the front tree panel flat. Secure it in an embroidery hoop if needed to stabilize the fabric.
- Embroider the Design:
- Use metallic or colorful embroidery floss to stitch words like “Merry Christmas” or “Joy.”
- Add decorative elements such as vines, berries, or small snowflakes using simple embroidery stitches like backstitch, satin stitch, or French knots.
- Add Embellishments:
- Sew on beads, sequins, or small bells to mimic ornaments or stars.
Part 3: Assemble the Tree
- Join the Panels:
- Place the front and back panels together with the right sides facing outward.
- Use single crochet or whip stitch to join the edges, leaving a small opening at the bottom.
- Stuff the Tree:
- Fill the tree with fiberfill stuffing to give it a plush look. Be careful not to overstuff, as it might distort the embroidery.
- Close the Opening:
- Sew or crochet the bottom edge closed once stuffed.
Part 4: Add the Finishing Touches
- Attach a Star Topper (Optional):
- Crochet a small star using a Crochet Simple pattern.
- Sew the star to the top of the tree.
- Add a Hanging Loop (Optional):
- Attach a small loop of yarn or ribbon to the top of the tree for hanging.
Extra Tips for Success:
- Use contrasting embroidery floss for designs to make the details pop.
- Experiment with fonts and symbols to personalize your trees further.
- Spray a light adhesive glitter on the finished trees for a magical sparkle.
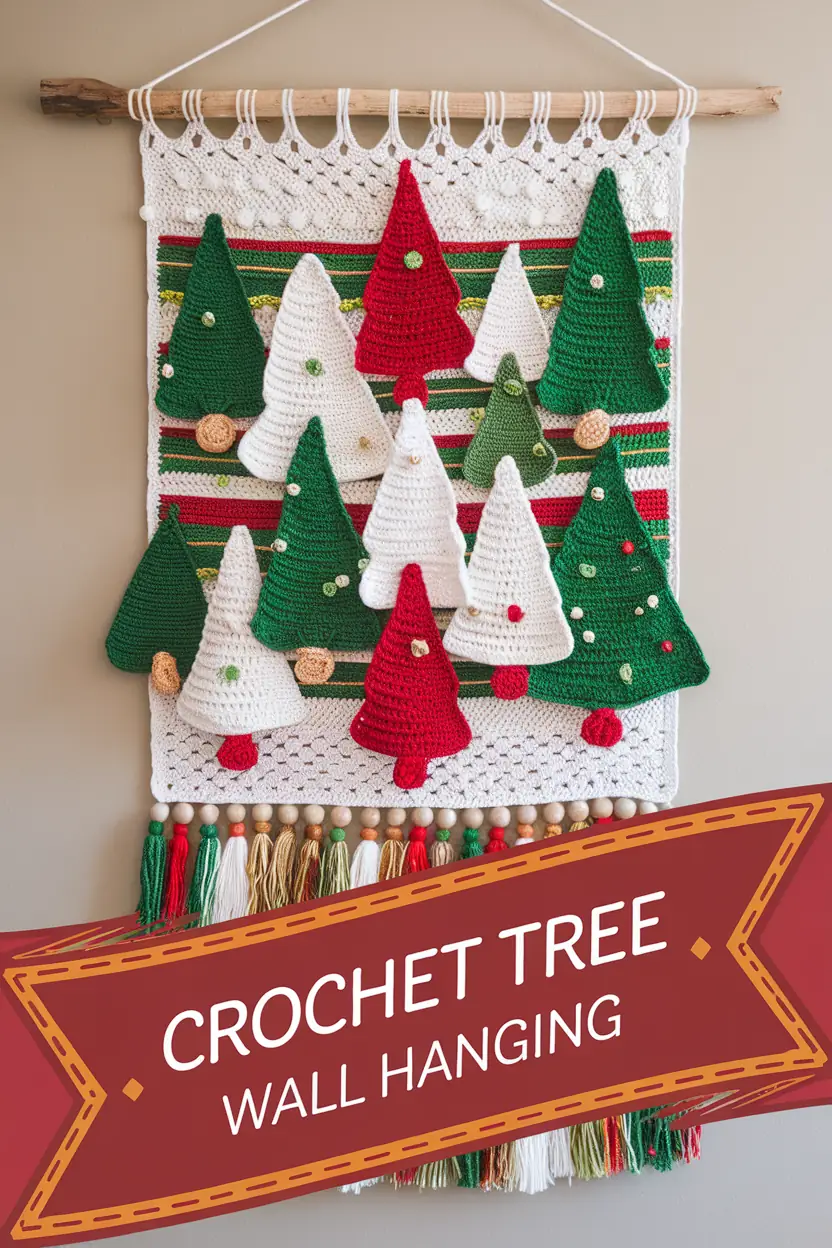
11. Design a Bold Crochet Tree Wall Hanging
Turn your crochet skills into wall art with a bold Crochet Tree Wall Hanging! Combine various patterns to create a tapestry-style display that’s perfect for large, empty walls. This project is ideal for showcasing your creativity and adding a festive focal point to your home.
Pros/Features:
- Makes a statement piece for your decor.
- Combines multiple Crochet Design Patterns for a unique look.
- Easy to adapt to your preferred size and color scheme.
Materials Needed:
- Christmas Crochet Cotton Yarn in red, green, white, and additional colors for accents.
- Crochet hook (4mm–5mm).
- Tapestry needle for sewing.
- Wooden dowel or stick for hanging.
- Twine or yarn for attaching to the dowel.
- Beads and tassels for embellishment.
- Scissors.
- Sequins, pom-poms, or buttons for tree decorations (optional).
Step-by-Step Instructions:
Part 1: Crochet the Background Panel
- Create the Base Panel:
- Chain the desired width of your wall hanging (approximately 40–50 stitches for medium-sized pieces).
- Work in rows of double crochet (DC) or single crochet (SC) until the panel reaches the desired length (around 20–25 rows).
- Add Texture (Optional):
- Use different stitches like bobble stitch or treble crochet in certain rows to create texture.
- Incorporate horizontal stripes in festive colors like red, green, and white for a holiday look.
- Finish the Panel:
- Crochet a row of SC around the edges of the panel to create a clean border.
- Weave in any loose ends with a tapestry needle.
Part 2: Crochet the Christmas Trees
- Make Multiple Trees:
- Use a Crochet Simple pattern to create small triangular trees.
- For each tree:
- Begin with a magic ring.
- Round 1: Work 6 single crochets (SC) into the ring.
- Round 2: 2 SC in each stitch (12 SC).
- Continue alternating between increase and plain SC rounds until the base of the tree is wide enough (6–8 rounds).
- Add Tree Trunks:
- Chain 5–6 stitches and work SC rows to form a small rectangle for the trunk.
- Attach the trunk to the bottom of each tree.
- Decorate the Trees:
- Sew on beads, sequins, or buttons to mimic ornaments.
- Use embroidery floss to add garlands or snowflake details.
Part 3: Assemble the Wall Hanging
- Attach the Trees to the Panel:
- Lay the trees on the panel in your desired arrangement.
- Sew each tree onto the background using matching yarn and a tapestry needle.
- Secure the Panel to the Dowel:
- Fold the top edge of the panel over the wooden dowel or stick.
- Sew the folded edge in place, creating a pocket for the dowel.
- Add Hanging Twine:
- Attach a piece of twine or yarn to both ends of the dowel for hanging.
Part 4: Add Tassels and Beads
- Create Tassels:
- Wrap yarn around a small book or cardboard piece 10–15 times.
- Tie the top tightly, cut the bottom loops, and trim the ends evenly.
- Attach tassels to the bottom edge of the panel using yarn or a tapestry needle.
- Incorporate Beads:
- Thread beads onto the tassels or attach them along the bottom row of the panel for added decoration.
Extra Tips for Success:
- Use a variety of Crochet Design Patterns for the trees to add visual interest.
- Experiment with yarn textures, such as metallic or glitter yarn, to give the piece a festive sparkle.
- Incorporate additional embellishments like mini bells or pom-poms for extra charm.
Common FAQs About Crochet Christmas Trees
- What kind of yarn should I use for these projects?
Most projects work great with medium-weight yarn, but you can use Christmas Crochet Cotton Yarn for detailed work or chunky yarn for a cozy, oversized look. - Are these projects beginner-friendly?
Absolutely! Many of these ideas, like the Crochet Simple Trees or Free Crochet Christmas Tree Pattern, are perfect for Christmas Crochet Beginners. - How long does it take to make a crochet Christmas tree?
Smaller projects, like Xmas Crochet Ornaments, can take an hour or two, while larger ones, like the Crochet Tree Pillow Pattern Free, might take a few evenings. - Can I customize these trees for different decor themes?
Yes! You can change the yarn colors, sizes, and embellishments to match your style, whether it’s vintage, modern, or minimalist. - Do I need special tools for these projects?
Most projects only require basic crochet tools: a hook, yarn, scissors, and sometimes stuffing or beads for decoration. - How do I care for crocheted decorations?
Store them in a dry, cool place after the holidays. Gently hand wash and air dry if they get dusty or dirty. - Where can I find patterns for these projects?
Patterns for Crochet Puff Stitch Christmas Trees and Bobble Tree Crochet are widely available online. Some are even free!
Conclusion: Share Your Festive Creations!
Crochet Christmas trees are such a joyful way to add personality and warmth to your holiday season. From cozy pillows to charming garlands, there’s no limit to what you can create. Experiment with different colors, textures, and patterns to craft something truly unique. Try combining your favorite Crochet Design Patterns with other festive crafts like Folding Origami for a creative twist!
We’d love to see what you make! Share your creations on social media and tag us to spread the holiday cheer. Don’t forget to save or pin this article for later so you can revisit these ideas year after year. Happy crocheting, and have a Crocheted Christmas full of love and creativity!

