Winter is the perfect time to stay indoors and unleash your creativity with your family. Making paper snowflakes is a classic and enjoyable craft for all ages.
Here are 16 fun and easy paper snowflake crafts that will keep you entertained during those chilly days. Not only that, but you will have stunning decorations for the whole winter season, Christmas decor, and even cute tags for the top of wrapped presents.
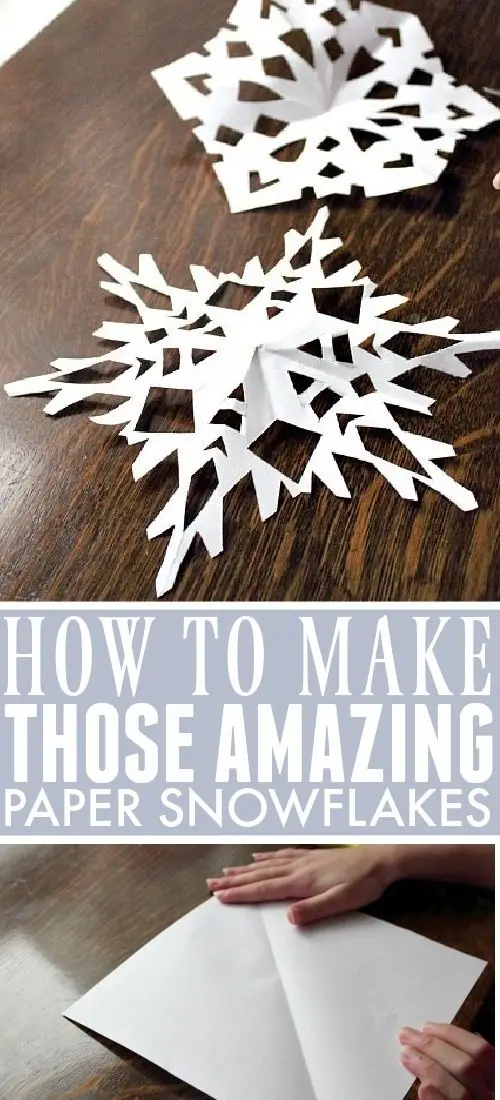
1. Classic Fold-and-Cut Snowflakes
Create timeless and unique snowflakes with just a few folds and cuts—perfect for all skill levels.
How To Make
- Start with a square piece of paper.
- Fold it in half diagonally to form a triangle.
- Fold it again into a smaller triangle.
- For more intricate shapes, fold it into a third or fourth triangle.
- Use sharp scissors to cut small shapes along the edges, such as triangles or half-circles.
- Experiment with different cuts to create unique designs.
- Unfold to reveal your delicate snowflake design.
- Try folding into six or eight sections for more symmetrical designs.
- Use colored paper or draw patterns on the paper before cutting for added creativity.
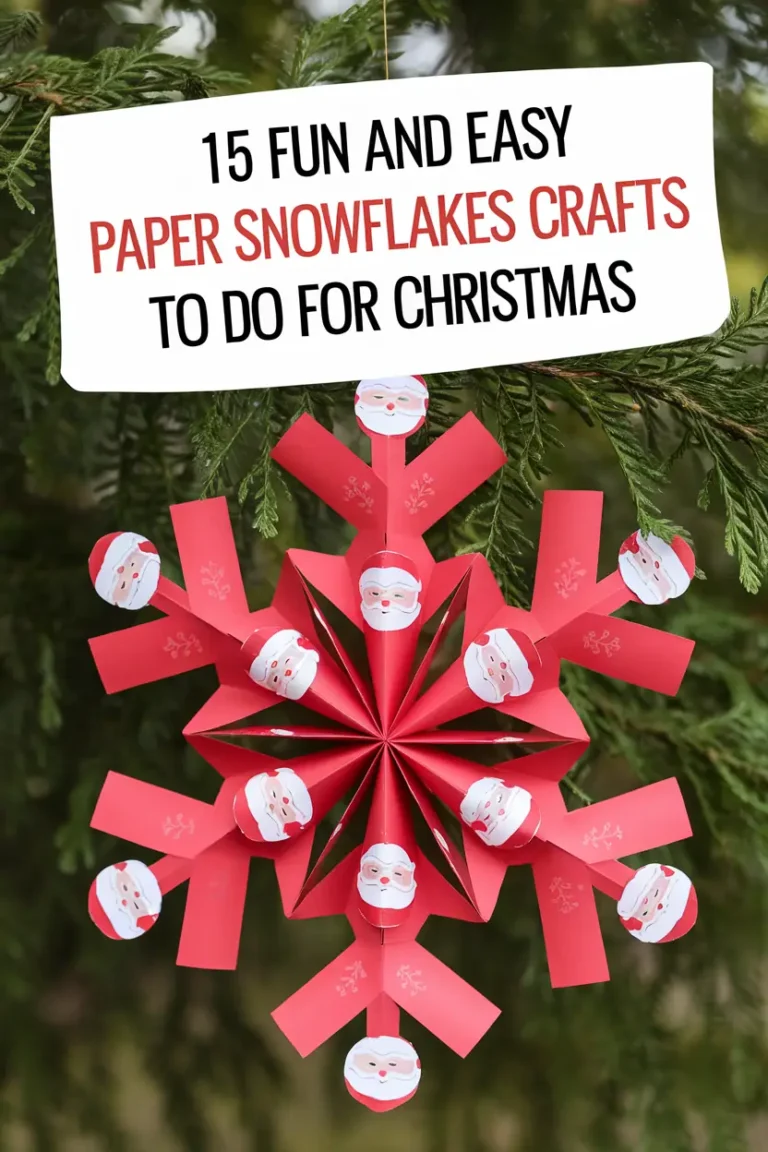
2. Cute Santa Claus Snowflakes
Turn your holiday decor up a notch with this fun and festive Santa-face snowflake craft that’s as merry as it is magical!
Materials Needed:
- Red cardstock or heavy construction paper
- Scissors
- Glue stick or double-sided tape
- Santa face stickers or small printed Santa images
- String or ribbon for hanging (optional)
How to Make
Cut the Snowflake:
- Fold the red cardstock to create the base for your snowflake.
- Cut the folded paper into a snowflake design. You can use templates if needed.
Prepare the Santa Faces:
- If using printed Santa images, cut them into small circles.
- Optionally, laminate the Santa faces for durability or use premade stickers.
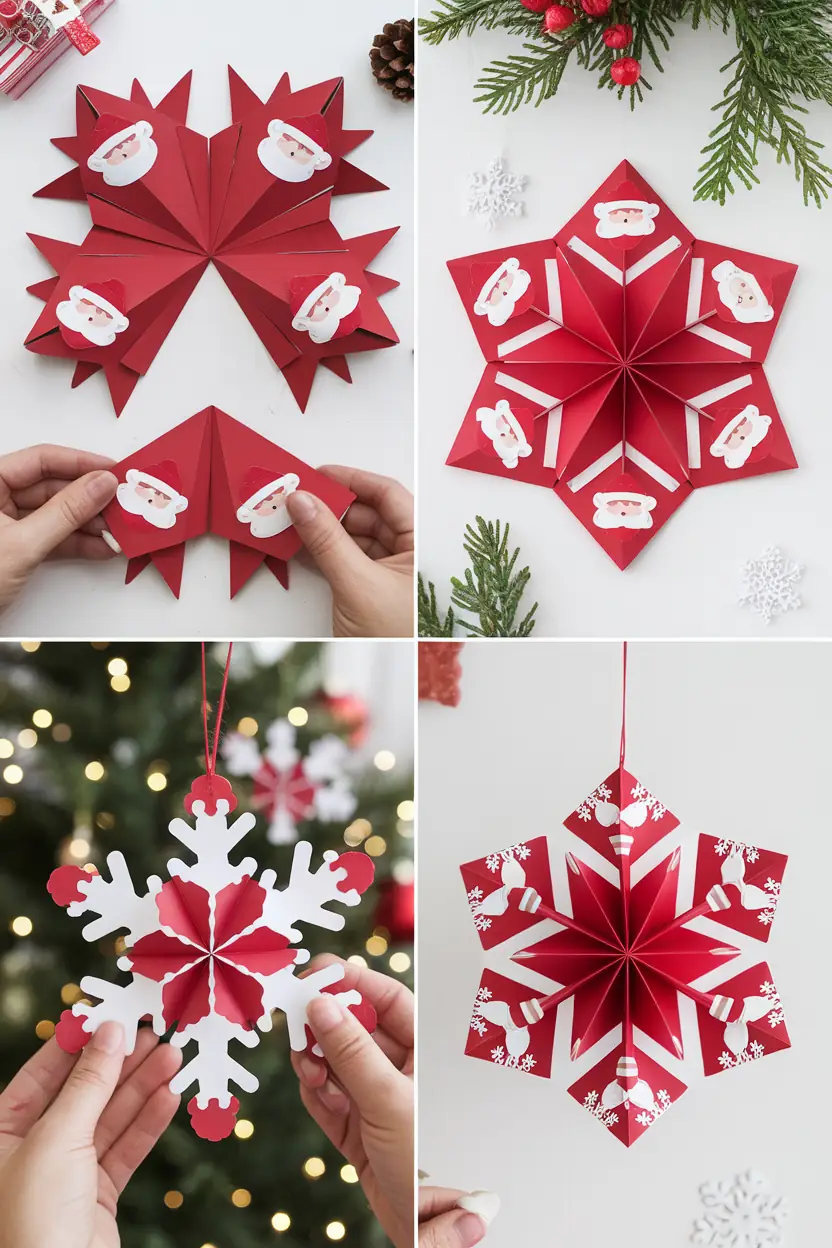
Attach the Santa Faces:
- Evenly space the Santa faces around the snowflake, attaching them with a glue stick or double-sided tape.
- Aim for symmetry to enhance the design.
Add Final Touches:
- Make the snowflake 3D by folding and layering sections of paper, if desired.
- Attach string or ribbon to one tip of the snowflake for hanging.
Display:
- Hang your festive snowflake in windows, on the Christmas tree, or around your home.
3. Glittery Snowflakes
Add a sparkling touch to your snowflakes to make them shine and dazzle in the winter light.
How To Make
- Cut out your snowflake from paper.
- Apply glue to the edges or specific sections you want to highlight.
- Sprinkle glitter on top while the glue is still wet.
- Shake off the excess glitter and let it dry completely.
- Use different colors of glitter to create eye-catching patterns.
- Outline the edges with metallic markers for extra glitz.
- Add sequins or rhinestones for an extra dazzling effect.
- Hang the glittery snowflakes near a light source to enhance their sparkle.
- Use them to decorate windows or your Christmas tree for a festive touch.
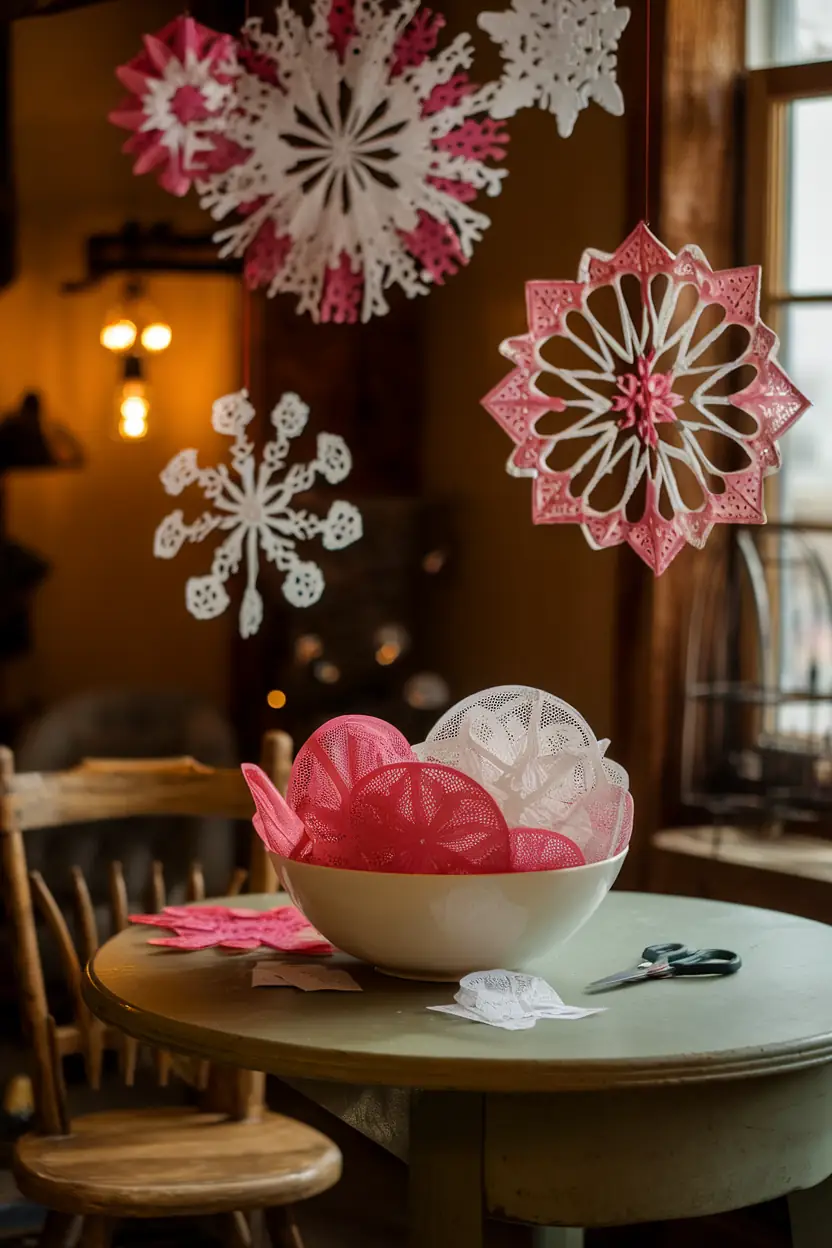
4. Coffee Filter Snowflakes
Create lacy, delicate snowflakes with coffee filters for a translucent and colorful effect.
How To Make
- Flatten a coffee filter and fold it into a triangle, similar to the classic snowflake method.
- Because coffee filters are thinner than regular paper, they are easier to cut, making them ideal for kids.
- Cut your desired designs into the folded coffee filter.
- Carefully unfold the filter to reveal your delicate snowflake.
- For added color, use watercolor paints to gently add soft hues to the coffee filter before cutting.
- Allow the colors to blend beautifully for a vibrant effect.
- Hang the snowflakes in a window to create a stained-glass appearance with the light shining through.
- String multiple snowflakes together to make a colorful garland.
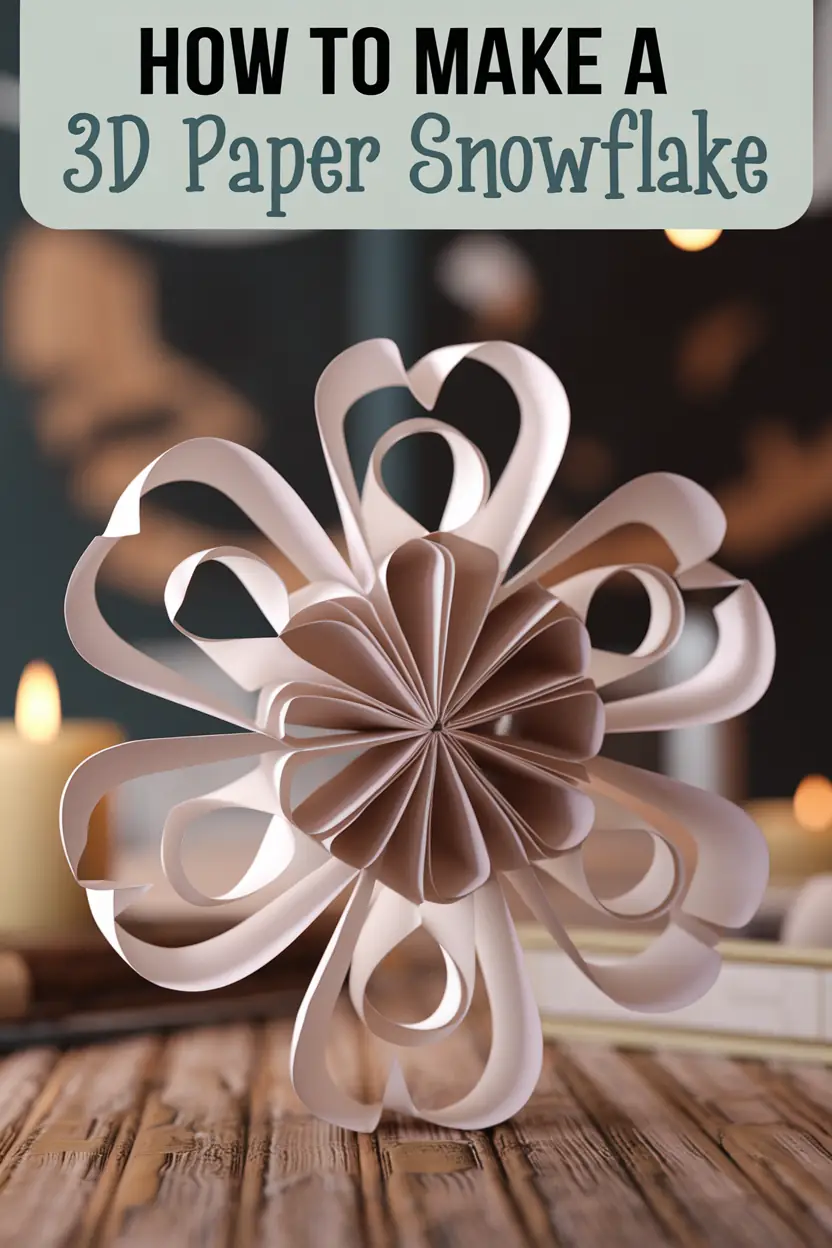
5. 3D Paper Snowflakes
Elevate your snowflake game with stunning 3D designs that add depth and magic to your decor.
How To Make
- Start with six identical paper squares.
- Fold each square diagonally to make a triangle.
- Cut three evenly spaced slits from the folded edge toward the center, without cutting all the way through.
- Unfold each piece and curl the inner corners together to form a tube, securing them with glue or tape.
- Repeat the process with alternating sections until all six pieces are complete.
- Glue or staple the six sections together in the center to form the 3D snowflake.
- Use metallic or glittery paper for extra sparkle and a more elaborate effect.
- Hang the snowflakes from the ceiling or in doorways to create a magical winter wonderland indoors.
- Experiment with different sizes to add variety and a dynamic display to your decorations.
6. Colored Paper Snowflakes
Bring your snowflakes to life with vibrant colors and unique patterns for a standout winter decoration.
How To Make
- Choose construction paper in shades like blue, purple, and silver for colorful snowflakes.
- Follow the classic fold-and-cut method to create your snowflake shapes.
- Experiment with layering different colored snowflakes on top of each other for a multi-dimensional look.
- Use patterned scrapbook paper or metallic-finish paper for a fun and unique design.
- Decorate the paper with markers or crayons before folding and cutting for a personalized touch.
- Create garlands by stringing multiple colorful snowflakes together.
- Use them to decorate walls, windows, or any space needing a vibrant winter flair.
7. Snowflakes with Hole Punch Designs
Take your snowflakes to the next level with intricate hole punch details that let the light shine through.
How To Make
- Fold your paper and cut your snowflake design as usual.
- Use a hole punch to add small, circular cutouts along the edges or center of the snowflake.
- Create symmetrical patterns or random placements for an organic look.
- Hang your snowflakes in a window to let the light shine through the holes for a delicate effect.
- Experiment with hole punch shapes like hearts or stars for added creativity.
- Try using multiple sizes of hole punches to enhance the intricacy of your designs.
- Use this method to add a professional touch to your handmade snowflakes.
8. Tissue Paper Snowflakes
Create light and airy snowflakes with tissue paper for an elegant and ethereal winter decoration.
How To Make
- Stack several layers of tissue paper together for easier cutting and multiple snowflakes at once.
- Fold the stacked tissue paper into a triangle, similar to the classic snowflake method.
- Carefully cut your design into the folded tissue paper.
- Gently separate each layer to reveal multiple delicate snowflakes.
- Use different colors of tissue paper for a layered effect or stick to white for a classic look.
- Hang the snowflakes in clusters for a beautiful display that moves gently in the breeze.
- For added sparkle, lightly spray the tissue paper with adhesive and sprinkle it with fine glitter before cutting.

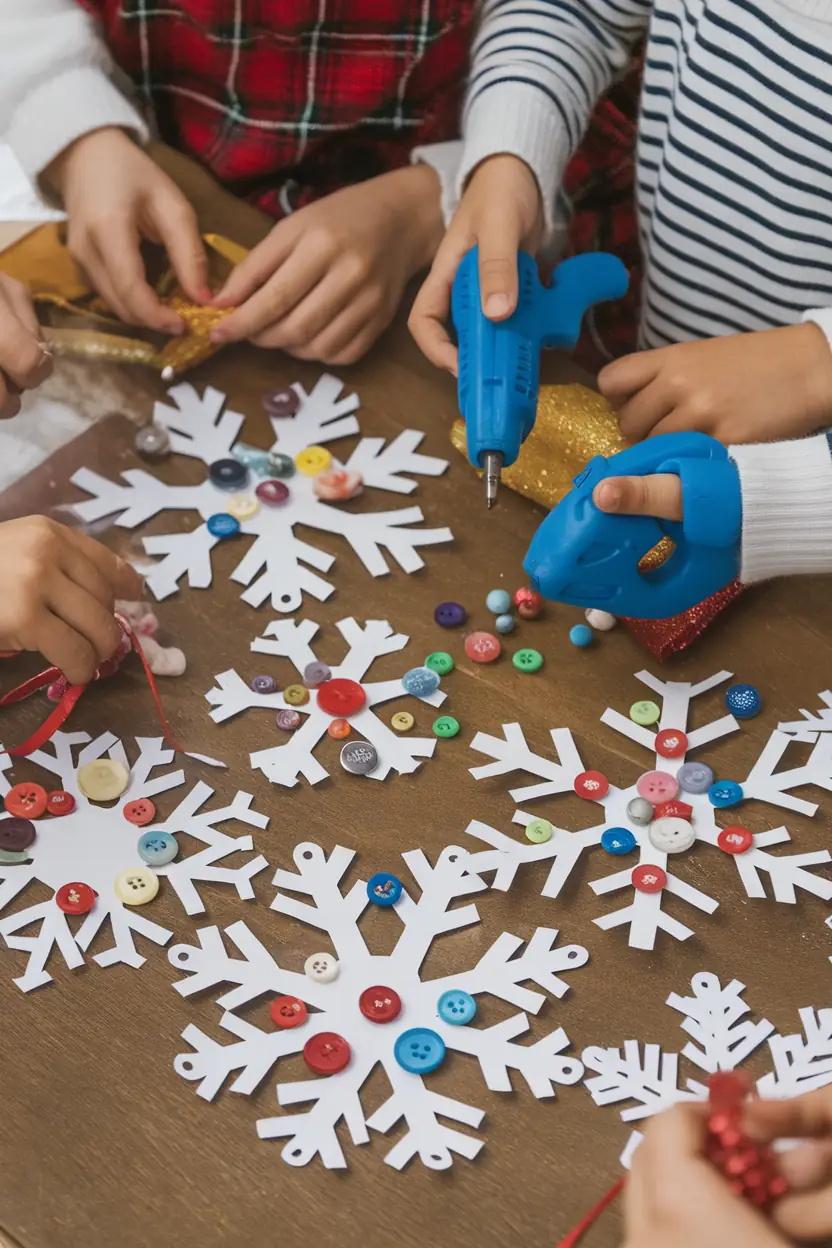
9. Button-Decorated Paper Snowflakes
Add a whimsical and playful touch to your snowflakes with colorful button decorations.
How To Make
- Cut out your snowflake design from paper.
- Gather buttons of different sizes and colors for decoration.
- Use a hot glue gun to attach the buttons to the tips or edges of your snowflake.
- Create fun patterns with the buttons or place them randomly for a unique look.
- Involve kids by letting them personalize each snowflake with their favorite colors.
- For added texture, use beads or small pom-poms instead of buttons.
- Hang the button-decorated snowflakes on a Christmas tree or use them to decorate gifts.
- Add a loop of ribbon to the top to turn them into ornaments.
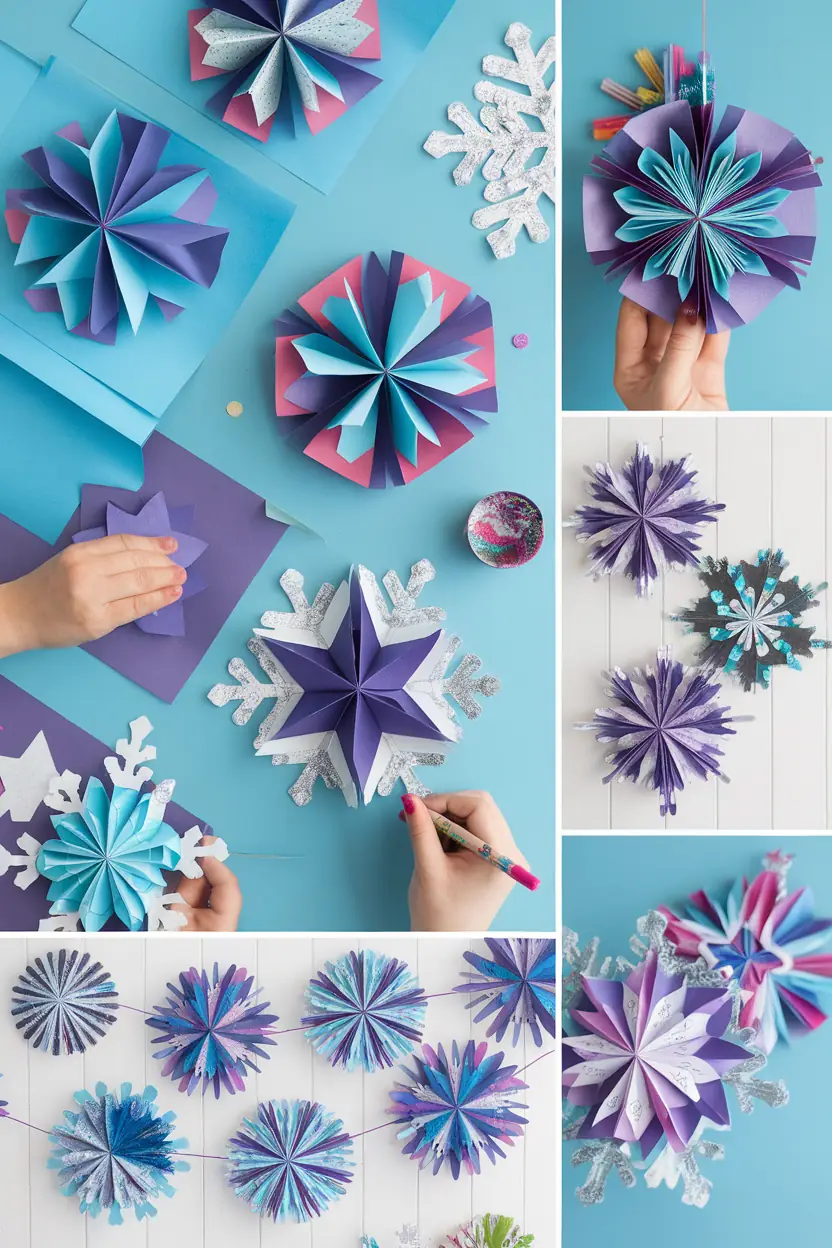
10. Paper Snowflake Garland
Transform your snowflakes into a festive garland for a cozy and magical winter decoration.
How To Make
- Make several snowflakes of varying sizes using your preferred techniques.
- Lay the snowflakes out along a piece of string, yarn, or ribbon, spacing them evenly.
- Attach each snowflake to the string with a dab of glue or a piece of tape.
- For a more secure hold, use a needle and thread to sew through the top of each snowflake.
- Drape the garland across your mantel, staircase railing, or window.
- Add fairy lights to the garland for an enchanting, illuminated effect.
- For a rustic look, use twine instead of ribbon and include small pinecones or sprigs of greenery between the snowflakes.
11. Snowflake Sun Catchers
Create vibrant snowflake sun catchers that brighten up your windows with colorful, stained-glass effects.
How To Make
- Cut out a snowflake shape from wax paper.
- Tear or cut small pieces of colorful tissue paper.
- Use glue to attach the tissue paper pieces to the wax paper snowflake.
- Allow the glue to dry completely.
- Hang the sun catcher in a window to let the light shine through the colorful tissue paper.
- For a brighter effect, use translucent colored cellophane instead of tissue paper.
- Enjoy the vibrant, stained-glass look that adds color and warmth to your home during winter.

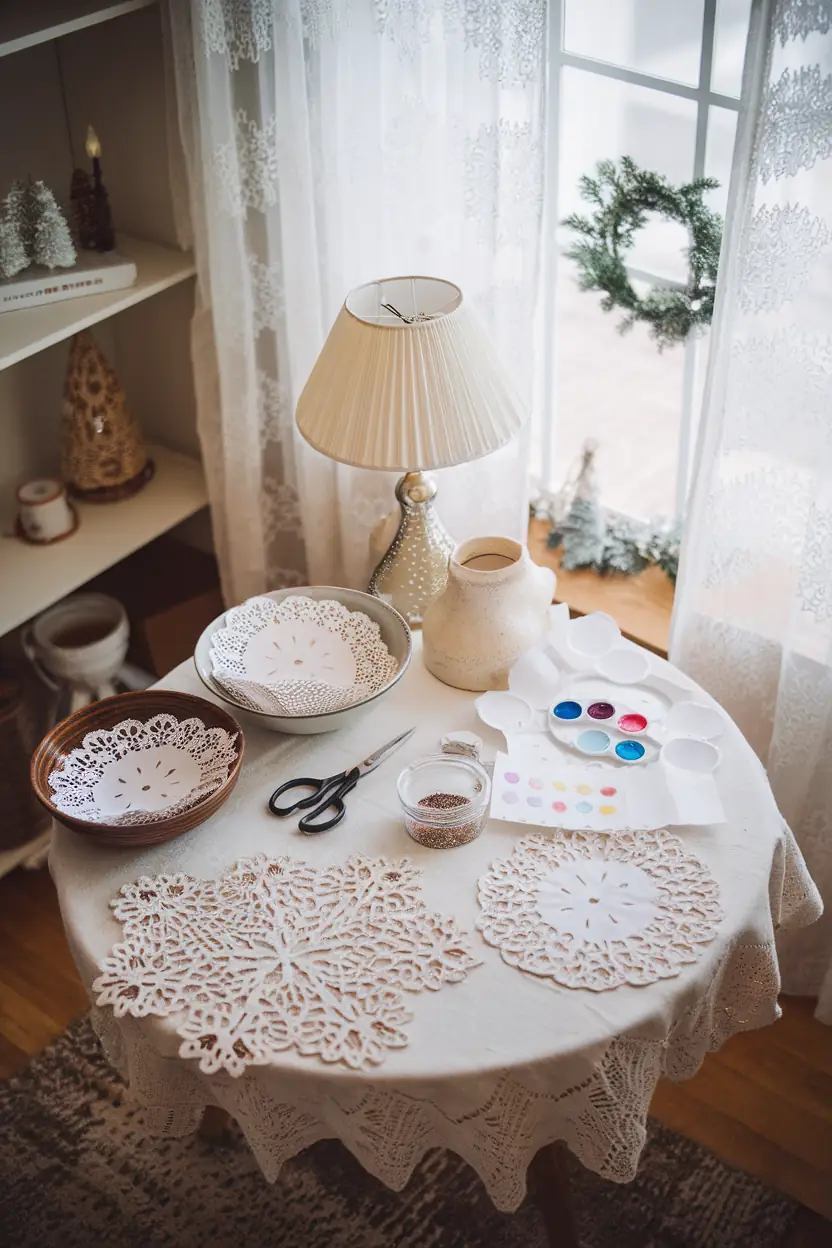
12. Lace Doily Snowflakes
Turn delicate lace doilies into stunning snowflakes with minimal effort and maximum charm.
How To Make
- Take a round paper doily and fold it into triangles.
- Cut small shapes into the folded edges to enhance the design.
- Unfold the doily to reveal its intricate, snowflake-like pattern.
- Layer the lace doilies over colorful paper for contrast or use them as they are.
- Lightly paint the doily with watercolor paints for a soft, decorative touch.
- Add glitter along the edges for extra sparkle.
- Use the doilies to decorate tabletops, windows, or create cards and gift tags.
- Incorporate them into a winter-themed wreath for a beautiful seasonal decoration.
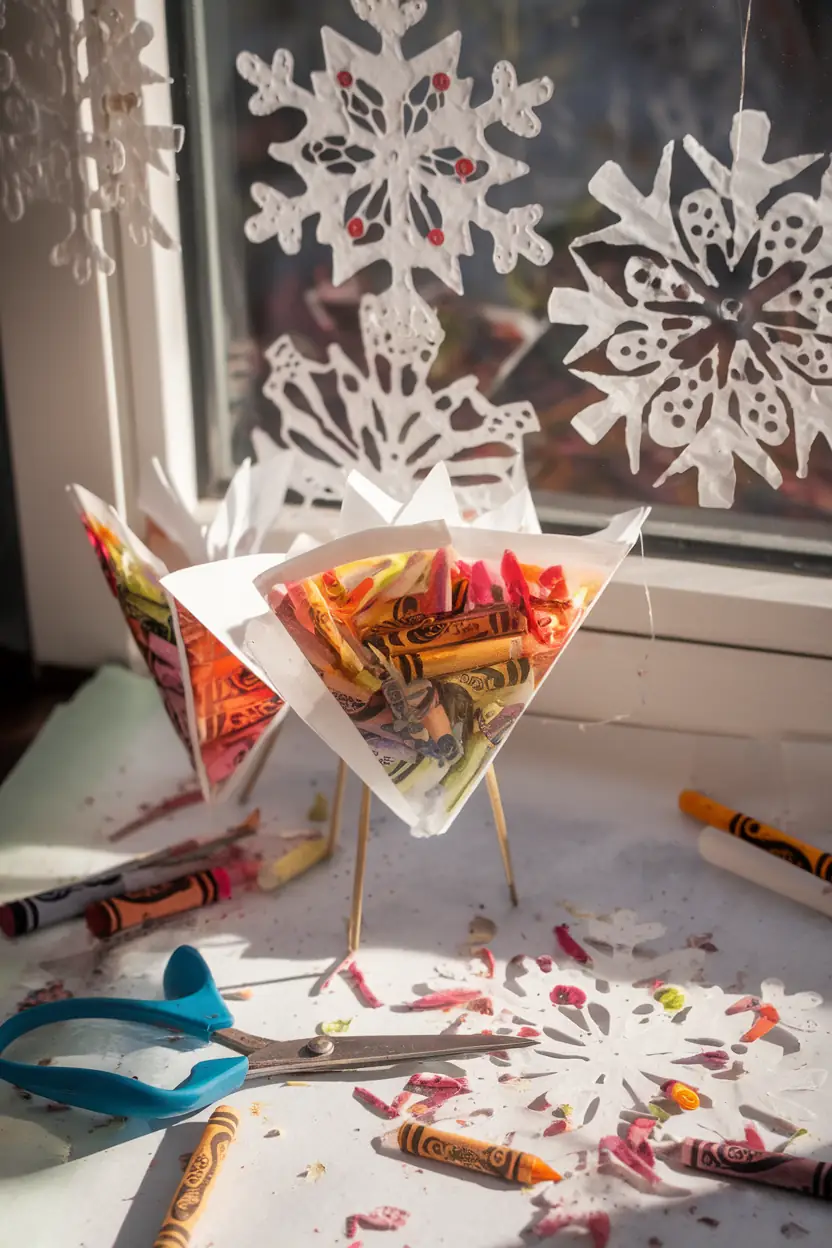
13. Wax Paper Crayon Shavings Snowflakes
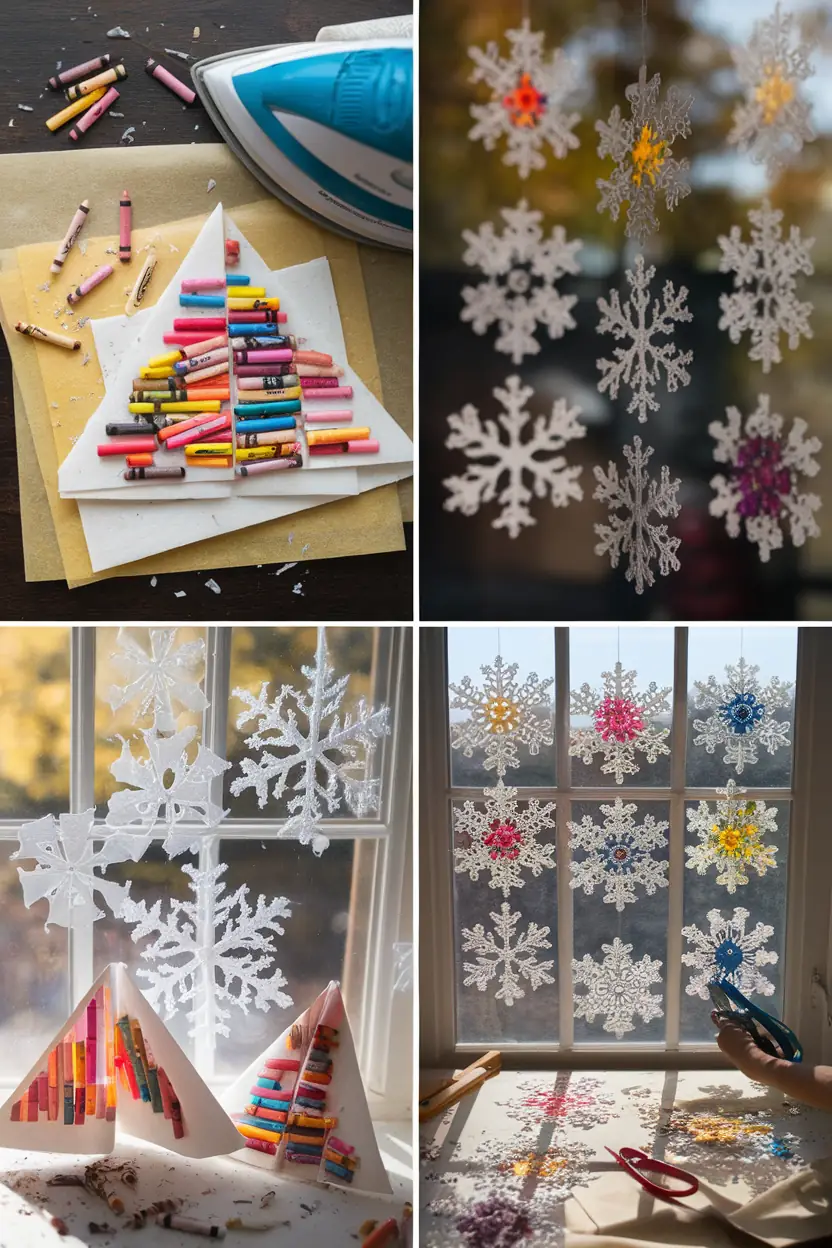
Create vibrant, stained-glass-effect snowflakes with wax paper and melted crayon shavings.
How To Make
- Fold a piece of wax paper into a triangle.
- Shave different colors of crayons onto the inside of the folded wax paper.
- Place the wax paper between sheets of parchment paper to protect your iron and workspace.
- Carefully iron the wax paper on a low heat setting until the crayon shavings melt.
- Allow the wax paper to cool completely.
- Cut the wax paper into a snowflake shape.
- Hang the snowflakes in windows to let light shine through for a colorful effect.
- For a larger display, cut smaller wax paper pieces and combine them into a multi-colored snowflake.
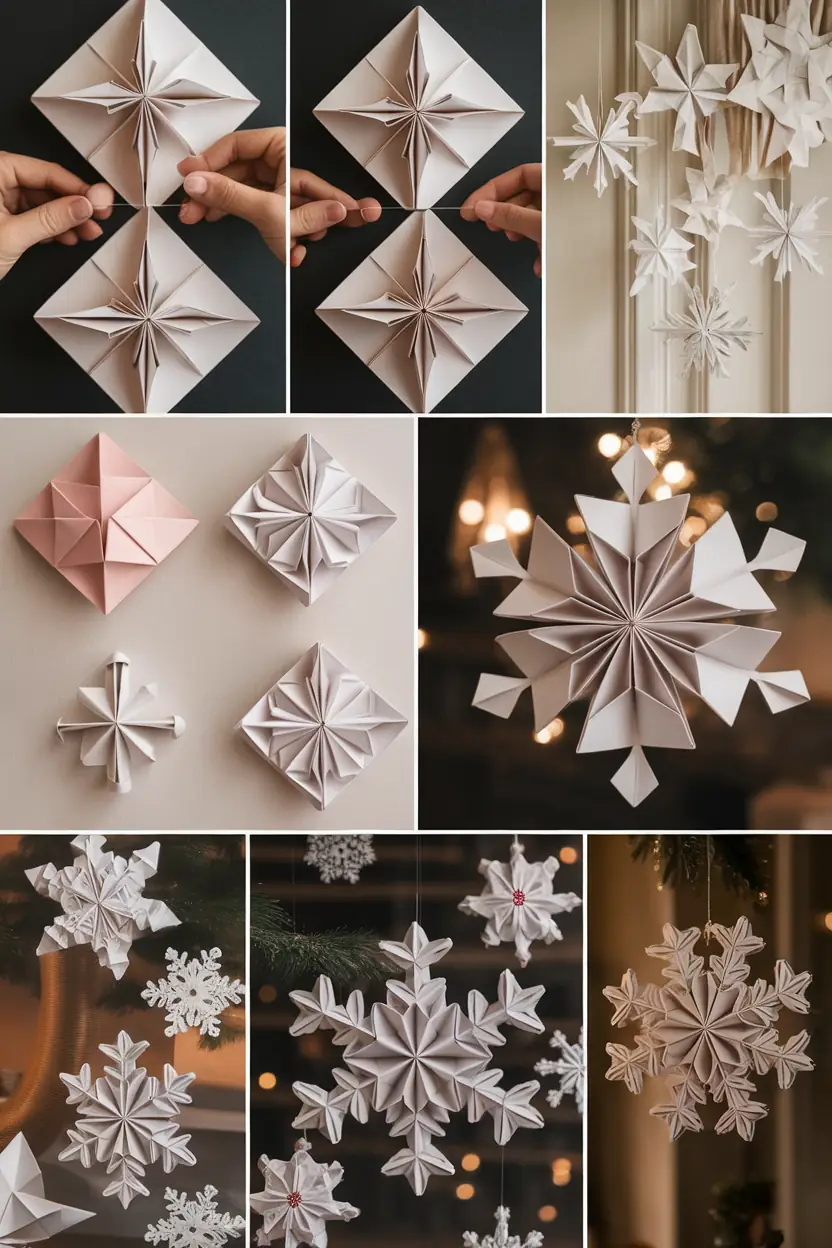
14. Origami Snowflakes
Create intricate and elegant snowflakes with origami techniques for a sophisticated winter decoration.
How To Make
- Start with a square piece of origami paper.
- Follow step-by-step folding instructions to create an intricate snowflake design.
- Avoid making cuts; focus on precise folds to form complex shapes and patterns.
- Experiment with different origami techniques to craft unique designs.
- Layer multiple origami snowflakes for added dimension and depth.
- Use metallic or pearlized origami paper for an elegant and festive look.
- Display these snowflakes as sophisticated decorations around your home during winter.

15. Beaded Snowflakes
Enhance your snowflakes with sparkling beads for a frosty, eye-catching winter decoration.
How To Make
- Cut out a snowflake from sturdy cardstock.
- Use a needle and thread to sew small beads onto the edges or center of the snowflake.
- Choose white, blue, or silver beads for a frosty appearance, or opt for multi-colored beads for a bold look.
- Incorporate sequins alongside beads for even more sparkle.
- Hang the beaded snowflakes under lights to highlight their shine and beauty.
- For a rustic touch, use wooden beads and natural twine for a handmade, cozy feel.
- Display them on your Christmas tree or in windows for festive decoration.

16. Newspaper Snowflakes
Create eco-friendly snowflakes with recycled newspapers for a rustic and charming winter decoration.
How To Make
- Cut a square from a page of an old newspaper.
- Fold the newspaper square and cut it as you would for a classic snowflake.
- Allow the printed text and images to add an interesting, rustic look to your snowflake.
- Layer the newspaper snowflakes over solid-colored paper to make the design stand out.
- Lightly paint the newspaper with watercolors for a touch of color, if desired.
- Add glitter to the edges for extra sparkle.
- Use these snowflakes to decorate your home while repurposing materials you already have.
- Hang them in windows or use them as part of a rustic, homemade winter display.

10 Ideas for Using Your Newly Made Paper Snowflakes
Get creative with your paper snowflakes by using them in various fun and decorative ways!
- Window Decorations: Tape them to your windows for a frosty, wintery vibe that catches the light beautifully.
- Holiday Ornaments: Add a ribbon loop to the top and hang them on your Christmas tree for a festive touch.
- Gift Wrapping: Use them as unique toppers on wrapped gifts for a personal and creative presentation.
- Table Decor: Scatter them across your holiday table for an elegant and seasonal centerpiece.
- Wall Art: Arrange a collection of snowflakes on a wall to create a stunning winter mural.
- Garlands: String several snowflakes together to make a garland for mantels, doorways, or staircases.
- Photo Backdrop: Use them as part of a wintry backdrop for holiday photos or parties.
- Cards and Tags: Attach snowflakes to greeting cards or use them as gift tags for a homemade touch.
- Mobiles: Hang multiple snowflakes from a hoop or branch to create a delicate, moving mobile.
- Scrapbooking: Incorporate them into scrapbooks or journals to add a seasonal and decorative element.
Conclusion: Showcase Your Stunning Paper Snowflake Creations!
Paper snowflakes are a timeless and versatile craft that bring the magic of winter into your home. Whether you’re creating simple designs with your kids, experimenting with intricate 3D patterns, or adding a touch of sparkle with glitter and beads, there’s a snowflake project for everyone
Imagine decorating your windows with lovely snowflakes or crafting personalized gift tags, the possibilities are endless. Best of all, they are budget-friendly and can be made with materials you already have at home.
So, gather your supplies, let your creativity flow, and transform your space into a winter wonderland with these delightful snowflake ideas!

