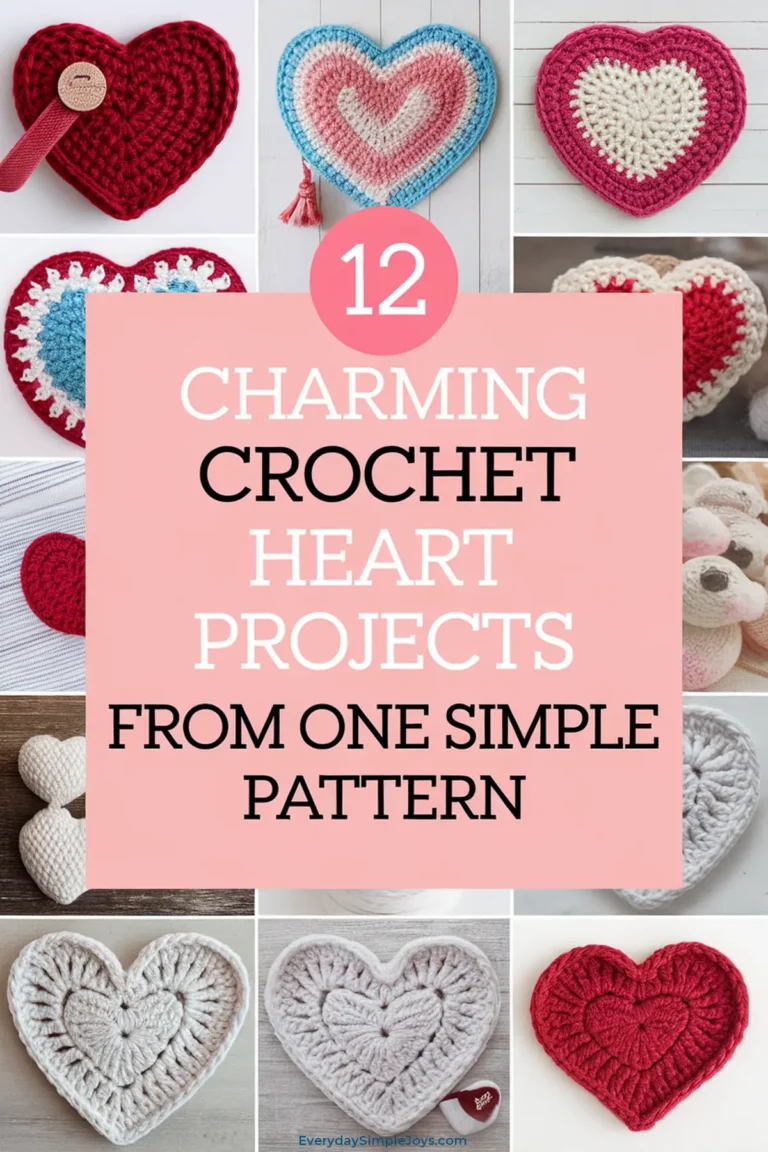
Have you ever wanted to create something small yet brimming with charm that you can finish in less than an hour? The simple crochet heart is your perfect starting point—a delightful little project that blends creativity with ease. Imagine gifting the heart as a sweet token of affection, stitching it onto a cozy blanket, or even turning it into a quirky keychain—its versatility is endless. With just a few basic stitches, you’ll craft a symbol of love that’s as timeless as it is adorable. The rhythmic motion of your hook through soft yarn is oddly soothing, making this a relaxing escape from the everyday hustle. Plus, it’s a fantastic way to use up those yarn scraps lingering in your stash. This guide will walk you through every step, ensuring your heart turns out plump and perfect.
Simple Basic Crochet Heart Pattern
Pattern and Instructions
Materials and Equipment List
- Yarn: Worsted weight yarn (approximately 10-15 yards), any color you love—red, pink, or even a soft pastel works beautifully.
- Crochet Hook: 4.0 mm (G) hook, ideal for worsted yarn to keep stitches tight and neat.
- Yarn Needle: For weaving in ends cleanly and securely.
- Scissors: Sharp pair to trim yarn without fraying.
- Optional: Stitch marker if you’re new to counting stitches, though not essential for this quick project.
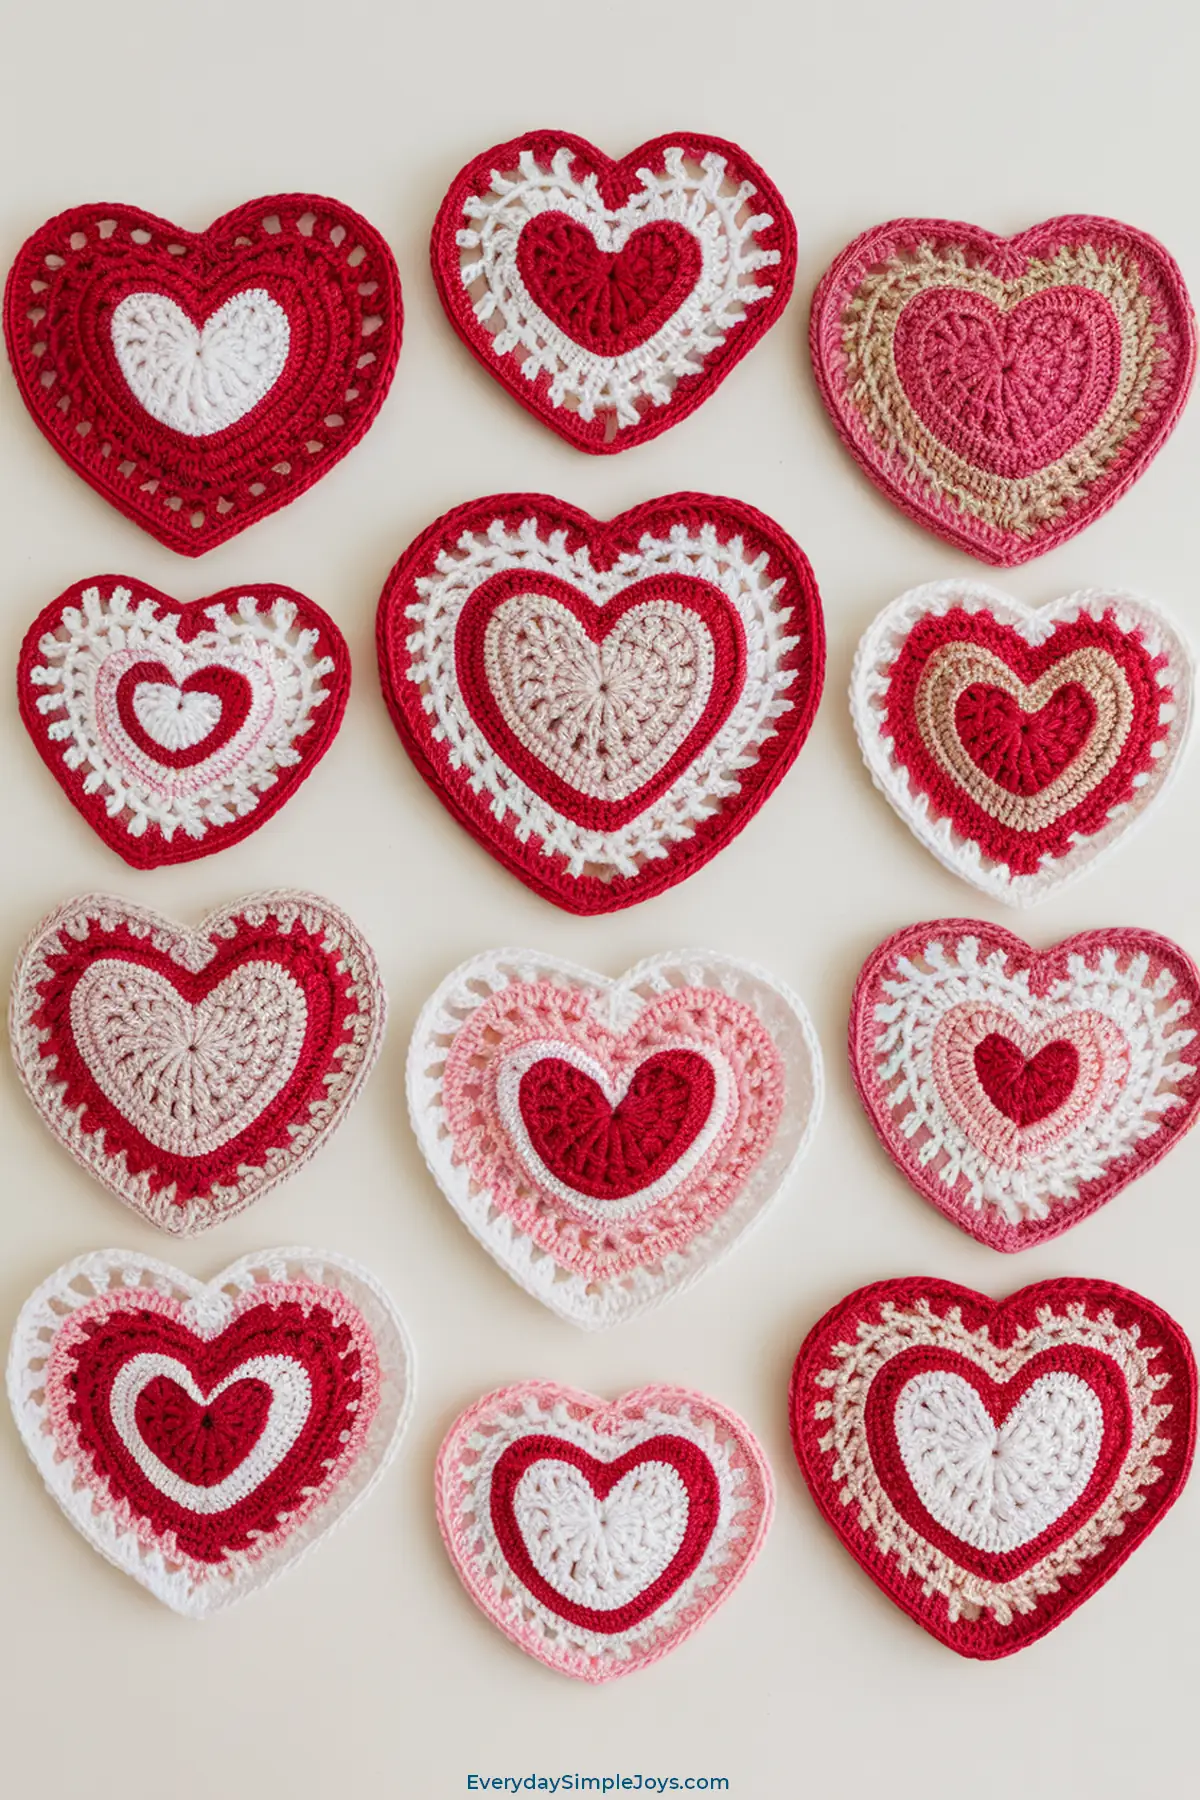
Step-by-Step Instructions
- Create the Foundation: Start by making a slip knot on your hook. Chain 4 stitches—these will form the base of your heart. Keep your tension even so the chain isn’t too tight or too loose.
- Begin the Heart Shape (Row 1): Work into the 4th chain from your hook (the first chain counts as part of the structure). Yarn over twice, insert your hook, and complete 3 treble crochet stitches (tr)—these tall stitches form the left curve. Next, yarn over once and work 3 double crochet stitches (dc) for a gentler slope. Chain 1 to create a small space, then yarn over twice and add 1 treble crochet (tr) to mark the heart’s bottom point. Chain 1 again, followed by 3 more double crochet (dc) stitches for the right slope, and finish with 3 treble crochet (tr) for the right curve. Chain 3, then slip stitch (sl st) into the same 4th chain to close the shape—your heart’s outline is now formed!
- Shape the Bottom Point: Chain 1 to start tightening the base. Work 5 single crochet (sc) stitches evenly across the bottom edge where the treble crochet meets the center point—this pulls the heart into its iconic V-shape. Slip stitch into the first chain to join this mini-row.
- Smooth the Edges (Round 2): Chain 1 to begin the border. Work 1 single crochet (sc) into each stitch around the heart, but when you reach the top curves (treble crochet stitches), place 2 single crochet (sc) in each to round them out nicely. At the bottom point, work 3 single crochet (sc) into the center stitch to emphasize the tip. Continue around and slip stitch into the first chain-1 to complete the round—your heart should now look polished and full.
- Finishing Touches: Cut the yarn, leaving a 6-inch tail. Pull the tail through the last loop to secure it. Thread the tail onto your yarn needle and weave it through the back loops of a few stitches to hide it, then trim any excess with scissors. Gently tug the heart into shape if needed.
Tips: If your heart looks uneven, adjust your tension—looser for a bigger heart, tighter for a smaller one. For a firmer shape, use a smaller hook like a 3.75 mm.
Why This Craft Is Great
- It’s Perfect for Beginners Who Want to Learn Fast: This simple crochet heart uses only a handful of basic stitches—chain, single crochet, double crochet, and treble crochet—making it an ideal project for newcomers to build confidence while creating something undeniably cute in just a few minutes.
- You’ll Finish It Quickly and Feel Accomplished: Unlike larger projects that take days or weeks, this heart comes together in under an hour, giving you that instant gratification of a finished piece you can admire or share right away.
- It’s Incredibly Versatile for Any Occasion: Whether you sew it onto a hat, string it into a garland, or gift it as a standalone token, this heart adapts to countless uses, letting you sprinkle a bit of handmade love wherever it’s needed.
- You Can Use Up Leftover Yarn and Reduce Waste: Those odd bits of yarn sitting in your stash find a perfect home in this project, turning scraps into something beautiful while keeping your craft space tidy and eco-friendly.
- It’s a Heartwarming Gift That Shows You Care: Handing someone a handmade crochet heart says more than words—it’s a tangible piece of your time and affection, perfect for birthdays, Valentine’s Day, or just because, and it’s sure to bring a smile to their face.
Here’s 11 fun items you can make by using the basic heart pattern
1. Crochet Heart Applique
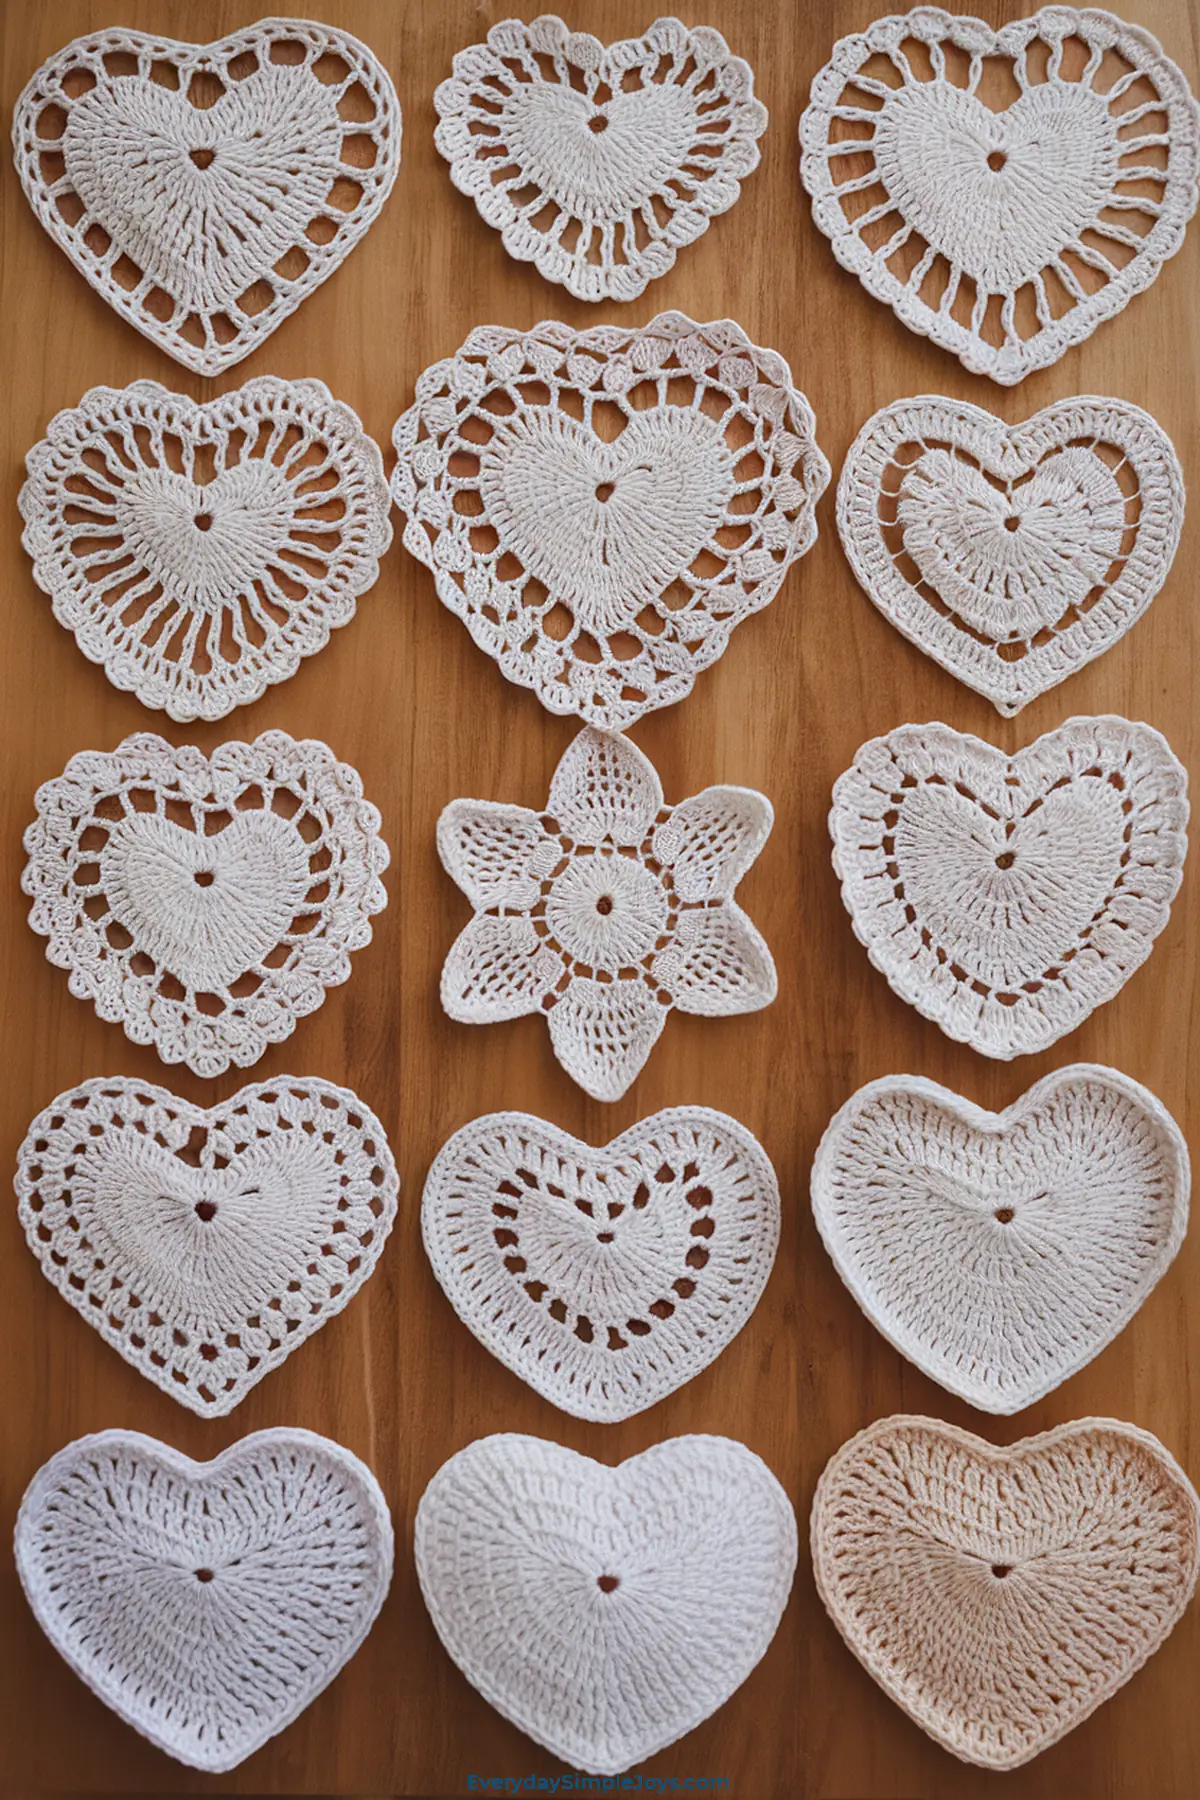
Looking for a way to add a touch of handmade charm to your favorite jacket or bag? The crochet heart applique is a fantastic twist on the simple crochet heart, designed to stick right onto your projects with ease. Imagine how cute it would look sewn onto a denim sleeve or a knit scarf—talk about a conversation starter! This little heart is quick to whip up, making it perfect for those moments when you want to personalize something without a big time commitment. It’s amazing how a small piece of yarn can transform the ordinary into something special. Whether you’re a newbie or a crochet pro, this applique offers a fun way to play with color and texture. The process is so meditative, you’ll find yourself lost in the rhythm of the stitches. Plus, it’s a great excuse to dig into your yarn stash and experiment with scraps. This guide will show you exactly how to make it and attach it flawlessly. Get ready to elevate your wardrobe or gifts with a little heart-shaped flair!
Pattern and Instructions
Materials and Equipment List
- Yarn: Worsted weight yarn (10-15 yards), pick a bold or subtle shade depending on your project.
- Crochet Hook: 4.0 mm (G) hook for tight, neat stitches that hold their shape.
- Yarn Needle: Essential for sewing the applique onto your chosen surface.
- Scissors: To snip the yarn cleanly after finishing.
- Optional: Fabric glue or thread if you prefer an alternative to sewing.
Step-by-Step Instructions
- Create the Foundation: Make a slip knot and chain 4 stitches, keeping your tension consistent for a uniform base.
- Form the Heart (Row 1): In the 4th chain from the hook, yarn over twice and work 3 treble crochet (tr) for the left curve, then yarn over once for 3 double crochet (dc). Chain 1, add 1 treble crochet (tr) for the point, chain 1 again, then 3 double crochet (dc) and 3 treble crochet (tr) for the right curve. Chain 3, slip stitch (sl st) into the 4th chain to close.
- Shape the Bottom: Chain 1, then work 5 single crochet (sc) across the bottom edge to form the V-shape, slip stitching to join.
- Add the Border (Round 2): Chain 1, single crochet (sc) around, placing 2 sc in each treble crochet at the top curves and 3 sc at the bottom point. Slip stitch to the first chain-1 to finish the heart.
- Finishing and Attaching: Cut yarn with a 6-inch tail, pull through, and weave in ends with a yarn needle. Thread the needle with matching yarn or thread and sew the heart onto your fabric, using small, even stitches around the edge.
Tips: Use a contrasting color for a bold look or match the fabric for subtlety; test placement before sewing.
Why This Craft Is Great
- It’s a Simple Way to Customize Anything You Own: This crochet heart applique lets you transform plain clothing, bags, or home décor into personalized treasures with minimal effort, making it a go-to for anyone who loves a unique touch.
- You’ll Love How Fast It Comes Together: In under an hour, you can create a stack of these appliques, giving you instant creative satisfaction and plenty to share or use right away.
- It’s Perfect for Adding Personality to Gifts: Sewing this heart onto a store-bought item turns it into a thoughtful, handmade present, showing off your skills and care in a way that’s sure to impress.
- You Can Play with Colors and Make It Your Own: With endless yarn options, this project invites you to experiment with shades and textures, ensuring every applique reflects your personal style perfectly.
- It’s an Easy Add-On That Packs a Big Punch: Despite its small size, this heart adds a huge dose of charm and craftsmanship to anything it touches, making your projects stand out with minimal fuss.
2. Crochet Heart Bookmark
Introduction
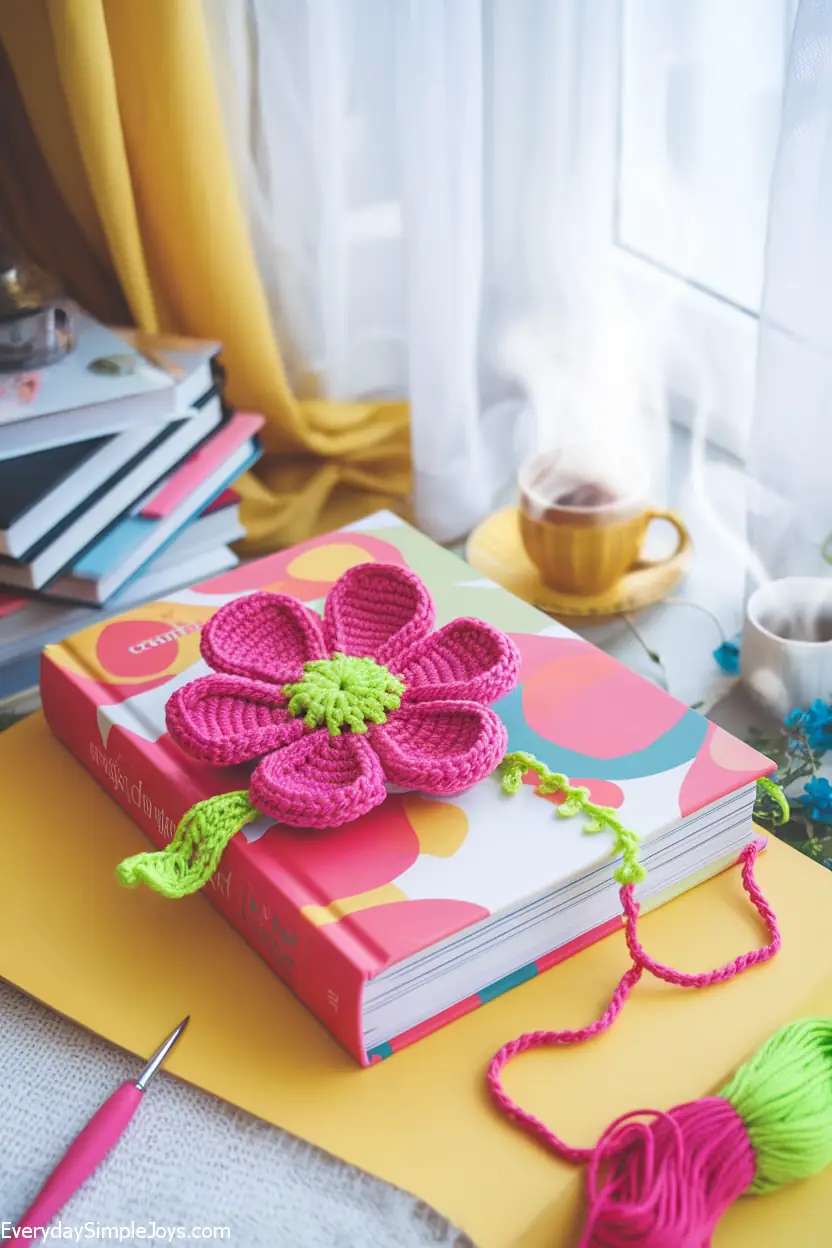
Are you a bookworm who loves a little handmade flair between the pages? The crochet heart bookmark takes the simple heart and gives it a practical twist that’s as cute as it is useful. Picture sliding this into your novel or journal, with its little heart peeking out to mark your spot—it’s pure joy! This project is a breeze to make, perfect for a quiet evening with your hook and yarn. It’s amazing how something so small can brighten your reading routine. Whether you keep it for yourself or gift it to a fellow reader, it’s a sweet way to spread some love. The repetitive stitches are calming, almost like a mini meditation session. You’ll also get to use up those yarn odds and ends cluttering your craft corner. This guide will show you how to craft it step-by-step, tail and all. Get ready to fall in love with your books all over again!
Pattern and Instructions
Materials and Equipment List
- Yarn: Worsted weight yarn (15-20 yards), any color that suits your reading vibe.
- Crochet Hook: 4.0 mm (G) hook for a firm, defined heart.
- Yarn Needle: To weave in ends and secure the tail.
- Scissors: For a clean cut after completing the tail.
- Optional: Bead or charm for the tail’s end for extra flair.
Step-by-Step Instructions
- Create the Foundation: Slip knot, chain 4 with even tension to start your heart base.
- Form the Heart (Row 1): In the 4th chain from hook, work 3 treble crochet (tr), 3 double crochet (dc), chain 1, 1 treble crochet (tr), chain 1, 3 double crochet (dc), 3 treble crochet (tr). Chain 3, slip stitch (sl st) to close.
- Shape the Bottom: Chain 1, work 5 single crochet (sc) across the bottom to form the point, slip stitch to join.
- Add the Border (Round 2): Chain 1, single crochet (sc) around, with 2 sc in each top treble crochet and 3 sc at the bottom point. Slip stitch to finish the heart.
- Add the Tail: At the bottom point, chain 50 (or desired length), then single crochet (sc) back along the chain to the heart. Slip stitch to secure, cut yarn with a 6-inch tail, and weave in ends.
Tips: Adjust tail length for thicker books; add a bead by threading it onto the yarn before crocheting back.
Why This Craft Is Great
- It’s a Charming Way to Keep Your Place in Style: This crochet heart bookmark adds a whimsical touch to your reading, making every page turn a little more delightful with its adorable design.
- You’ll Finish It in One Cozy Sitting: Quick to crochet, this project gives you that wonderful feeling of completion in under an hour, perfect for a relaxing night in with a cup of tea.
- It’s a Thoughtful Gift for Book Lovers Everywhere: Handing over this bookmark shows you’ve put heart into a practical, personal gift that any reader will treasure and use daily.
- You Can Use Scrap Yarn and Save Money: This small project is ideal for turning leftover yarn into something functional, keeping your stash in check while creating something lovely.
- It’s a Small Project with Big Heart: Despite its simplicity, this bookmark carries a lot of charm and utility, proving that even little crafts can make a significant impact on your day.
3. Crochet Heart Coaster
Introduction
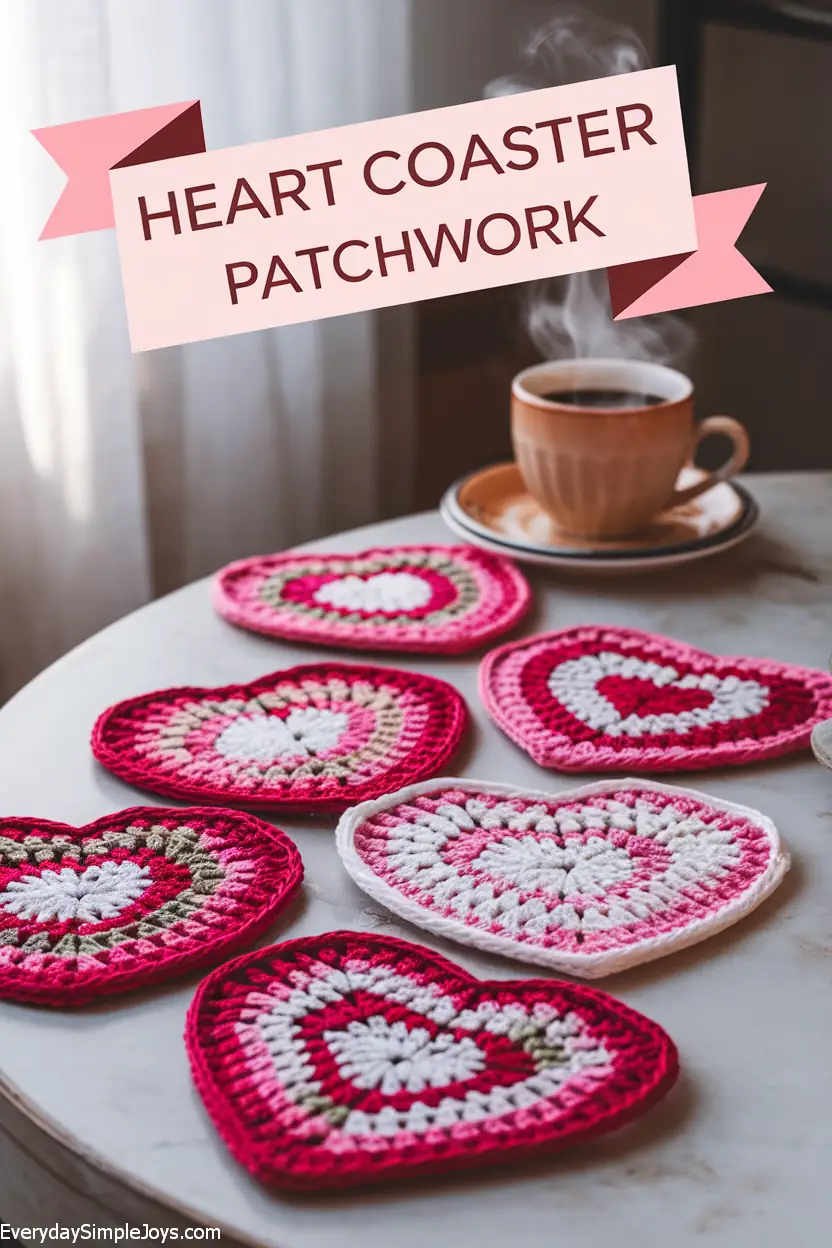
Want to keep your surfaces safe with a dash of handmade love? The crochet heart coaster takes the basic heart and turns it into a practical tabletop protector that’s as pretty as it is useful. Imagine setting your mug on this cute little heart—it’s a small detail that makes every sip feel special. This project is quick and straightforward, perfect for anyone who loves a functional craft. It’s incredible how a few stitches can create something so handy and charming. Whether you’re hosting guests or just treating yourself, these coasters add a cozy vibe to any space. The process is so relaxing, you might find yourself making a whole set. Plus, it’s a great way to use up leftover cotton yarn from other projects. This guide will walk you through crafting a perfect coaster step-by-step. Get ready to sip in style with a heart under every cup!
Pattern and Instructions
Materials and Equipment List
- Yarn: Worsted weight cotton yarn (15 yards), absorbent and durable for coaster use.
- Crochet Hook: 4.0 mm (G) hook for tight stitches that hold up to moisture.
- Yarn Needle: To weave in ends neatly.
- Scissors: For trimming yarn after finishing.
- Optional: Spray starch to stiffen the coaster if desired.
Step-by-Step Instructions
- Create the Foundation: Slip knot, chain 4, keeping stitches even for a solid base.
- Form the Heart (Row 1): In the 4th chain from hook, work 3 treble crochet (tr), 3 double crochet (dc), chain 1, 1 treble crochet (tr), chain 1, 3 double crochet (dc), 3 treble crochet (tr). Chain 3, slip stitch (sl st) to close.
- Shape the Bottom: Chain 1, work 5 single crochet (sc) across the bottom edge to define the point, slip stitch to join.
- Add the Border (Round 2): Chain 1, single crochet (sc) around, with 2 sc in each treble crochet at the curves and 3 sc at the bottom point. Slip stitch to finish.
- Finishing: Cut yarn with a 6-inch tail, pull through, and weave in ends with a yarn needle. Gently shape the coaster flat with your fingers.
Tips: Use cotton for absorbency; make a set in matching colors for a cohesive look.
Why This Craft Is Great
- It’s a Practical Way to Protect Your Furniture: This crochet heart coaster keeps your tables free of rings and scratches while adding a sweet, handmade touch to your home décor.
- You’ll Enjoy Making Something Useful in No Time: Quick to crochet, this coaster gives you instant utility and satisfaction, letting you craft something functional in under an hour.
- It’s a Lovely Addition to Any Hosting Setup: Impress your guests with these charming coasters that show off your skills and make every drink feel a little more special.
- You Can Use Cotton Yarn for Durability: Perfect for soaking up spills, this project lets you repurpose cotton scraps into something that lasts and works beautifully.
- It’s a Small Craft That Feels Like a Big Win: Despite its simplicity, this coaster brings a lot of joy and practicality to your daily life, making it a rewarding little project.
4. Crochet Heart Keychain
Introduction
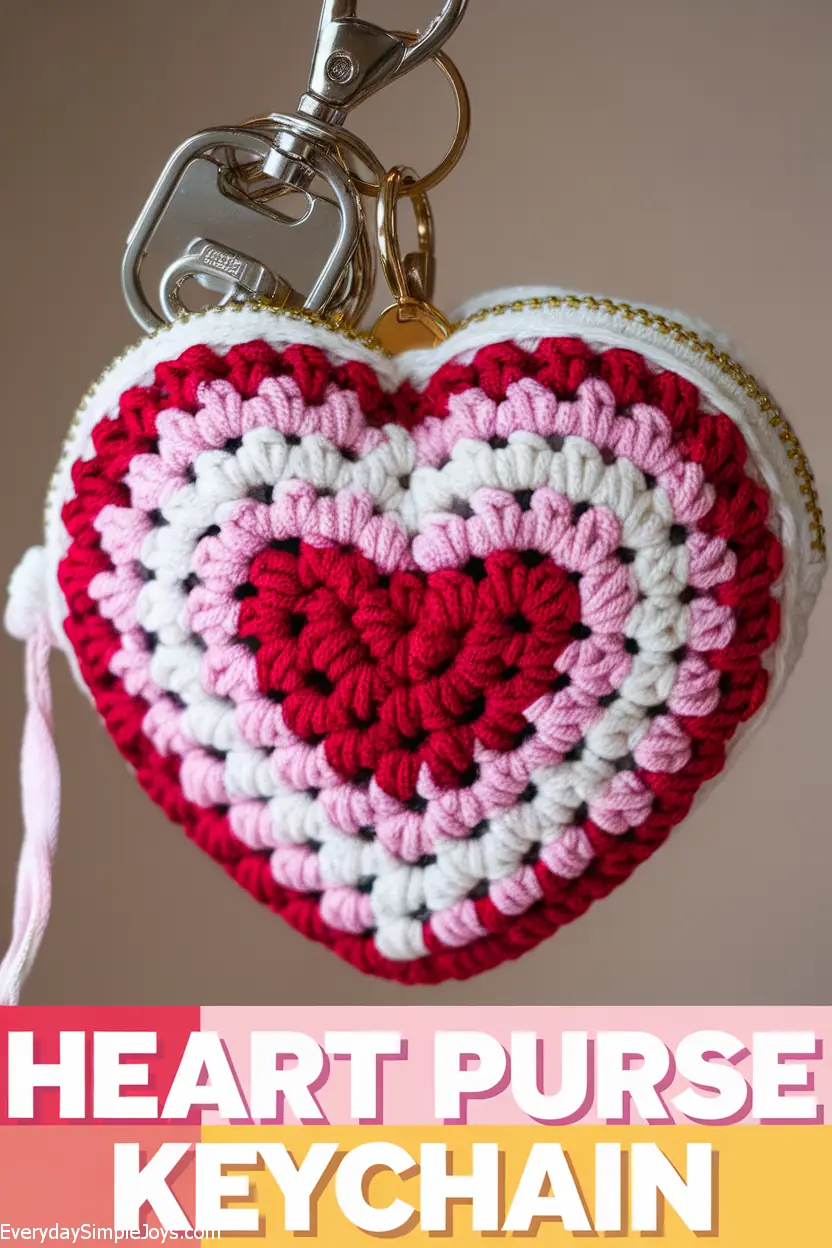
Ever thought about adding a bit of handmade pizzazz to your keys? The crochet heart keychain takes the simple heart and turns it into a portable piece of charm you can carry everywhere. Imagine pulling out your keys and seeing this adorable heart dangling there—it’s a tiny mood-lifter! This project is so quick, you’ll have it done before you know it, perfect for a spontaneous craft session. It’s amazing how a little yarn can make something so personal and fun. Whether you keep it or gift it, it’s a sweet way to spread some cheer. The repetitive stitches are calming, making it a great way to unwind. You can even use leftover yarn to match your style. This guide will show you how to craft it and attach the ring. Get ready to jingle your keys with a little heart!
Pattern and Instructions
Materials and Equipment List
- Yarn: Worsted weight yarn (10-15 yards), any color to match your vibe.
- Crochet Hook: 4.0 mm (G) hook for a firm heart shape.
- Yarn Needle: To weave in ends and attach the keyring.
- Scissors: For trimming yarn neatly.
- Keyring: Small metal ring (1 inch) to attach the heart.
Step-by-Step Instructions
- Create the Foundation: Slip knot, chain 4 with steady tension for the heart base.
- Form the Heart (Row 1): In the 4th chain from hook, work 3 treble crochet (tr), 3 double crochet (dc), chain 1, 1 treble crochet (tr), chain 1, 3 double crochet (dc), 3 treble crochet (tr). Chain 3, slip stitch (sl st) to close.
- Shape the Bottom: Chain 1, work 5 single crochet (sc) across the bottom to shape the point, slip stitch to join.
- Add the Border (Round 2): Chain 1, single crochet (sc) around, with 2 sc in each top treble crochet and 3 sc at the bottom point. Slip stitch to finish.
- Attach the Keyring: At one top curve, chain 5, slip stitch through the keyring and back into the same stitch. Cut yarn with a 6-inch tail, weave in ends.
Tips: Double the chain loop for a stronger hold; use a bright color to spot your keys easily.
Why This Craft Is Great
- It’s a Fun Way to Personalize Your Keys Every Day: This crochet heart keychain adds a burst of personality to your everyday essentials, making them uniquely yours with a handmade touch.
- You’ll Be Done Before You Even Start to Stress: Quick and easy, this project gives you a finished keychain in under an hour, perfect for instant gratification without any fuss.
- It’s a Perfect Little Gift for Anyone: Gifting this heart keychain shows thoughtfulness and creativity, making it a delightful surprise for friends or family who love small, meaningful tokens.
- You Can Use Up Yarn Scraps Creatively: This craft turns those leftover bits into something practical and cute, keeping your stash manageable while you make something useful.
- It’s a Tiny Project with Tons of Charm: Small in size but big in impact, this keychain brings a lot of joy and style to your daily routine with minimal effort.
5. Crochet Heart Garland
Introduction
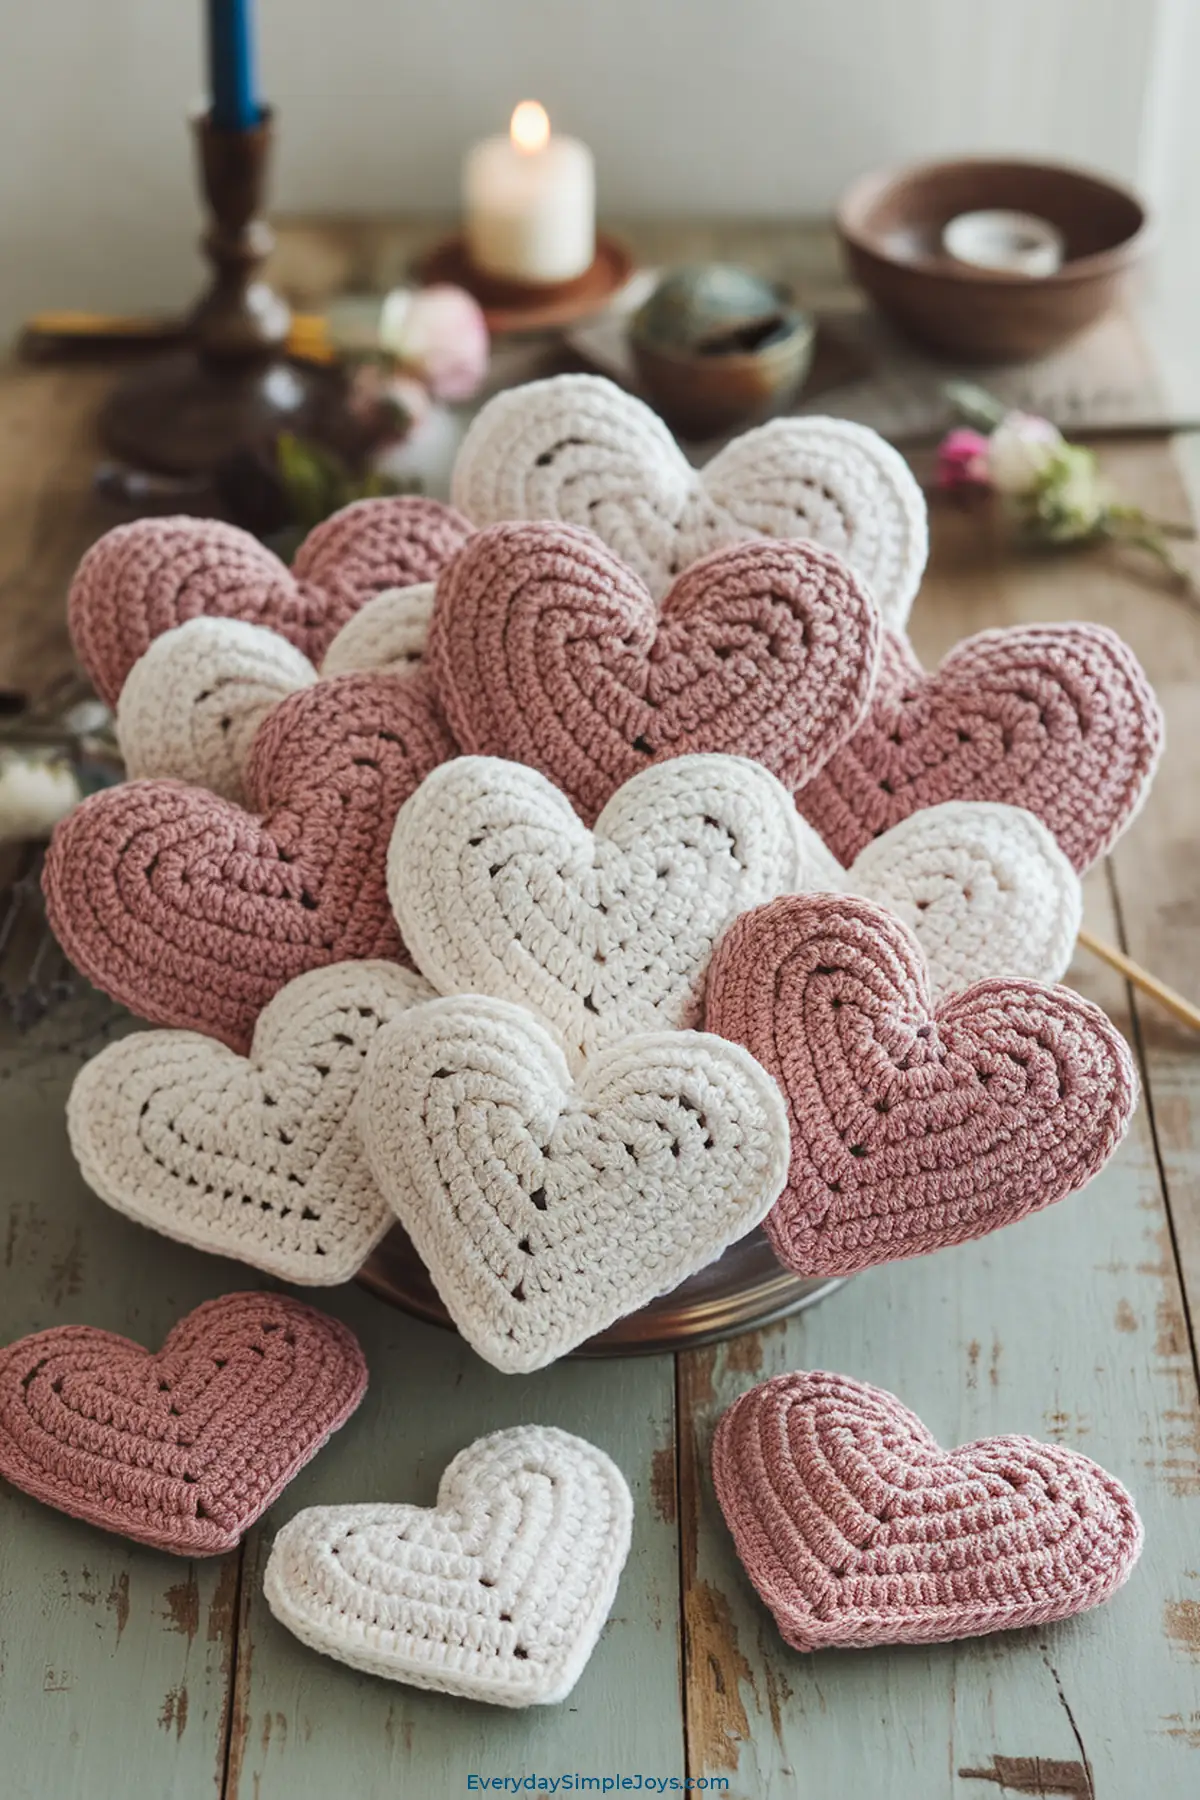
Looking to brighten up your space with a handmade touch? The crochet heart garland strings together the simple heart into a festive decoration that’s perfect for any occasion. Imagine it draped across your mantel or window, adding a cozy, heartfelt vibe to your home. This project is so easy and fun, you’ll be hooked (pun intended) in no time. It’s incredible how a few little hearts can transform a room. Whether it’s for a party, holiday, or just because, this garland brings warmth and cheer. The repetitive stitching is a soothing way to spend an afternoon. You can even use up those yarn scraps to make it uniquely yours. This guide will show you how to craft and connect them perfectly. Get ready to deck your halls with love!
Pattern and Instructions
Materials and Equipment List
- Yarn: Worsted weight yarn (50-60 yards total), mix colors for a fun look.
- Crochet Hook: 4.0 mm (G) hook for consistent heart sizes.
- Yarn Needle: To weave in ends and join hearts.
- Scissors: For cutting yarn after assembly.
- Optional: Extra yarn for hanging loops at ends.
Step-by-Step Instructions
- Create the Foundation (Make 5+ Hearts): For each heart, slip knot, chain 4 evenly.
- Form Each Heart (Row 1): In the 4th chain from hook, work 3 treble crochet (tr), 3 double crochet (dc), chain 1, 1 treble crochet (tr), chain 1, 3 double crochet (dc), 3 treble crochet (tr). Chain 3, slip stitch (sl st) to close.
- Shape the Bottom: Chain 1, work 5 single crochet (sc) across the bottom, slip stitch to join.
- Add the Border (Round 2): Chain 1, single crochet (sc) around, with 2 sc in each top treble crochet and 3 sc at the bottom point. Slip stitch, cut yarn, weave in ends.
- Assemble Garland: Chain 20, slip stitch through a heart’s top curve, chain 10 between each heart, repeat for all hearts, chain 20 at the end. Knot ends securely.
Tips: Vary heart colors for a rainbow effect; adjust chain length for spacing.
Why This Craft Is Great
- It’s a Festive Way to Decorate Any Space: This crochet heart garland brings a cheerful, handmade vibe to your home, making every corner feel warm and inviting for any occasion.
- You’ll Love How Quick Each Heart Comes Together: With each heart taking just minutes, you can create a full garland in an afternoon, giving you fast décor with big impact.
- It’s a Perfect Party or Gift Idea: Hang it up for celebrations or give it as a thoughtful present—either way, it’s a lovely way to share your crafty skills with others.
- You Can Mix and Match Yarn for Fun: Using up scraps in different colors lets you create a unique garland that reflects your creativity while clearing out your stash.
- It’s a Simple Craft That Looks Impressive: Despite its ease, this garland looks intricate and charming, making your efforts shine without needing advanced skills.
6. Crochet Heart Brooch
Introduction
Want to wear your heart on your sleeve—literally? The crochet heart brooch takes the simple heart and turns it into a stylish accessory you can pin anywhere. Picture it on your coat, scarf, or bag, adding a pop of handmade charm to your outfit. This project is so quick and satisfying, perfect for a little creative break. It’s amazing how a small heart can make such a big statement. Whether you keep it or gift it, it’s a fun way to show off your crochet skills. The process is calming, letting you unwind as you stitch. You can even use leftover yarn to match your wardrobe. This guide will walk you through making and attaching the pin. Get ready to accessorize with love!
Pattern and Instructions
Materials and Equipment List
- Yarn: Worsted weight yarn (10-15 yards), choose a color that complements your style.
- Crochet Hook: 4.0 mm (G) hook for a tight, firm heart.
- Yarn Needle: To weave in ends and attach the pin.
- Scissors: For trimming yarn neatly.
- Brooch Pin: Small safety pin or brooch back (1-2 inches).
Step-by-Step Instructions
- Create the Foundation: Slip knot, chain 4 with even tension for the base.
- Form the Heart (Row 1): In the 4th chain from hook, work 3 treble crochet (tr), 3 double crochet (dc), chain 1, 1 treble crochet (tr), chain 1, 3 double crochet (dc), 3 treble crochet (tr). Chain 3, slip stitch (sl st) to close.
- Shape the Bottom: Chain 1, work 5 single crochet (sc) across the bottom to form the point, slip stitch to join.
- Add the Border (Round 2): Chain 1, single crochet (sc) around, with 2 sc in each top treble crochet and 3 sc at the bottom point. Slip stitch to finish.
- Attach the Pin: Cut yarn with a 6-inch tail, weave in ends. Thread the needle and sew the brooch pin horizontally across the back center, securing it firmly.
Tips: Use a smaller hook (3.5 mm) for a daintier brooch; test pin placement before sewing.
Why This Craft Is Great
- It’s a Stylish Way to Show Off Your Skills: This crochet heart brooch lets you wear your creativity proudly, adding a unique, handmade flair to any outfit with ease.
- You’ll Have a New Accessory in No Time: Quick to make, this project delivers a fashionable brooch in under an hour, perfect for instant gratification and instant wear.
- It’s a Perfect Gift for Fashion Lovers: Gifting this brooch shows thoughtfulness and craftsmanship, making it a delightful surprise for anyone who loves personal accessories.
- You Can Match It to Your Wardrobe: Using scraps from your stash, this craft lets you create a brooch that perfectly complements your style, adding a custom touch.
- It’s a Small Craft with Big Impact: Tiny but mighty, this brooch brings a lot of charm and personality to your look, proving small projects can shine brightly.
7. Crochet Heart Hair Clip
Introduction
Looking for a cute way to jazz up your hairstyle? The crochet heart hair clip takes the simple heart and turns it into a playful hair accessory that’s sure to turn heads. Imagine clipping this little heart into your hair, adding a touch of whimsy to your everyday look. This project is so fast and fun, perfect for a quick craft fix. It’s amazing how a bit of yarn can become something so adorable. Whether you wear it yourself or give it to a friend, it’s a sweet way to brighten any day. The stitching process is relaxing, like a mini escape from the chaos. You can use leftover yarn to match your favorite outfit. This guide will show you how to make and attach it perfectly. Get ready to wear your heart up high!
Pattern and Instructions
Materials and Equipment List
- Yarn: Worsted weight yarn (10-15 yards), pick a color that pops in your hair.
- Crochet Hook: 4.0 mm (G) hook for a firm heart shape.
- Yarn Needle: To weave in ends and attach the clip.
- Scissors: For trimming yarn cleanly.
- Hair Clip: Small alligator clip or barrette (1-2 inches).
Step-by-Step Instructions
- Create the Foundation: Slip knot, chain 4 with consistent tension.
- Form the Heart (Row 1): In the 4th chain from hook, work 3 treble crochet (tr), 3 double crochet (dc), chain 1, 1 treble crochet (tr), chain 1, 3 double crochet (dc), 3 treble crochet (tr). Chain 3, slip stitch (sl st) to close.
- Shape the Bottom: Chain 1, work 5 single crochet (sc) across the bottom to define the point, slip stitch to join.
- Add the Border (Round 2): Chain 1, single crochet (sc) around, with 2 sc in each top treble crochet and 3 sc at the bottom point. Slip stitch to finish.
- Attach the Clip: Cut yarn with a 6-inch tail, weave in ends. Sew the hair clip to the back center with the needle, securing it tightly.
Tips: Use a bright color for kids or subtle for adults; ensure the clip opens easily after sewing.
Why This Craft Is Great
- It’s a Cute Way to Accessorize Your Hair: This crochet heart hair clip adds a playful, handmade touch to your hairstyle, making every day a little more fun and stylish.
- You’ll Finish It Super Fast and Wear It Right Away: Quick to crochet, this project gives you a new hair accessory in under an hour, perfect for instant use or gifting.
- It’s a Sweet Gift for Kids and Adults Alike: This hair clip makes a charming, thoughtful present that anyone can enjoy, showing off your skills in a wearable way.
- You Can Use Scrap Yarn to Match Anything: Dig into your stash to create a clip that complements your outfits, turning leftovers into something practical and pretty.
- It’s a Small Craft That Stands Out: Tiny but eye-catching, this hair clip brings a lot of charm and personality to your look with minimal effort.
8. Crochet Heart Ornament
Introduction
Want to add a handmade touch to your holiday tree or gift wrapping? The crochet heart ornament takes the simple heart and turns it into a festive decoration that’s full of charm. Imagine it hanging on a branch or tied to a present, spreading love wherever it goes. This project is quick and delightful, perfect for getting into the seasonal spirit. It’s amazing how a little yarn can become a cherished keepsake. Whether you make one or a dozen, it’s a sweet way to celebrate any occasion. The stitching is so soothing, you’ll feel the stress melt away. You can use leftover yarn to match your décor or theme. This guide will show you how to craft and hang it perfectly. Get ready to deck the halls with heart!
Pattern and Instructions
Materials and Equipment List
- Yarn: Worsted weight yarn (10-15 yards), festive colors like red, green, or white.
- Crochet Hook: 4.0 mm (G) hook for a tight heart shape.
- Yarn Needle: To weave in ends and create a hanging loop.
- Scissors: For trimming yarn after finishing.
- Optional: Ribbon or extra yarn for hanging.
Step-by-Step Instructions
- Create the Foundation: Slip knot, chain 4 with even tension.
- Form the Heart (Row 1): In the 4th chain from hook, work 3 treble crochet (tr), 3 double crochet (dc), chain 1, 1 treble crochet (tr), chain 1, 3 double crochet (dc), 3 treble crochet (tr). Chain 3, slip stitch (sl st) to close.
- Shape the Bottom: Chain 1, work 5 single crochet (sc) across the bottom to form the point, slip stitch to join.
- Add the Border (Round 2): Chain 1, single crochet (sc) around, with 2 sc in each top treble crochet and 3 sc at the bottom point. Slip stitch to finish.
- Add Hanging Loop: At one top curve, chain 10, slip stitch back into the same stitch to form a loop. Cut yarn with a 6-inch tail, weave in ends.
Tips: Starch lightly for stiffness; use metallic yarn for extra sparkle.
Why This Craft Is Great
- It’s a Festive Way to Celebrate Any Season: This crochet heart ornament adds a handmade touch to your holidays or gifts, making every occasion feel extra special and heartfelt.
- You’ll Finish It Quickly and Decorate Sooner: Fast to make, this project lets you create a stack of ornaments in no time, perfect for last-minute decorating or gifting.
- It’s a Keepsake Gift That Lasts: Giving this ornament creates a lasting memory, showing your care with a craft that can be cherished year after year.
- You Can Use Scrap Yarn for a Personal Touch: This craft turns leftovers into festive décor, letting you match your theme while clearing out your yarn pile.
- It’s a Small Craft with Big Cheer: Tiny but full of charm, this ornament brings a lot of joy and warmth to your celebrations with minimal effort.
9. Crochet Heart Magnet
Introduction
Want to add some love to your fridge or locker? The crochet heart magnet takes the simple heart and turns it into a fun, functional decoration that sticks around. Imagine it holding up your shopping list or a sweet note—it’s a small detail that makes a big difference. This project is so quick and easy, perfect for a little crafty pick-me-up. It’s amazing how a bit of yarn can brighten up a metal surface. Whether you keep it or share it, it’s a cute way to spread some cheer. The stitching is relaxing, giving you a moment of calm in your day. You can use leftover yarn to match your kitchen or mood. This guide will show you how to make and magnetize it perfectly. Get ready to stick some heart into your space!
Pattern and Instructions
Materials and Equipment List
- Yarn: Worsted weight yarn (10-15 yards), any color that pops on your fridge.
- Crochet Hook: 4.0 mm (G) hook for a firm heart shape.
- Yarn Needle: To weave in ends and attach the magnet.
- Scissors: For trimming yarn neatly.
- Magnet: Small round magnet (0.5-1 inch) with adhesive or glue.
Step-by-Step Instructions
- Create the Foundation: Slip knot, chain 4 with steady tension.
- Form the Heart (Row 1): In the 4th chain from hook, work 3 treble crochet (tr), 3 double crochet (dc), chain 1, 1 treble crochet (tr), chain 1, 3 double crochet (dc), 3 treble crochet (tr). Chain 3, slip stitch (sl st) to close.
- Shape the Bottom: Chain 1, work 5 single crochet (sc) across the bottom to define the point, slip stitch to join.
- Add the Border (Round 2): Chain 1, single crochet (sc) around, with 2 sc in each top treble crochet and 3 sc at the bottom point. Slip stitch to finish.
- Attach the Magnet: Cut yarn with a 6-inch tail, weave in ends. Use glue or sew the magnet to the back center, ensuring it’s secure.
Tips: Test magnet strength before gluing; use a bright color to stand out.
Why This Craft Is Great
- It’s a Fun Way to Decorate Your Fridge: This crochet heart magnet adds a playful, handmade touch to your kitchen or office, making everyday tasks a bit more cheerful.
- You’ll Finish It in a Flash and Use It Right Away: Quick to crochet, this project gives you a functional magnet in under an hour, perfect for instant décor and utility.
- It’s a Cute Gift That Sticks Around: Gifting this magnet is a thoughtful way to share your craft, offering a practical, charming keepsake for anyone’s space.
- You Can Use Scrap Yarn to Keep It Simple: This craft turns leftovers into something useful, letting you create a magnet that matches your style while clearing your stash.
- It’s a Small Craft with Big Utility: Tiny but mighty, this magnet brings a lot of charm and function to your daily life with minimal effort.
10. Crochet Heart Pincushion
Introduction
Need a cute spot to stash your pins while you sew? The crochet heart pincushion takes the simple heart and turns it into a handy tool that’s as adorable as it is practical. Imagine it sitting on your craft table, holding your pins with a little handmade love. This project is quick and satisfying, perfect for anyone who loves a functional craft. It’s amazing how a few stitches can create something so useful. Whether you’re a sewer or just need a pin holder, this pincushion is a sweet addition. The stitching process is so calming, you’ll enjoy every moment. You can use leftover yarn to match your craft space. This guide will show you how to stuff and finish it perfectly. Get ready to keep your pins in heart-shaped style!
Pattern and Instructions
Materials and Equipment List
- Yarn: Worsted weight yarn (20-25 yards), any color you love.
- Crochet Hook: 4.0 mm (G) hook for a tight fabric.
- Yarn Needle: To weave in ends and sew pieces together.
- Scissors: For trimming yarn after assembly.
- Stuffing: Polyester fiberfill or cotton for a plump pincushion.
Step-by-Step Instructions
- Create the Foundation (Make 2): Slip knot, chain 4 for each heart piece, keeping tension even.
- Form Each Heart (Row 1): In the 4th chain from hook, work 3 treble crochet (tr), 3 double crochet (dc), chain 1, 1 treble crochet (tr), chain 1, 3 double crochet (dc), 3 treble crochet (tr). Chain 3, slip stitch (sl st) to close.
- Shape the Bottom: Chain 1, work 5 single crochet (sc) across the bottom, slip stitch to join.
- Add the Border (Round 2): Chain 1, single crochet (sc) around, with 2 sc in each top treble crochet and 3 sc at the bottom point. Slip stitch to finish each piece.
- Assemble: Place hearts wrong sides together, single crochet (sc) around the edges, leaving a 1-inch gap. Stuff lightly with fiberfill, then sc the gap closed. Cut yarn, weave in ends.
Tips: Don’t overstuff—keep it firm but soft; use a bold color to spot it easily.
Why This Craft Is Great
- It’s a Practical Tool for Every Crafter: This crochet heart pincushion keeps your pins organized and accessible, adding a cute, handmade touch to your sewing or crafting setup.
- You’ll Finish It Quickly and Use It Right Away: Fast to make, this project gives you a useful pincushion in under an hour, perfect for instant utility and satisfaction.
- It’s a Thoughtful Gift for Sewists: Gifting this pincushion shows you care about their hobby, offering a practical, charming tool that any crafter will appreciate.
- You Can Use Scrap Yarn to Make It Yours: This craft turns leftovers into something functional, letting you match your craft space while keeping your stash tidy.
- It’s a Small Craft with Big Helpfulness: Tiny but essential, this pincushion brings a lot of utility and charm to your workspace with minimal effort.
11. Crochet Heart Wall Hanging
Introduction
Want to add a handmade touch to your walls? The crochet heart wall hanging takes the simple heart and turns it into a stunning décor piece that’s full of warmth. Imagine it hanging above your desk or in your living room, bringing a cozy vibe to your space. This project is easy and rewarding, perfect for anyone who loves a craft with impact. It’s amazing how a few hearts can create something so eye-catching. Whether you’re decorating your home or gifting it, it’s a sweet way to share some love. The stitching is so relaxing, you’ll lose yourself in the process. You can use leftover yarn to match your style or room. This guide will show you how to craft and hang it perfectly. Get ready to adorn your walls with heart!
Pattern and Instructions
Materials and Equipment List
- Yarn: Worsted weight yarn (40-50 yards total), multiple colors for variety.
- Crochet Hook: 4.0 mm (G) hook for consistent hearts.
- Yarn Needle: To weave in ends and assemble.
- Scissors: For trimming yarn after finishing.
- Dowel or Stick: Small wooden dowel (12 inches) for hanging.
Step-by-Step Instructions
- Create the Foundation (Make 3-5 Hearts): Slip knot, chain 4 for each heart, keeping tension even.
- Form Each Heart (Row 1): In the 4th chain from hook, work 3 treble crochet (tr), 3 double crochet (dc), chain 1, 1 treble crochet (tr), chain 1, 3 double crochet (dc), 3 treble crochet (tr). Chain 3, slip stitch (sl st) to close.
- Shape the Bottom: Chain 1, work 5 single crochet (sc) across the bottom, slip stitch to join.
- Add the Border (Round 2): Chain 1, single crochet (sc) around, with 2 sc in each top treble crochet and 3 sc at the bottom point. Slip stitch, cut yarn, weave in ends.
- Assemble Hanging: Chain 20, slip stitch through a heart’s top curve, chain 5 between hearts, repeat across dowel. Attach yarn to dowel with slip stitches, chain 20 at ends for hanging loops.
Tips: Vary heart sizes with different hooks; hang with a rustic stick for charm.
Why This Craft Is Great
- It’s a Stunning Way to Decorate Your Home: This crochet heart wall hanging adds a warm, handmade focal point to any room, making your space feel uniquely cozy and inviting.
- You’ll Create Something Impressive in Little Time: Quick to stitch, this project lets you craft a beautiful décor piece in an afternoon, offering big impact with minimal wait.
- It’s a Perfect Gift for Housewarmings: Gifting this wall hanging shows thoughtfulness and skill, making it a heartfelt addition to someone’s new home or space.
- You Can Use Scrap Yarn for a Custom Look: This craft turns leftovers into a cohesive design, letting you match your décor while clearing out your yarn stash.
- It’s a Simple Craft That Looks Sophisticated: Easy to make yet elegant, this wall hanging brings a lot of style and charm to your walls with minimal complexity.

