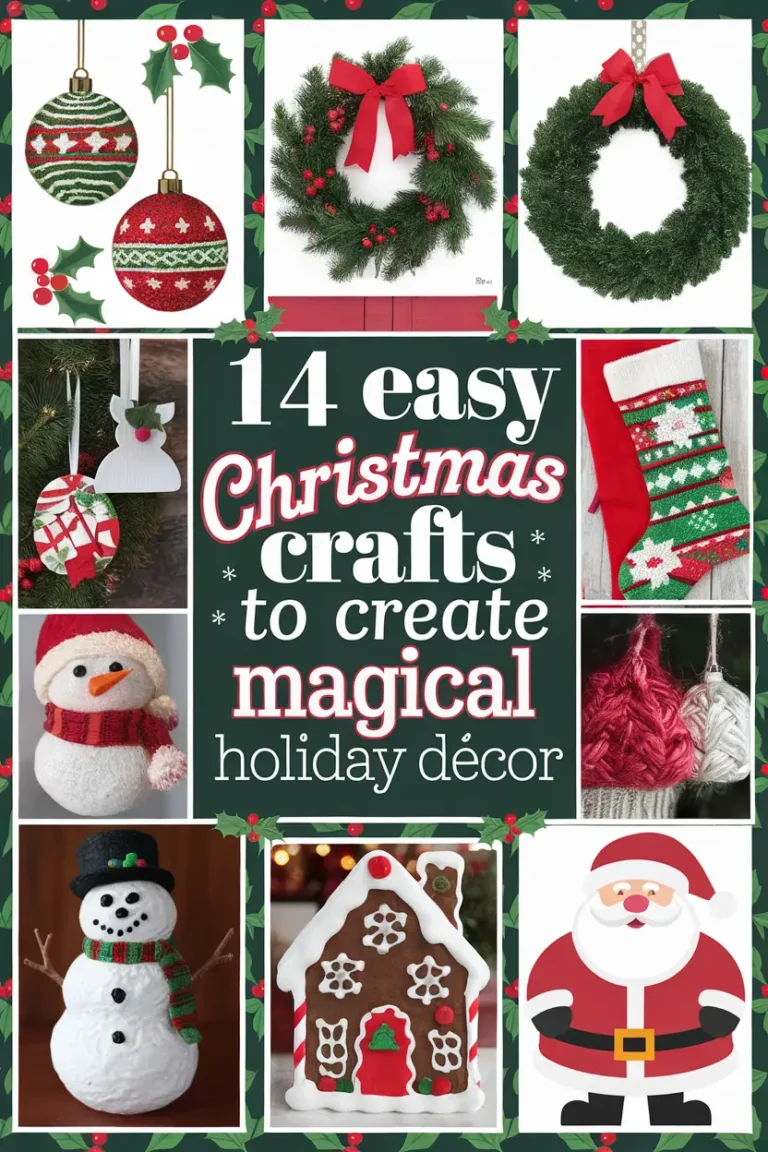
Want some DIY ideas that are perfect for decorating your home or gifting during the festive season?
These Easy Christmas Crafts are an absolute delight! They’re fun, festive, and guaranteed to spread holiday cheer without requiring special crafting skills or any experience.
From charming ornaments to cheerful decorations and centerpieces, these crafts will brighten your home and make thoughtful handmade gifts. Plus, they’re beginner-friendly and budget-conscious.
Why You’ll Love This Guide:
- Simple and Fun: Perfect for crafters of all skill levels.
- Affordable Materials: Create beautiful pieces on a budget.
- Versatile: Great for home decor, gift-giving, or holiday market sales.
- Festive Spirit: Bring the magic of Christmas into your crafting.
14 Easy Christmas Crafts that You Can Create On a Budget
Easy Christmas Crafts Gifts
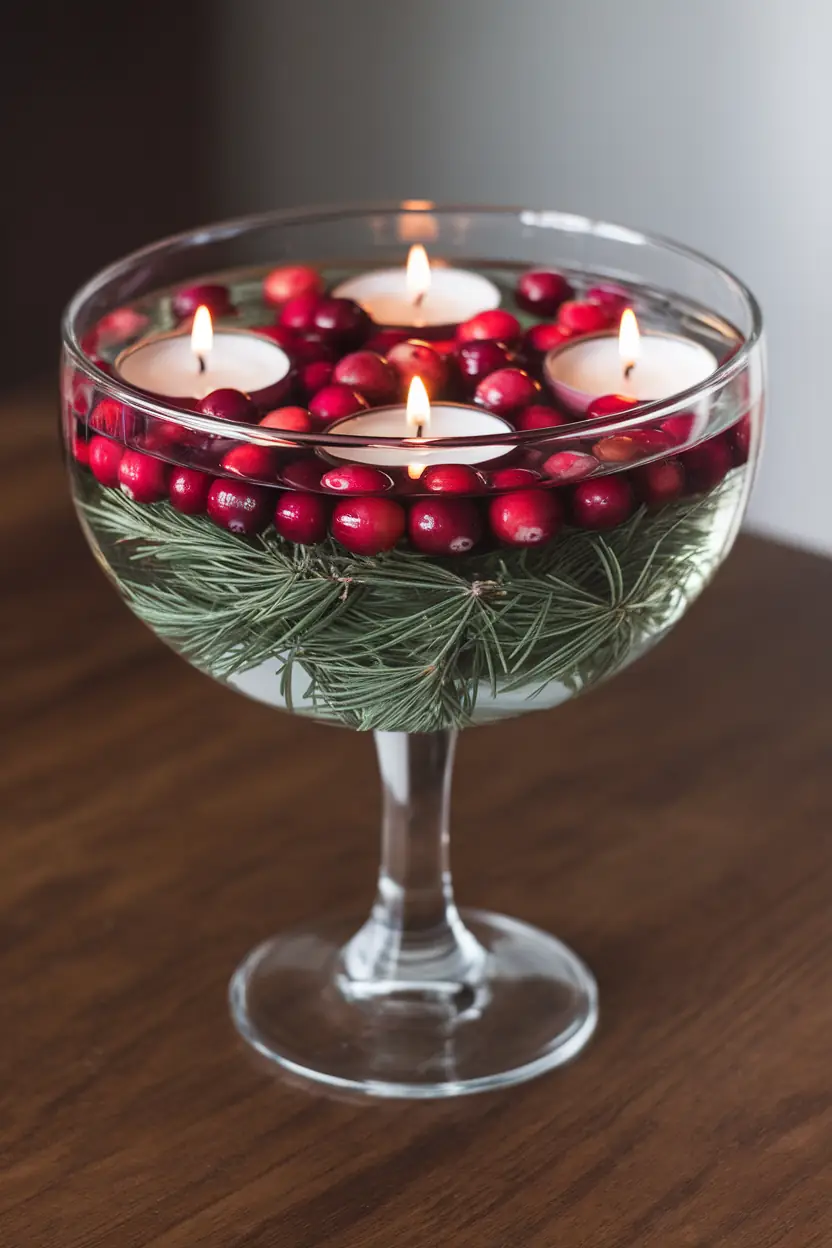
1. Floating Cranberry Candle Bowl
How To Make
- Fill a large glass bowl with fresh water.
- Add an assortment of greenery like pine or holly.
- Drop in some fresh cranberries. A full bag is ideal.
- Gently place a few floating tea candles on top.
- The flickering candlelight will create a warm, inviting ambiance.
Why this is the perfect craft
- It is a spectacular centerpiece. Also, if you can’t afford florist prices to send a arrangement, this is just as elegant.
- Simple and Quick: This craft is easy to assemble and doesn’t require any specialized skills or tools, making it perfect for last-minute decorations.
- Visually Appealing: The combination of natural greenery, bright red cranberries, and the gentle glow of floating candles creates an elegant and festive centerpiece.
- Versatile Decor: This decoration can enhance various settings, from a relaxed home environment to a sophisticated holiday party, adding warmth and a festive spirit anywhere it’s displayed.
2. Sparkling Pine Cone Centerpieces
How To Make
- Gather pine cones and spray paint them with silver or gold.
- Once dry, add a touch of glitter for extra sparkle.
- Arrange them on a tray or in a decorative bowl.
- Intersperse small LED lights for a shimmering display.

Why this is the perfect craft
- Cost-Effective: Utilizes readily available materials like pine cones, making it an economical decorating option.
- Customizable: Allows for personalization with different paint and glitter colors to match any holiday decor theme.
- Enchanting: The addition of LED lights offers a subtle, magical glow that enhances the ambiance of any festive gathering.
- Convenient: If you can’t find everything around your home or outside in nature, the supplies are readily available at the dollar store.
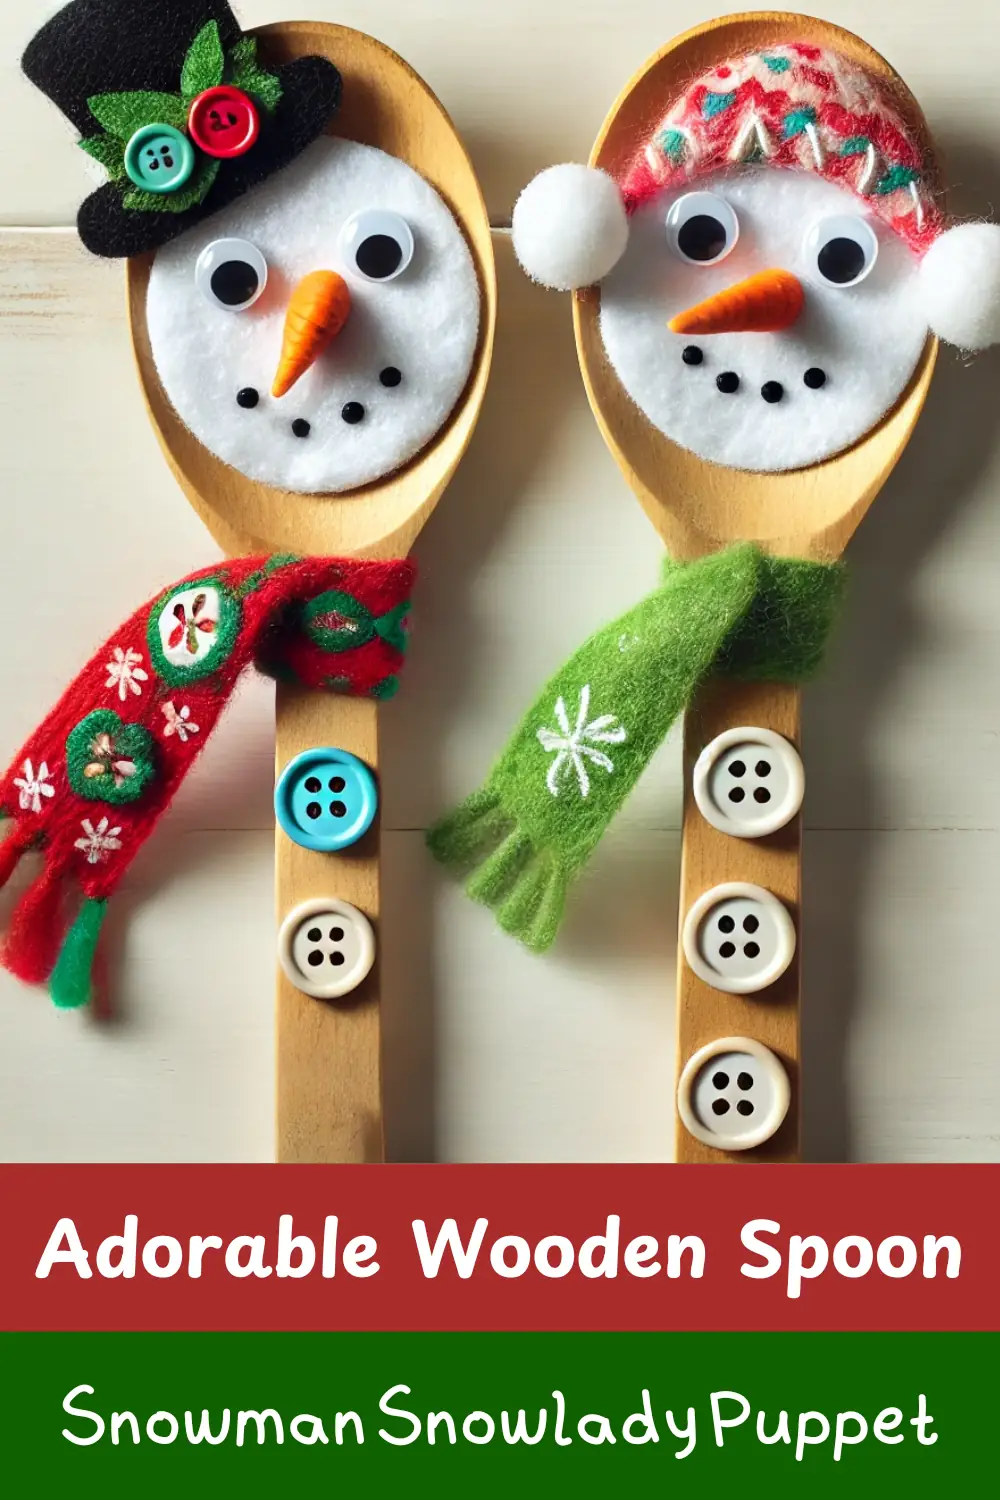
3. Snowman Snowlady Wooden Spoon Puppets
How To Make
-
Prepare the Face Base:
- Cut an oval or circle from white felt to match the bowl (rounded part) of the wooden spoon.
- Glue the felt piece onto the spoon to serve as the snowman or snowlady’s face.
-
Add Facial Features:
- Cut small circles from black felt for the eyes and mouth.
- Cut a tiny triangle from orange felt for the carrot nose.
- Optional: Cut small ovals from pink felt for rosy cheeks.
- Glue these pieces onto the white felt face in the appropriate positions.
-
Decorate the Handle:
- Wrap a strip of felt or fabric around the handle to resemble a scarf. Tie or glue it in place.
- Use additional felt or fabric scraps to create clothing or patterns on the handle if desired.
-
Make Hats and Accessories:
- Cut and assemble hats, earmuffs, or headbands from felt or fabric.
- Glue these onto the top of the spoon handle, just above the face.
-
Embellish:
- Add buttons, ribbon, pom-poms, or glitter for extra flair.
- For a snowlady, you can add a bow or other feminine touches.
-
Prepare for Hanging:
- If the wooden spoon has a hole in the handle, thread a festive ribbon through the hole, tie a knot or bow, and your puppet is ready to hang!
- If the spoon doesn’t have a hole, twist a small screw eye into the top of the handle. Thread a ribbon or string through the screw eye to hang your puppet.
- Finish and Display: Allow all glue to dry completely, then use the puppets as decorations, toys, or ornaments!
Why this is the perfect craft
- Gifting: The snowman and snowlady spoon puppets make great gifts for kids or holiday party favors!
- Simplicity and Accessibility
- Uses inexpensive, easy-to-find materials like spoons, paint, and ribbons.
- Easy for kids and beginners, making it inclusive for all skill levels.
- Versatility in Use
- Can be used as holiday ornaments, storytelling puppets, or festive decorations.
- Fully customizable, allowing unique and personal touches.
- Holiday Fun and Creativity
- Encourages creativity with endless design possibilities (faces, scarves, accessories).
- A fun, festive way to create memorable handmade decorations.
Easy Christmas Crafts Adults
4. Christmas Ornament Garland
How To Make
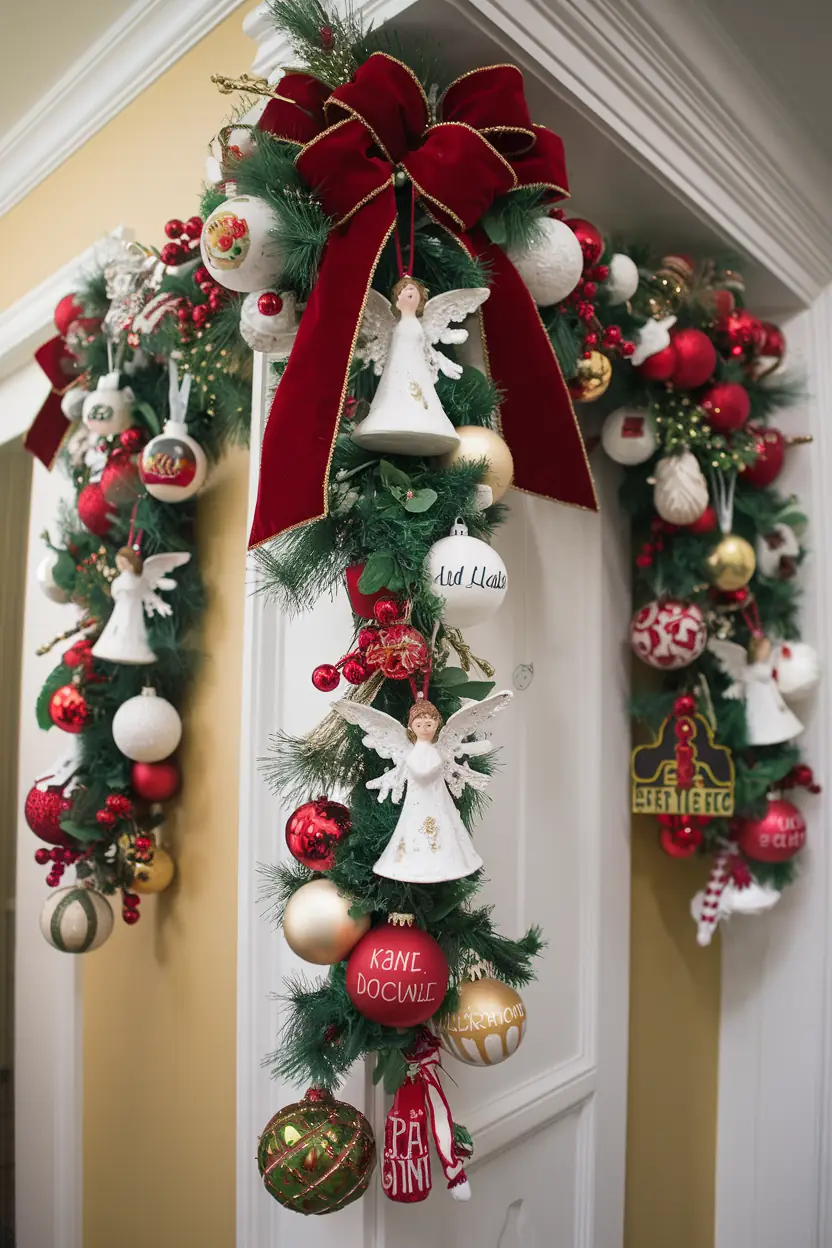
- Gather a variety of Christmas ornaments in different shapes, sizes, and colors to create visual interest.
- Cut a length of thin ribbon or clear fishing line, ensuring it’s long enough for your desired placement. For example mantel, doorway, table centerpiece, window frame, or whatever you want to decorate.
- Thread the ribbon or fishing line through the ornament hooks or loops, spacing them out evenly or clustering them as desired for a fuller look.
- Secure each ornament in place by tying a small knot or using a tiny dab of glue to prevent sliding.
- Add embellishments such as bows, greenery, or small jingle bells between ornaments for extra flair.
- Carefully drape the finished garland across your chosen location, such as a mantel, doorway, or table centerpiece, adjusting the positioning as needed.
- Use small hooks, adhesive strips, or tacks to anchor the garland if hanging it in place.
Why this is the perfect craft
- Customizable: You can choose ornaments in colors and styles that perfectly match your holiday decor theme.
- Reusable: The garland can be stored and reused for future Christmas seasons, making it a sustainable decoration option.
- Versatile Placement: It can be displayed in various in your home, adding charm to any space.
- Elegant and Festive: The combination of shiny ornaments and decorative touches creates a luxurious and celebratory look that instantly elevates your holiday decor.
- Sentimental Value: If you have ornaments that are dear to you and your family, this is a lovely and creative way to showcase them.
5. Tinsel Stir Sticks
How To Make
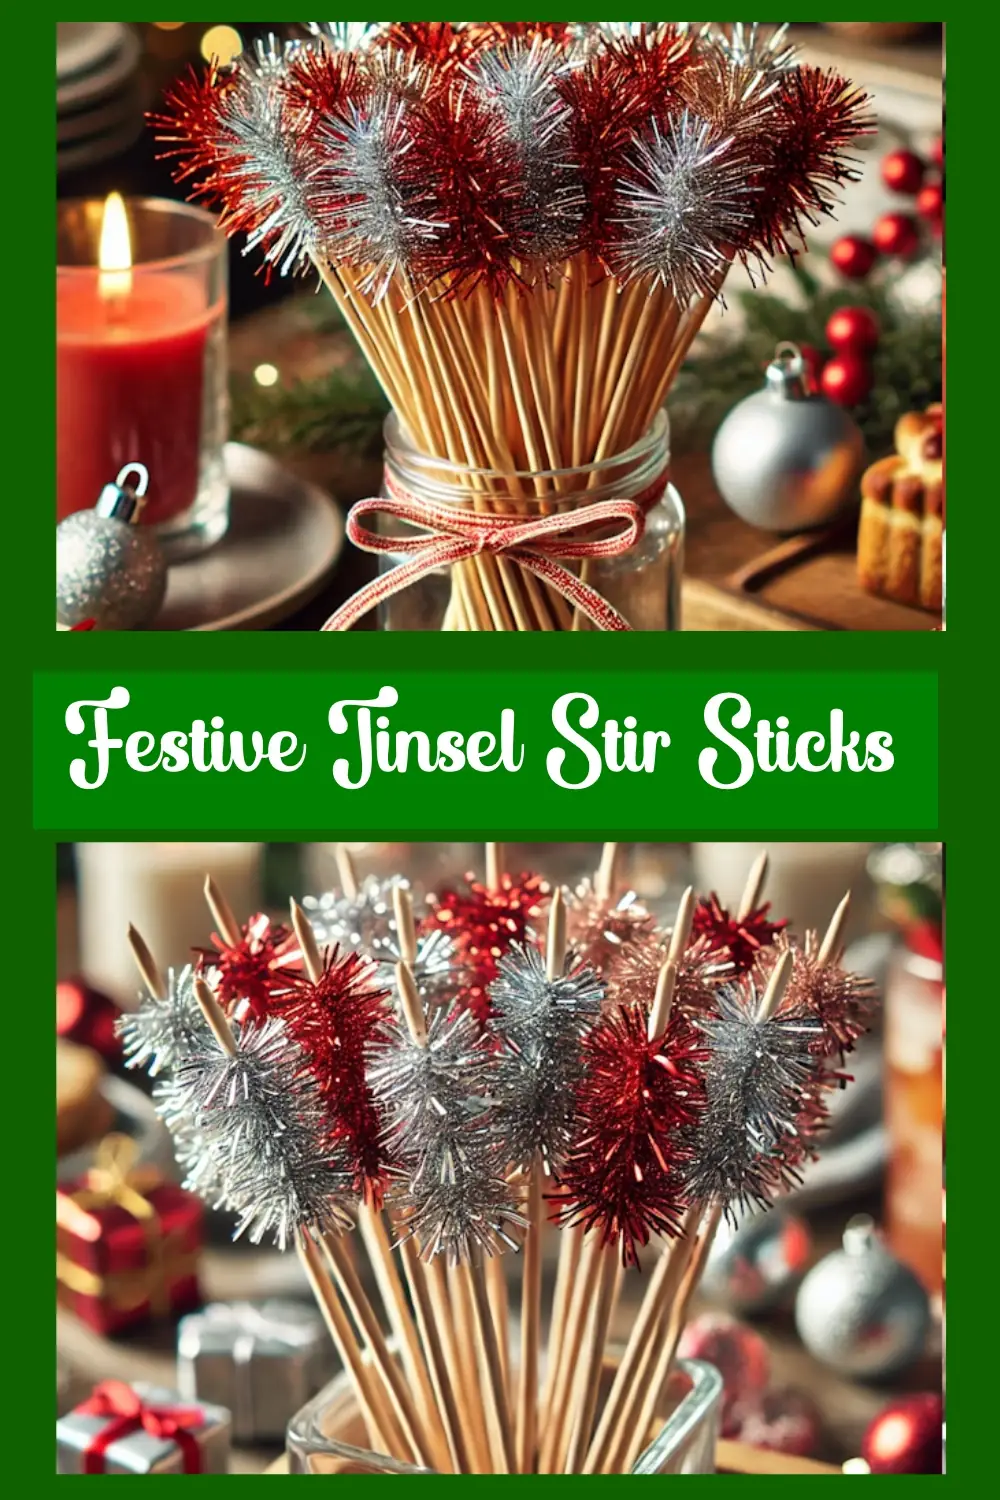
- Gather materials: tinsel garland in your chosen color, wooden or plastic skewers, scissors, and a strong adhesive like hot glue or craft glue.
- Cut small lengths of tinsel, approximately 4-6 inches long, depending on how fluffy you want the stir sticks to look.
- Take a skewer and apply a small dab of glue to the top end.
- Wrap the cut piece of tinsel tightly around the glued end of the skewer, pressing gently to secure it in place.
- If necessary, add a little more glue to hold the tinsel firmly and prevent it from unraveling.
- Trim any uneven edges of the tinsel to create a neat, polished appearance.
- Allow the glue to dry completely before using the stir sticks in drinks.
- Place the finished tinsel stir sticks in a decorative container for display or directly into holiday beverages for a festive touch.
Why this is the perfect craft
- Really Simple to Make: This simple craft is super fast to make and can really brighten a buffet table when entertaining.
- Eye-Catching Party Detail: These glittering stir sticks add a touch of sparkle and charm to drinks, impressing guests with your attention to detail.
- Quick and Easy to Make: They require minimal materials and can be assembled in just a few minutes, making them ideal for last-minute holiday preparations.
- Customizable and Festive: You can use different tinsel colors to match your holiday theme, adding a personal touch to your beverage presentation.
Easy Christmas Crafts Construction Paper
6. Paper Chain Christmas Garland
How To Make
-
Cut Paper Strips:
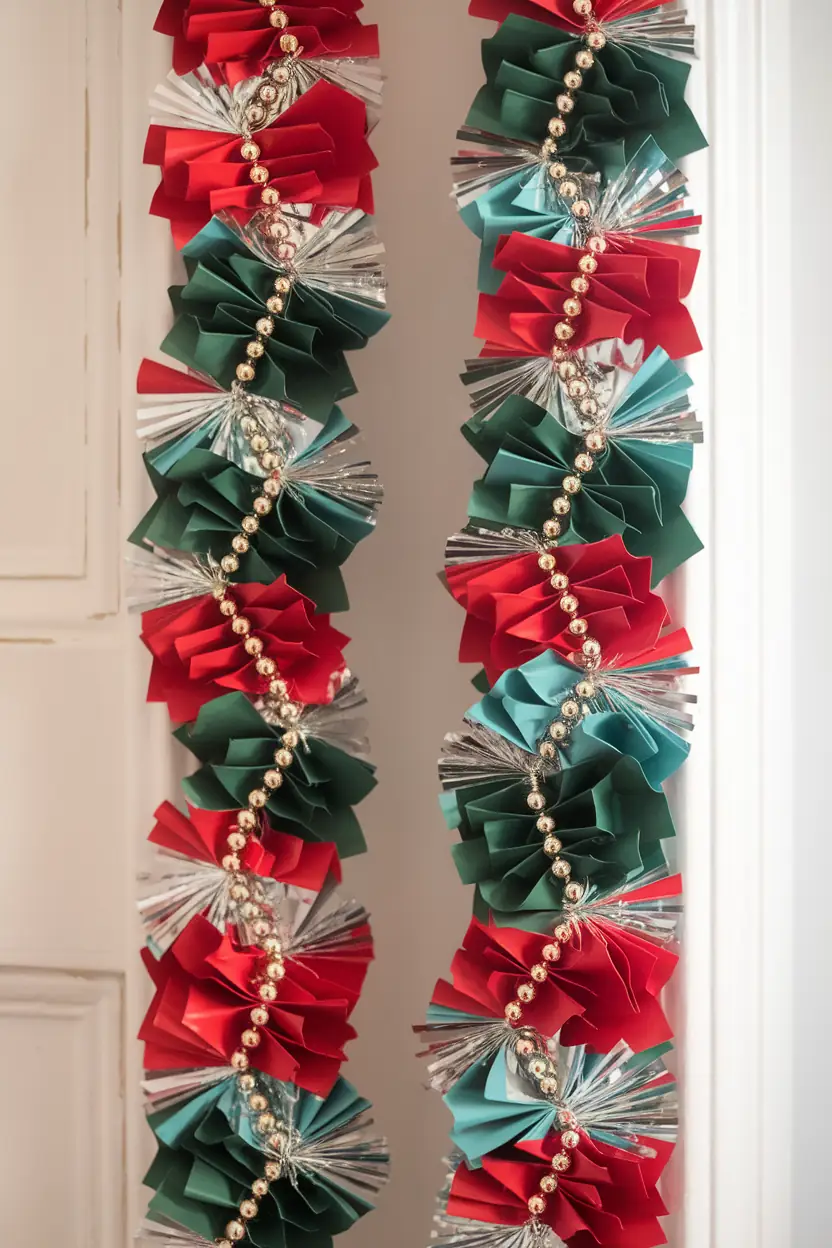
- Cut red, green, blue, and silver construction paper into strips about 2 inches wide and 6 inches long.
- You will need several strips in each color.
-
Accordion Fold:
- Take each strip and fold it back and forth in an accordion style.
- Aim for consistent folds about half an inch wide.
-
Shape the Folds:
- Pinch the middle of each folded strip to create a bow shape.
- Secure the middle with a small staple or a drop of glue to hold the bow shape.
-
Prepare Tinsel Pieces:
- Cut small sections of metallic tinsel or foil, about 4-6 inches long.
- Alternate between the paper bows for added sparkle.
-
Assemble the Garland:
- Thread the paper bows and tinsel onto a gold bead garland or string.
- Alternate the colors (e.g., red, green, tinsel) as you go.
- Secure each piece in place by tying knots, using glue, or threading tightly.
-
Hang and Enjoy:
- Once your garland is at your desired length, hang it around door frames, windows, or on your Christmas tree for a festive look.
Why this is the perfect craft
- The paper chain Christmas garlands are budget-friendly and use easily accessible materials like construction paper and tinsel.
- Quick and simple to make, making them perfect for last-minute holiday decorations or group activities.
- Customizable with various colors and designs to match any holiday theme or personal preference.
7. 3D Construction Paper Christmas Trees
How To Make
- Cut Tree Shapes:
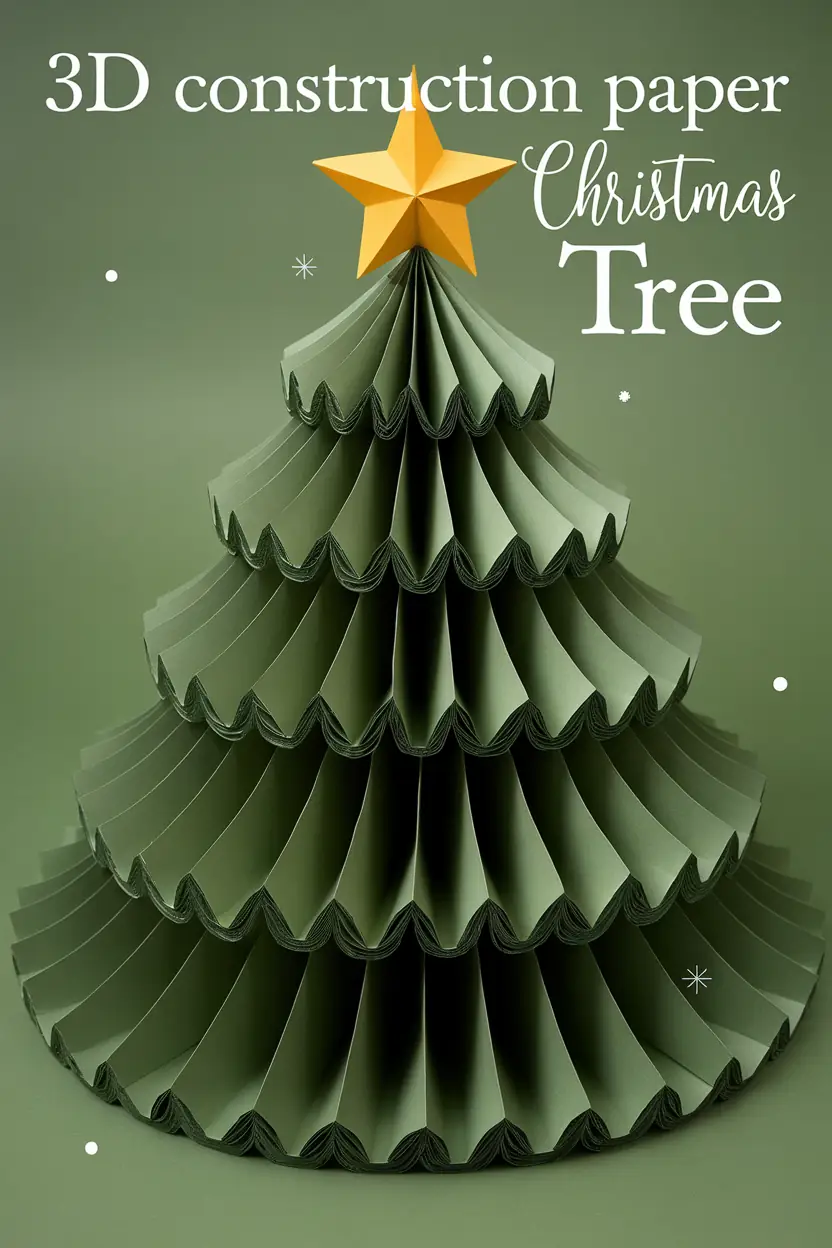
- Use green construction paper to cut out multiple identical tree shapes (e.g., simple triangular Christmas tree designs).
- Fold the Trees:
- Fold each tree shape in half vertically. The fold should be crisp and clean.
- Assemble the 3D Tree:
- Take two folded tree shapes and glue one half of a tree to the corresponding half of another tree.
- Repeat this process with additional folded tree shapes (3-5 layers look great) to create a rounded, 3D effect.
- Add a Base:
- Glue or attach the bottom of the tree to a sturdy piece of cardboard or a paper circle to help it stand upright.
- Decorate:
- Use glitter, small paper ornaments, or stickers to decorate the trees for added flair.
Why this is the perfect craft
- They are quick and easy to make, requiring only basic materials like construction paper and glue.
- Perfect for decorating small spaces or creating a festive centerpiece for holiday tables.
- Customizable with colors, sizes, and decorations to match any holiday theme or personal style.
- Look really cute for buffet table decorations and kids’ parties.
8. 3D Paper Christmas Trees ~ Even Easier NO Glue
How To Make
-
Cut Tree Shapes:
Use red and green construction paper to cut out two identical tree shapes. These should resemble a simple Christmas tree design with a wide base and a pointed top.
-
Add the Slits:
On the red tree, cut a slit starting from the bottom middle of the tree and going halfway up. On the green tree, cut a slit starting from the top middle of the tree and going halfway down.
-
Assemble the Tree:
Slide the two trees together by interlocking the slits. Adjust them so they stand perpendicular to each other, forming a stable, free-standing tree.
-
Decorate:
If desired, decorate the tree with markers, stickers, or glitter to add a festive touch.
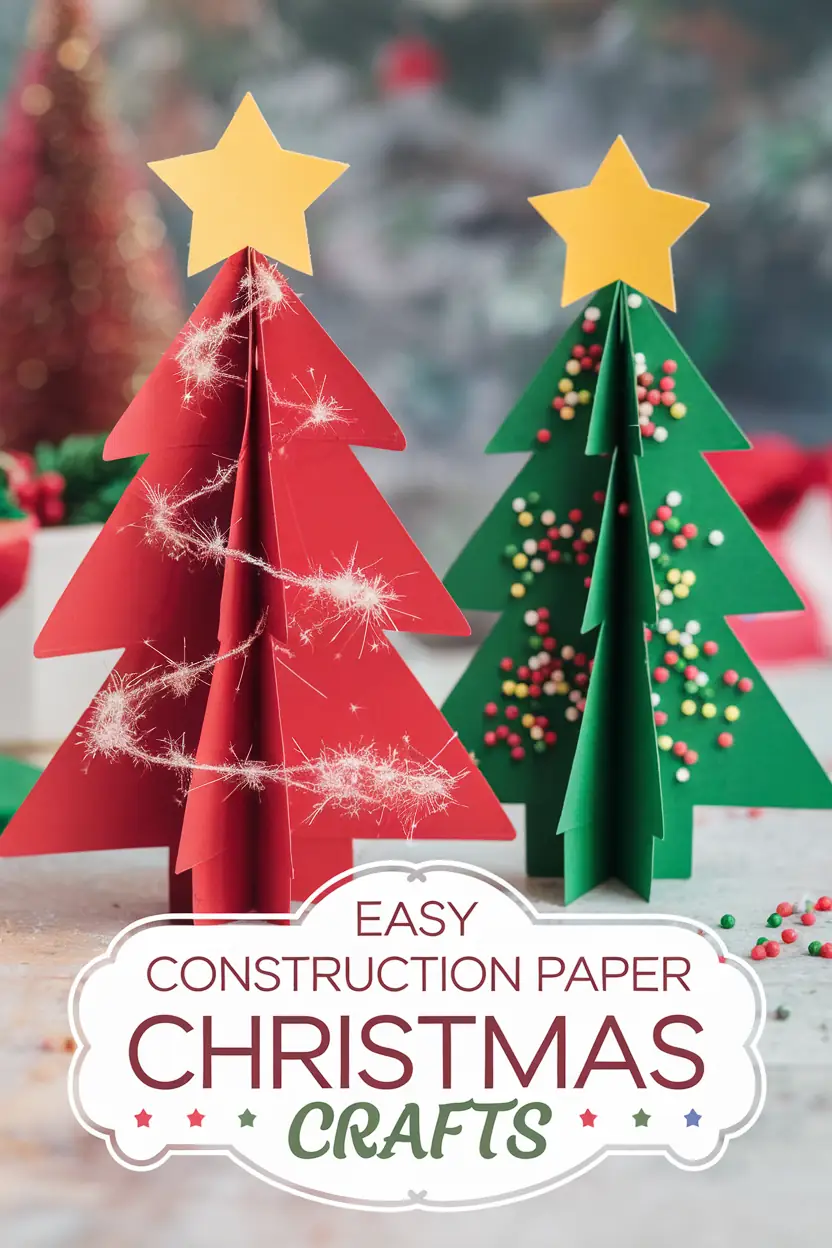
Why this is the perfect craft
- It can be done in a matter of minutes
- As long as an adult does the cutting, little ones will love this craft. With a pair of child’s cutting scissors, a small child could help to cut the trees.
- The trees look cute. Stand them beside the nut or candy dish for holiday decorating.
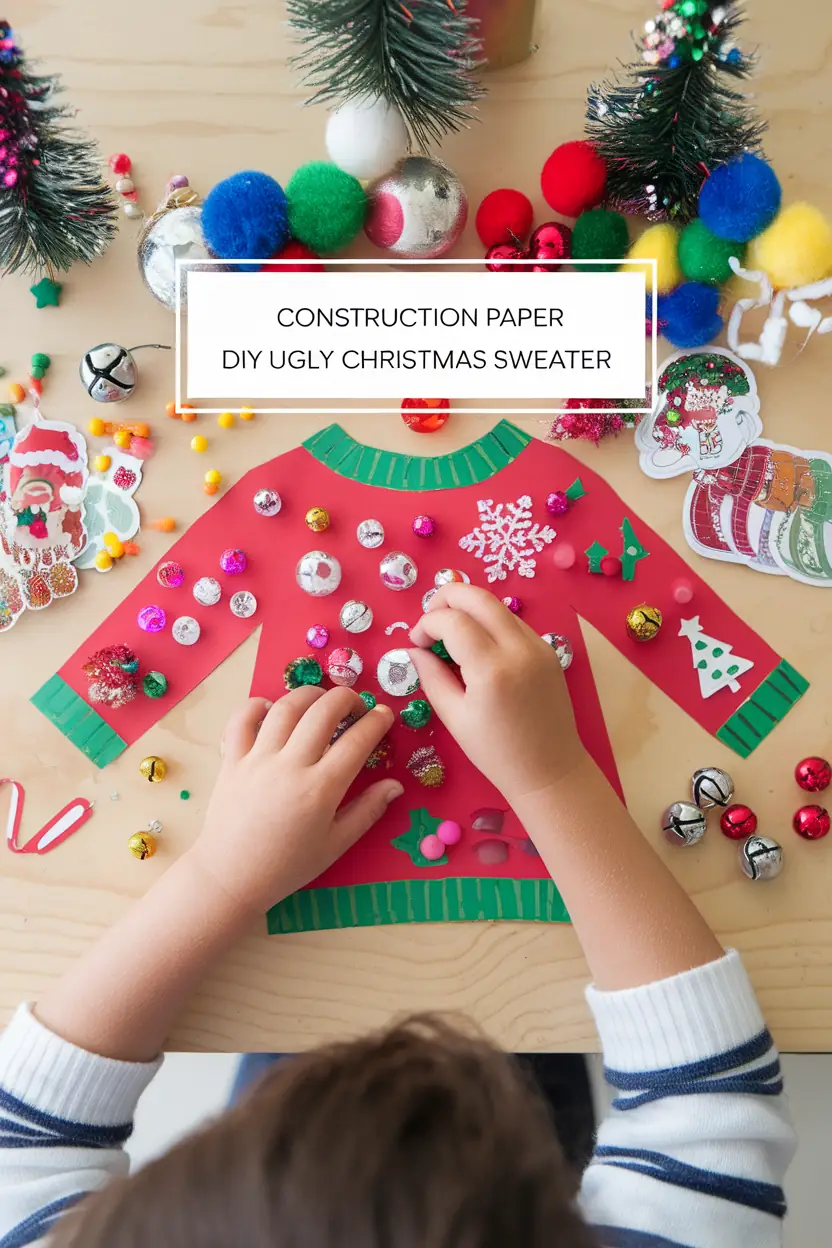
9. Kids Ugly Christmas Sweater Collage on Construction Paper
How To Make
This craft is so much fun for really young children. It is easy to do and they can make their sweater as garish as they wish or as simple as they choose. The easiest way to gt started is for an adult or older child to cut a sweater out of construction paper. Use the color of the child’s choice or take the traditional green or red Christmas colors.
Trace an outline of the sweater on the paper so that you can cut it out evenly.
Once the sweater is made, the kids can start decorating with all kinds of pieces of felt designs, small plastic candy canes, buttons, tinsel, sparkles, stickers, and whatever else is available.
Before adding all the accessories, take a black marker and outline the cuffs, bottom, and neck of the sweater to show ribbing. Or use crayons.
Some of the items can be sewn on ans some glued with a kid friendly glue stick (non-toxic)
Click here if you want to learn how to make a DIY Ugly Christmas Sweater from a real knit or wool sweater.
Oh, and remember, ugly is just a term. The sweaters will be gorgeous when done!
Easy Christmas Crafts Santa
10. Super Adorable Clothespin Santa
How To Make
- Paint the Clothespin:
- Paint the top half of the clothespeg red (Santa’s suit).
- Paint the bottom half white (beard area and trim).
- Allow the paint to dry completely.
- Add Santa’s Hat:
- Option 1: Cut a small triangle out of red felt, roll it into a cone, and glue it together. Attach it to the top of the clothespin and add a white pom-pom at the tip.
- Option 2: Use a red pom-pom as the hat itself. Glue it to the top of the clothespin and attach a tiny white pom-pom on top for the hat tip.
- Option 3: Use a pre-made mini Santa hat from a craft store. Glue it securely onto the clothespin.
- Create the Beard:
- Pull apart a cotton ball to create a fluffy beard.
- Glue the cotton to the white-painted area, leaving space for the eyes.
- Draw the Face:
- Use a fine-tip marker or black paint to draw Santa’s eyes above the beard.
- Optional Decorations:
- Add a small bell, ribbon, or any other festive embellishments to make your Santa extra cute.
- Dry and Display:
- Allow the glue to dry completely.
- Use your Santa clothespin as a decoration, gift clip, or ornament.
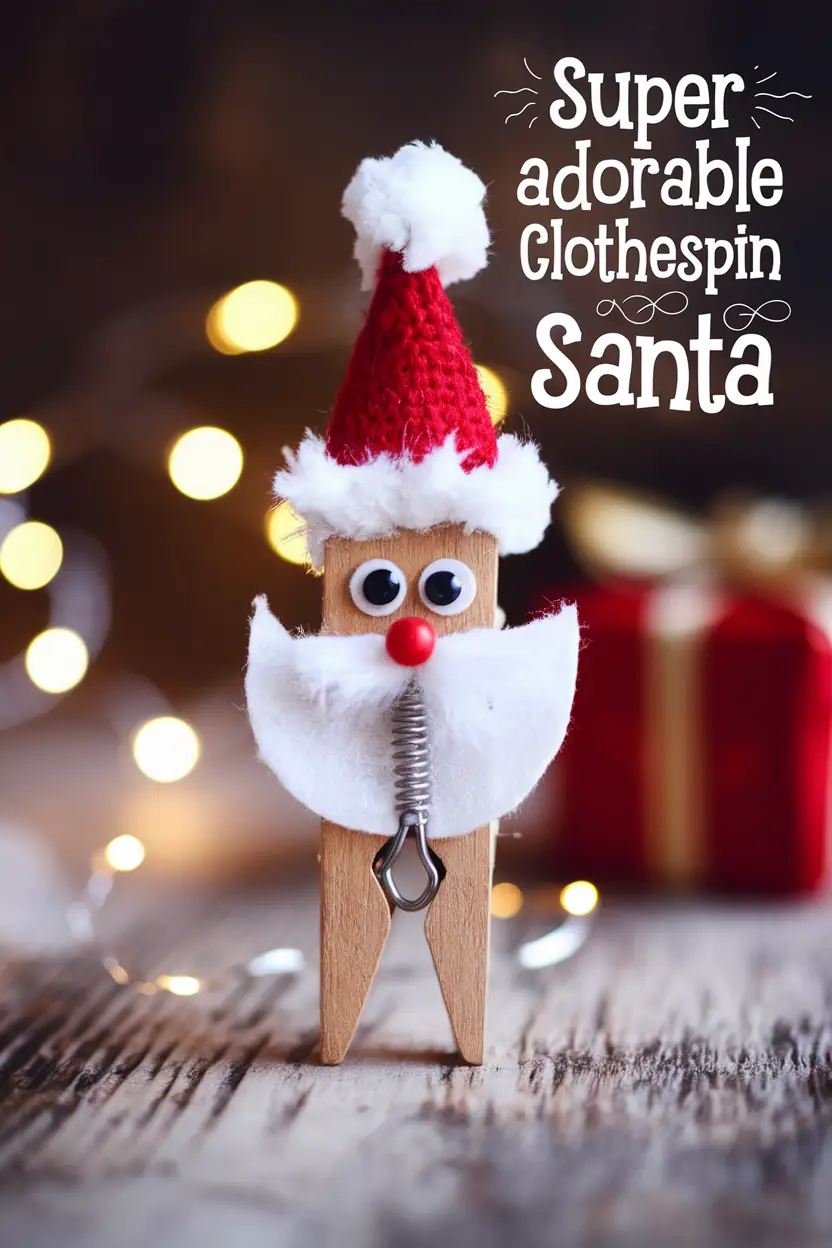
Why this is the perfect craft
- Simple and Quick to Make:
- The craft requires minimal materials, most of which are common household or craft items.
- It takes less than 30 minutes to complete, making it ideal for kids or last-minute holiday activities.
- Customizable and Creative:
- You can personalize your Santa with different colors, facial expressions, or embellishments.
- Experiment with items like tiny bells, ribbons, or glitter to make each piece unique.
- Versatile and Functional:
- The clothespin can serve as a decoration, card holder, gift clip, or ornament.
- It’s both decorative and practical for various holiday uses.
- Gift Clips: Attach the Santa clothespins to holiday cards or gift tags for a festive touch.
- Christmas Tree Ornaments: Hang the clothespins on your tree as unique, handmade decorations.
- Holiday Table Decor: Use them to clip napkins, hold name place cards, or close small treat bags for a festive table setting.
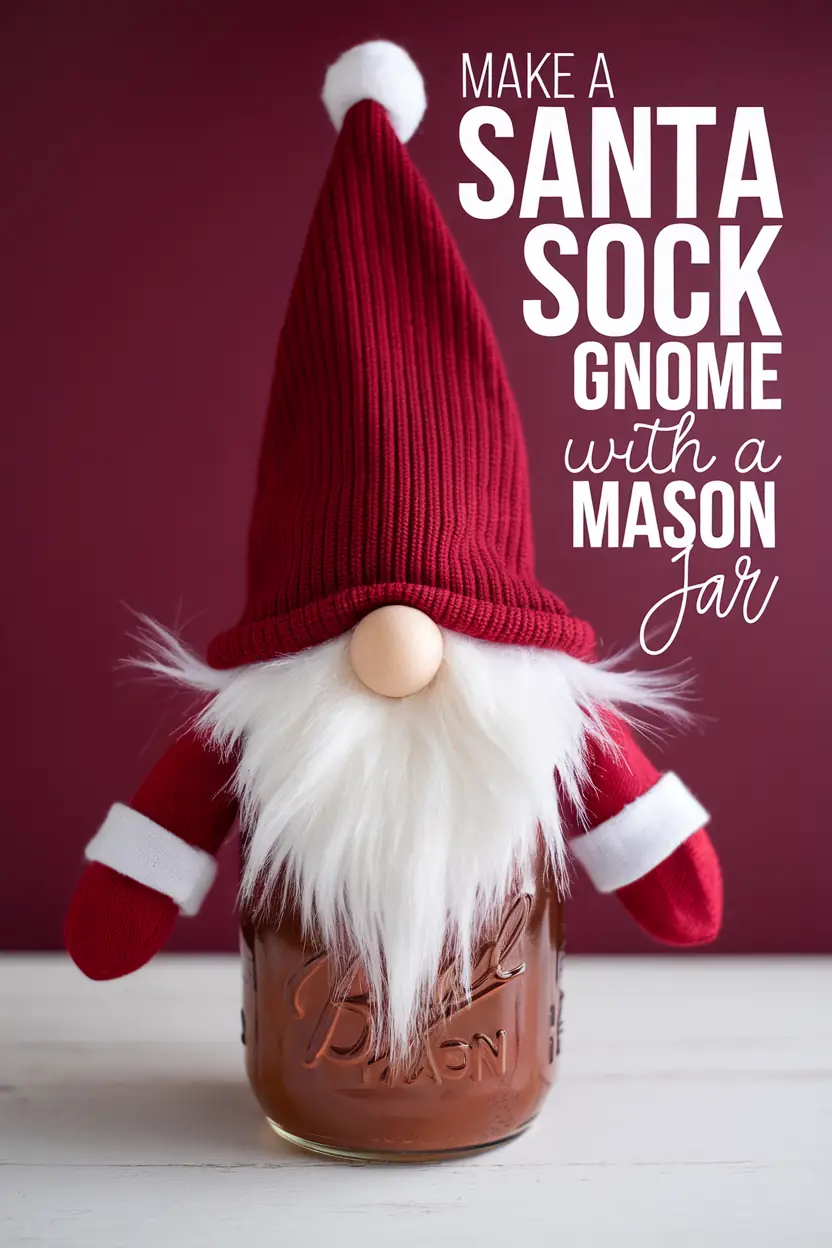
11. Mason Jar Santa Claus Gnome
Transform the holiday spirit into a delightful craft with a Santa Claus sock gnome and a mason jar! This charming project combines festive creativity with a touch of whimsy, turning everyday materials into a cheerful Christmas decoration.
Picture a jolly gnome in a cozy red sock hat, complete with a fluffy white beard. Made from a mason jar filled with treats or colored sand, this craft is too cute. Perfect as a gift, table centerpiece, or an addition to your holiday décor, this Santa gnome is sure to bring smiles and seasonal cheer wherever it’s placed!
Click here for the full instructions to make this fun easy Christmas craft.
Easy Christmas Crafts with Paper Snowflakes
12. My Guide to 15 Paper Snowflakes Ideas
Looking for a fun and creative way to embrace the winter season? Check out my magical world of paper snowflakes! From classic fold-and-cut designs to intricate 3D creations, this guide is packed with 15 unique and exciting snowflake crafts to try.
Whether you’re using tissue paper, glitter, or even recycled materials like newspaper, they’re perfect for all ages and skill levels.
Not only are these stunning snowflakes a joy to make, but they’re also incredibly handy. Use them to decorate your windows, create festive garlands, or add a personal touch to your gifts and cards.
Ready to get started?
Click here for the full instructions to make this fun and easy Christmas craft.
Snowman Craft Ideas for Super Easy Christmas Crafts
13. You’ll absolutely love these 20 snowman themed craft ideas.
Looking for a creative way to celebrate the magic of winter? Snowman crafts are a delightful way to bring the season indoors, whether you’re spending a cozy afternoon with the kids or adding a touch of homemade charm to your holiday decor. From whimsical sock snowmen to elegant mason jar snow globes, these crafts are perfect for all ages and skill levels. Not only are they fun to make, but they also make great decorations and heartfelt gifts for loved ones.
Ready to get started? Check out our 20 Snowman Crafts for Holiday Fun That You’ll Absolutely Love! for step-by-step guides on everything from pinecone snowmen to festive wreaths. With easy-to-follow instructions and a variety of creative ideas, you’ll find plenty of inspiration to make this winter season extra special!
Click here for the full instructions to make this fun and easy Christmas craft.
Easy Christmas Handprint Crafts
14. Adorably Fun and Jolly Children’s Crafts
There’s nothing more heartwarming than receiving a gift made with love, especially during the holiday season. Handprint crafts are the perfect way for little ones to create something truly special for their favorite aunties, uncles, and grandparents.
From reindeer with tiny antlers to penguins wearing cheerful scarves, these crafts turn little hands into works of art that capture the magic of the season. Not only are they adorable decorations, but they also serve as keepsakes, preserving the precious memory of a child’s tiny hands forever.
If you’re looking for a gift that will bring a smile to your face and warmth to someone’s heart, handprint crafts are the answer. They’re decorations, mementos, gifts, Christmas tree ornaments, gift toppers, and something to keep as a family souvenir.
Click here for the instructions for 24 different handprint crafts.
If you are looking for the turkey handprint, you will find that project here.

