You don’t need weeks of preparation to celebrate Christmas in July. With just a few basic supplies and some creative energy, you’ll discover that festive crafting can fit into even the busiest summer schedule. From five-minute snow globes to quick paper garlands, these twenty last-minute projects will help you transform your space into a midsummer winter wonderland.
Highlights
Mason jar snow globes can be assembled in five minutes using waterproof glue, miniature figures, and glitter for instant summer-winter charm.
Transform plain dollar store ornaments with metallic spray paint or Rub ‘N Buff for quick, boutique-worthy summer Christmas decorations.
Create cotton ball winter scenes on blue cardstock for a kid-friendly craft that takes just 30 minutes to complete.
Design instant digital holiday cards using Canva or Paperless Post, perfect for last-minute Christmas in July celebrations.
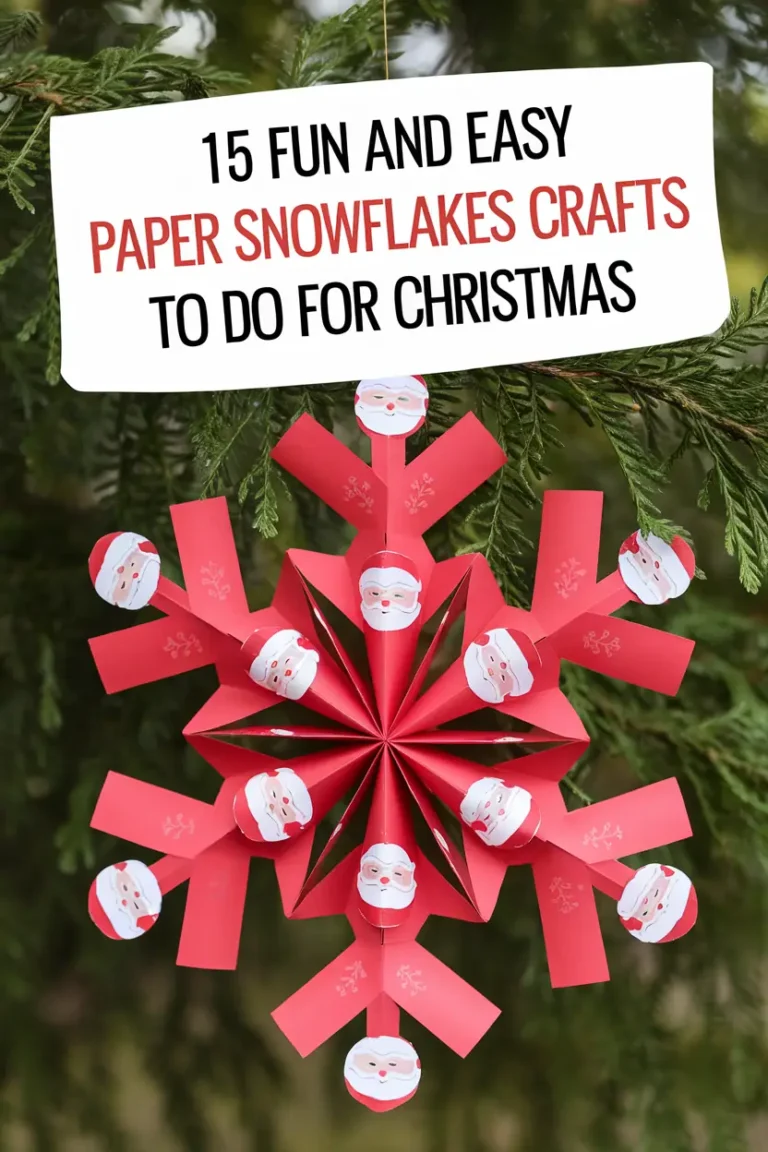
Craft paper snowflake garlands from white copy paper to create instant summer snowfall decorations for indoor or outdoor spaces.
Quick Paper Snowflake Garlands
When winter feels too far away, creating paper snowflake garlands brings the magic of Christmas to your summer celebrations.
You’ll transform ordinary white copy paper into intricate snowflakes using sharp scissors and innovative folding techniques. Start with accordion or triangle folds, then experiment with varying cut patterns to achieve delicate, airy designs.
For a modern twist, try sketching your patterns first or use cutting-edge templates to create uniform shapes. You can amplify the visual impact by alternating cuts on both open and folded edges, ensuring perfect symmetry.
Connect your finished snowflakes using silvery string or staples, spacing them evenly for maximum effect.
Don’t limit yourself to traditional displays. Hang your garlands in unexpected places like outdoor patios or create a stunning table runner.
You’ll find endless inspiration through online tutorials and social media platforms, where creative communities share their unique approaches to this timeless craft.
Five-Minute Mason Jar Snow Globes
To create your own charming snow globe, you’ll need just a few basic supplies: a mason jar, waterproof glue, miniature figurines, glitter, and glycerine.
Start by firmly attaching your chosen figurine to the jar lid with waterproof glue. Then fill the jar with water, glycerine, and glitter before sealing it tightly.
You can transform this classic craft into any theme you like, from winter wonderlands to beach scenes or fairy gardens.
Easy Supply List
Creating magical snow globes doesn’t require an extensive shopping list, as you’ll need just a few key materials to get started.
The best part? You’ll find most items at your local craft store or possibly right in your home.
Transform ordinary mason jars into enchanting winter wonderlands with these essential supplies:
- Your choice of mason jar (any size works), waterproof glue like E6000, and glycerine for that perfect slow-falling snow effect
- Festive miniatures such as bottle brush trees, tiny reindeer, or holiday houses; pick items that match your theme
- Glitter for snow, water to fill the jar, and a strong sealant to prevent leaks
At roughly $5 per globe, you’ll be able to craft multiple unique pieces without breaking your budget.
Mix and match components to create personalized scenes that capture your creative vision.
Waterproof Assembly Steps
Once you’ve gathered your supplies, building a leak-proof snow globe starts with proper platform construction.
Cut your plastic cup base to 1-inch height and secure it to the jar lid with hot glue. Attach your miniatures firmly to the platform, then add polyfill snow around the base.
Mix distilled water with clear glue and stir in your glitter for ideal suspension. Fill the jar, leaving 1/8 empty for displacement.
Before sealing, test-fit the jar over your decorated platform. Apply E6000 or hot glue along the rim, quickly secure the lid, and add a secondary seal around the junction. For extra protection, wrap twine around the seal and secure with glue.
Test your creation by inverting it over the sink and watch for leaks. Let it cure upright for 24 hours before gifting.
Creative Theme Ideas
Now that you’ve mastered the waterproof assembly, allow us to examine enchanting themes for your five-minute mason jar snow globes.
Transform your mason jars into magical winter wonderlands with a creative mix of miniature elements and strategic styling.
- Create an ice skating scene by positioning tiny skaters on a “frozen pond” made of blue glitter, surrounded by bottle brush trees and paper snowflakes.
- Design a rustic winter village using miniature pine trees, tiny snowmen, and delicate white snowflakes, enhanced with silver glitter for a new snow effect.
- Craft a woodland scene featuring small deer figurines amid snow-dusted trees, complete with tiny pinecones and gold glitter for an enchanted forest glow.
These innovative themes work perfectly for both winter holiday displays and revitalizing summer decor, bringing whimsical charm to any space year-round.
Simple Cotton Ball Winter Scene
A winter wonderland comes to life with this delightfully simple cotton ball craft project. You’ll need just a few basic supplies: blue cardstock for the sky, cotton balls for snow, glue, and optional embellishments like googly eyes and markers.
Transform your space into a frosty scene by pressing cotton balls onto glue-covered paper. You can tear the cotton balls into smaller pieces to create falling snow or cluster them together for snowdrifts. Add winter characters like penguins, snowy owls, or cheerful snowmen using markers and googly eyes.
This budget-friendly activity isn’t just fun, it’s educational too. As you create your masterpiece, you’ll develop fine motor skills and hand-eye coordination.
Let your creativity soar by adding trees, mountains, or whatever winter elements inspire you. The entire project takes just 30 minutes, making it perfect for spontaneous crafting sessions. Work solo or team up with others to bring your winter vision to life.
One-Hour Festive Yarn Wreaths
You’ll need just a few basic supplies to create a festive yarn wreath: a wreath frame, chunky yarn in bright red and Christmas green, and a hot glue gun.
By using efficient wrapping techniques, like layering your yarn and securing it with strategic glue points, you can complete your wreath in under an hour.
Mix and match complementary yarn colors, such as combining traditional holiday hues with metallic accents, to achieve a unique and eye-catching design that captures the Christmas spirit.
Simple Supply Shopping List
Creating a festive yarn wreath starts with five essential supplies that won’t break the bank.
Head to your local Dollar Tree or craft store for a 12-16 inch wire wreath frame, then grab some seasonal yarn in your preferred palette, regardless if you’re going traditional red and green or tropical turquoise and coral.
You’ll also need heavy-duty scissors, a hot glue gun with glue sticks, and decorative ribbon.
Choose 2-3 complementary yarn colors to create depth and visual interest.
Try mixing textures like fluffy with metallic strands.
Add personality with lightweight embellishments from the dollar store: mini ornaments, jingle bells, or wooden shapes.
Save money by splitting bulk supplies with crafting friends or repurposing old sweaters for unique yarn textures.
Quick Wrapping Techniques
With your supplies ready, let’s get started on the quick wrapping techniques that will transform your wreath frame into a festive masterpiece in under an hour.
Start by wrapping your chunky yarn around the frame in overlapping layers, ensuring even coverage. You’ll find that thicker yarn speeds up this process considerably. Create a balanced look by maintaining consistent tension as you wrap.
For added flair, weave ribbon between yarn layers and secure it with hot glue at strategic points.
Want to elevate your design? Try arm knitting a thick chain and attach it to sections of your wreath for dynamic texture.
Once you’ve achieved full coverage, secure all loose ends by tucking them under existing layers and adding a dab of glue. This technique ensures your wreath maintains its polished appearance throughout the season.
Creative Color Combinations
While traditional Christmas colors remain popular, exploring unique color combinations can breathe fresh life into your one-hour yarn wreaths.
Mix thick and thin yarns to create depth, and don’t hesitate to experiment with unconventional palettes like winter wonderland blues or summer-inspired pastels.
Start with a neutral base using cream or soft gray thick yarn, then layer on metallic accents for sophisticated sparkle.
Combine faux fur yarn in deep colors with glitter yarn accents to achieve a luxurious, festive look.
Add dimension with textured pom-poms and reflective ornaments in complementary shades.
Check Pinterest and crafting websites for fresh inspiration, and remember to balance bold choices with neutral elements.
Your wreath’s visual impact comes from thoughtful color layering and strategic texture combinations, making each piece uniquely eye-catching.
Easy Dollar Store Ornament Makeovers
Transform basic dollar store ornaments into high-end holiday decor through simple but stunning makeover techniques.
You’ll be amazed at how metallic spray paint instantly elevates cheap ornaments to boutique-worthy status, especially when you combine matte and glossy finishes for sophisticated texture.
Create vintage-inspired pieces by applying Rub ‘N Buff to raised details, then buffing gently for an authentic aged patina.
For a classic hobnail look, strategically place adhesive dots before coating with chalk paint.
Don’t forget to remove ornament caps and secure them with painter’s tape for professional results.
Take your designs further by incorporating mixed-media elements.
Attach miniature wooden shapes, wrap with rustic jute twine, or add rhinestone stickers for sparkle.
For winter wonderland effects, layer faux snow spray and iridescent glitter glue.
Display your transformed pieces in cloches or apothecary jars to showcase their boutique-quality appeal.
15-Minute Pinecone Tree Decorations
You’ll find plenty of no-paint options for pine cone decorations using simple dollar store supplies like ribbon and mini ornaments.
Let’s investigate quick glitter techniques that transform plain cones into sparkling beauties with just glue and your choice of metallic or iridescent sparkles.
For a natural approach, you can arrange fresh green pine cones in varying sizes, adding subtle touches of white-tipped branches and berries for an outdoor-inspired display.
Easy No-Paint Designs
Three simple techniques make pinecone tree decorations a breeze without reaching for paint. You’ll transform natural pinecones into stunning holiday décor using hot glue, ribbons, and natural elements.
Let these creative alternatives bring out the pinecones’ inherent beauty while saving time and mess.
Create instant depth by wrapping pinecones in natural twine or jute, then secure clusters with wire frames for a fuller appearance.
Layer dried flowers, herbs, and seed pods between pinecone scales using hot glue for an enchanting botanical display.
Weave burlap strips and natural fibers through your arrangement, finishing with rustic ribbon ties.
For added dimension, incorporate elements like dried fruit or wooden accents.
These no-paint techniques work perfectly for both tabletop displays and hanging decorations, letting you craft multiple pieces quickly for your summer Christmas celebration.
Glitter and Glue Magic
A dazzling display of glitter brings instant glamour to pinecone decorations in just minutes. You’ll transform ordinary pinecones into eye-catching ornaments using quick-dry techniques and strategic adhesive choices.
For full-coverage sparkle, roll your pinecone in fast-drying craft glue, then shake on glitter using a shaker container. Speed up drying time by using a hair dryer on low heat or placing pinecones on a parchment-lined baking sheet at 200°F.
Create stunning ombre effects by shifting from dark glitter at the base to lighter shades at the top.
Fasten your creations with durable hanging solutions: try jute twine loops hot-glued inside the top scales or wire wrapping for heavier pieces.
Don’t forget to seal your work with clear acrylic spray to prevent glitter shedding and guarantee lasting shine.
Natural Green Displays
If you’re celebrating Christmas in July or planning ahead for December, miniature pinecone trees offer a quick and charming way to bring nature indoors.
Transform your space with these innovative displays by starting with a solid base structure and layering pinecones using hot glue for efficient assembly.
Create stunning natural arrangements with these eye-catching elements:
- Mix different pinecone sizes with fresh eucalyptus and ferns for depth and texture
- Add sparkle with metallic beads or small ornaments nestled between the pinecone layers
- Top your creation with a golden star and wrap the base with rustic twine
For maximum impact, incorporate moss and small pebbles around the base of your display.
You’ll love how these natural elements bring an authentic woodland feel to your summer Christmas celebration while keeping the crafting process quick and simple.
Instant Digital Holiday Cards
While traditional paper cards hold nostalgic charm, digital holiday cards have revolutionized the way we share seasonal greetings. You’ll find platforms like Paperless Post, Canva, and Greenvelope offering instant solutions that blend creativity with convenience.
You can transform your holiday messages using AI-powered tools in Canva Magic Studio, which helps you generate unique designs and content effortlessly. Regardless of whether you’re crafting personal greetings or corporate messages, you’ll appreciate the ability to customize templates, integrate photos, and schedule delivery across multiple channels.
What’s particularly innovative is the tracking feature that lets you monitor engagement in real-time. You don’t need to worry about shipping delays or paper waste. Simply design, personalize, and send via email, text, or shareable links.
Plus, with collaborative editing options, you can involve team members or family in the creative process. Your recipients won’t need special apps to view your festive greetings, making digital cards a truly universal solution.
Quick-Craft Popsicle Stick Stars
Creating festive five-pointed stars from Popsicle sticks offers a perfect summer holiday craft project that’s both engaging and economical.
You’ll need colorful craft sticks, reliable adhesive, and optional decorative elements like glitter or mini pom-poms to bring your vision to life.
Transform ordinary sticks into dazzling stars with these innovative steps:
- Start by forming a triangle base with two sticks, ensuring they’re perfectly aligned for symmetry, then cross a third stick perpendicular to create your initial star point.
- Add the fourth stick to establish another triangle base, maintaining balance as you build the shape.
- Position the final stick to complete your star, securing all connection points with additional glue if needed.
You can customize your creation with paint, ribbons, or twine for hanging.
This versatile design works beautifully for both indoor displays and outdoor decorations, making it an ideal Christmas in July statement piece.
Speedy Newspaper Christmas Trees
A charming newspaper Christmas tree offers an eco-friendly twist on traditional holiday decor, perfect for your summer crafting sessions.
You’ll need newspaper strips, adhesive, and a BBQ skewer to create this upcycled masterpiece.
Start by cutting newspaper into long strips or triangles. For quick assembly, wrap strips tightly around a BBQ skewer, securing the ends with hot glue. Make vertical cuts at one end and gently stretch to create needle-like textures.
Attach these rolled pieces to a cone-shaped base in a star pattern, then layer additional strips until you’ve achieved full coverage.
For a time-saving approach, skip the cone base and secure rolls directly onto a central skewer. Add personality with colored newspaper sections, beads, or battery-operated lights.
You can even create a 2D version by gluing triangles together and adding texture through strategic pinching, perfect for wall displays or flat storage.
Fast Finger Paint Holiday Art
You’ll love creating vibrant holiday artwork using finger paints to mix festive reds, greens, and golds for quick seasonal cards and decorations.
Let your imagination run wild as you press your paint-covered fingers onto paper to form whimsical Christmas trees, wreaths, and starry winter scenes.
Transform plain glass ornaments into unique masterpieces by dipping your fingers in metallic paints and creating swirling patterns across their surfaces.
Fun With Festive Colors
While traditional Christmas crafts often call for time-consuming techniques, finger painting offers a fast and vibrant way to bring holiday spirit to your summer celebrations.
Mix classic holiday colors with summer-inspired hues by combining red and green with coral or turquoise for a fresh twist on festive art. You’ll love how quickly you can create stunning designs using simple finger painting techniques.
For instant holiday-themed artwork, try these innovative approaches:
- Layer multiple colors to create dimensional snowflakes and trees, blending traditional with tropical motifs
- Add patterns like stripes or polka dots using your fingertips for a playful, festive touch
- Incorporate nature-inspired elements by pressing real leaves or flowers into your wet paint
Grab your paints, paper, and smock. You’re ready to transform your space with vibrant holiday art in minutes.
Quick Holiday Card Ideas
Looking for fast and festive holiday card designs? Transform simple cardstock into eye-catching holiday greetings using finger painting techniques that will wow your recipients.
You’ll create stunning effects by dabbing and layering paints, then enhance your designs with glitter or seasonal stickers.
Embrace minimalist themes like dots, stripes, or abstract patterns for quick execution. For a classic touch, paint iconic symbols like reindeer or snowmen.
You can even turn your cards into a fun group activity by inviting family and friends to contribute their artistic flair.
Make your creations eco-friendly by choosing recycled materials and non-toxic paints.
Regardless of whether you’re crafting a modern masterpiece or a traditional greeting, these finger-painted cards offer a perfect blend of speed, creativity, and personal touch for your Christmas in July celebrations.
Paint-Dipped Ornament Designs
Transform ordinary ornaments into stunning holiday decorations through the art of paint dipping, a quick and creative technique perfect for Christmas in July celebrations.
You’ll love how this modern twist on traditional ornaments creates eye-catching designs in minutes, using simple materials you probably have at home.
Choose your preferred technique based on your time constraints and desired effect:
- Hydro dip ornaments in water mixed with spray paint for instant marbled patterns
- Create cellular designs by slowly dipping balls into acrylic paint mixtures
- Layer quick-drying paints for a striking gradient effect perfect for summer colors
Speed up your crafting process by setting up an assembly line and working on multiple ornaments simultaneously.
Don’t forget to add a clear protective coat once they’re dry. It’ll guarantee your creations last for future celebrations.
Rapid Recycled CD Ornaments
Before tossing those old CDs in the trash, you can turn them into dazzling Christmas ornaments in under an hour. With just a few basic supplies like scissors, a glue gun, and glass ornaments, you’ll transform outdated technology into eye-catching holiday decor.
Start by cutting CDs into small pieces for mosaic designs, or wrap them whole with colorful yarn for a different effect. You’ll love how the CD’s reflective surface creates stunning light patterns when attached to glass ornaments.
For quick mosaic designs, apply glue dots to CD fragments and arrange them in patterns on your ornament base. Don’t forget to add a sturdy ribbon loop for hanging.
Want to get creative? Try crafting snowman shapes with felt accents, or combine CD pieces with pine cones for a nature-inspired look. You can even use black tempera paint and a toothpick to create scratch art designs.
These eco-friendly ornaments make perfect personalized gifts, too.
Simple Paper Plate Angels
When you’re searching for a delightful Christmas craft that kids can master, paper plate angels offer the perfect balance of simplicity and charm. You’ll need basic supplies like paper plates, markers, scissors, and glue to transform ordinary materials into heavenly decorations.
Get creative with these innovative touches:
- Create wings using your child’s handprints on construction paper, making each angel uniquely personal
- Add sparkle with glitter accents on the gown and halo for extra festive flair
- Design expressive faces using markers or paint to give each angel its own personality
This adaptable craft works brilliantly for all skill levels, from preschoolers developing motor skills to elementary students exploring their artistic side.
You can complete these angels in one sitting, which makes them perfect for last-minute decorating or group activities. Let your children take the lead and they’ll develop confidence while creating cherished holiday keepsakes that capture their creativity.
Quick-Fix Glitter Jar Luminaries
Quick-Fix Glitter Jar Luminaries bring magical sparkle to summer Christmas celebrations while requiring minimal time and effort.
You’ll transform ordinary glass containers into dazzling light displays using basic supplies like glitter, Mod Podge, and LED tea lights.
Start by coating your jar’s interior with adhesive, then pour in your chosen glitter colors.
Try innovative techniques like creating rainbow gradients or marbling effects by swirling the mixture with a toothpick.
Once you’ve achieved your desired pattern, shake out excess glitter and let dry for 1-2 hours.
For extra flair, stamp holiday shapes using stencils, add seasonal fillers like faux snow, or wrap twine around the jar’s neck.
Safety tip: Always use battery-operated LED lights instead of real candles.
If you’re crafting with kids, swap glass for plastic containers.
These luminaries make perfect gifts or craft fair items, typically selling for $5-15.
Bundle them in themed sets for added appeal.
Express Christmas Card Garlands
Transform your stack of cherished holiday cards into stunning garlands that brighten any summer Christmas celebration. With just scissors, glue, and twine, you’ll create eye-catching displays that blend sustainability with style.
Regardless if you’re hosting a Christmas in July party or planning ahead for winter festivities, these garlands offer endless creative possibilities.
Get innovative with your design by incorporating modern elements and varied textures:
- Combine felt balls and wooden beads between card segments for contemporary appeal
- Mix gift wrap strips with cards for unexpected pops of color and pattern
- Add fresh greenery or metallic accents to enhance visual interest
For quick assembly, use a sewing machine to stitch through card circles, or simply glue pieces back-to-back along your twine.
You’ll love how easily these garlands adapt to any space, from mantels to staircases. Plus, they’re perfect for craft fairs, community workshops, or engaging family activities that teach sustainable crafting practices.
Swift Handprint Holiday Art
Every handprint becomes a whimsical holiday masterpiece with these quick and creative art projects perfect for Christmas in July celebrations.
Transform little palms into tropical Santas and festive flamingos using vibrant ink pads and quick-drying paint.
You’ll love turning handprints into Santa Claws crabs wearing red hats or creating palm tree Christmas designs with seashell ornaments.
For efficiency, set up an assembly line with pre-made templates and colored ink pads. Add sparkle with stickers and glitter, or enhance your designs with painted details like sunglasses and surfboards.
Create lasting memories by turning these handprint creations into personalized cards or framed keepsakes. You can even compile multiple prints into a summer holiday album.
Don’t forget to incorporate tropical twists like flamingos sporting holly berries or surfing Santas catching waves.
These innovative designs blend traditional Christmas elements with summer vibes for uniquely memorable art pieces.
Instant Printable Gift Tags
While handprint art captures personal memories, printable gift tags add a professional finishing touch to your Christmas in July packages. You’ll find an array of instant downloadable options, from whimsical candy cane frames to playful Santa-themed designs, perfect for both summer celebrations and workplace gifts.
Transform your tags into premium accessories by following these essential tips:
- Print on thick matte paper (200-300gsm) using high-quality settings for crisp, durable results.
- Cut precisely along dotted lines with a sharp blade or guillotine for clean edges.
- Punch holes strategically and thread with twine or ribbon for a polished look.
Whether you’re downloading free designs from Gather & Feast or exploring unique options on Etsy, you’ll discover tags that suit every gifting need.
Don’t forget to personalize the backs with special messages, making each package distinctly yours while maintaining that professional holiday charm.
Fast-Track Felt Ornaments
Fast-track felt ornaments are perfect for getting ahead on holiday crafting, especially with no-sew patterns that use simple shapes and secure glue joints.
Start with basic supplies like pre-cut felt sheets in traditional Christmas colors, craft glue, and decorative elements such as sequins and beads to create quick but eye-catching designs.
Simple No-Sew Patterns
When crafting festive decorations needs to be both quick and simple, no-sew felt ornaments offer the perfect solution for holiday enthusiasts.
You’ll discover these versatile projects require just a few basic supplies: a hot glue gun, felt sheets, and some creative spirit. Transform ordinary materials into eye-catching designs within 30 minutes, perfect for your Christmas in July celebrations.
Create stunning decorations with these novice-friendly patterns:
- Woodland creatures like foxes and owls, enhanced with textural elements and contrasting felt colors
- Modern poinsettias featuring layered petals and sparkly center embellishments
- Mini stockings with pocket designs, ideal for gift card holders or tree decorations
Mix and match colors, add glitter accents, or incorporate beads to elevate your designs.
You’ll love how these quick projects bring fresh energy to your seasonal decor without requiring advanced crafting skills.
Quick Color Combinations
Three essential color combinations can transform your fast-track felt ornaments into stunning holiday decor.
Pair traditional red and green with white accents for classic appeal, or layer jewel tones like sapphire and ruby for contemporary sophistication. For a modern twist, combine muted pastels with metallic threads.
You’ll create depth by layering complementary hues: try forest green beneath emerald, or cranberry under bright red.
For quick themed pieces, match your palette to your design. Pastels work perfectly for sweet treats, while earth tones suit woodland creatures. Keep it simple by limiting each ornament to 2-3 colors maximum.
Before cutting your final pieces, test your chosen combinations by stacking felt scraps. This quick check guarantees you’ll achieve the perfect balance of festive charm and visual impact.
Essential Supply List
Success in creating fast-track felt ornaments starts with gathering the right supplies.
You’ll need a focused selection of materials that maximize efficiency without compromising creativity. Think streamlined and strategic: every item should serve a clear purpose in your crafting process.
Base materials: wool felt in 2-3 complementary colors, sharp craft scissors, and an embroidery needle for precise control.
Essential components: embroidery floss or regular thread, lightweight filling material (wool or cotton), and sturdy cord for hanging.
Optional embellishments: sequins, beads, or decorative thread for adding personality to your designs.
Quick Christmas Potpourri Mix
Creating a festive Christmas potpourri mix doesn’t require hours of preparation or hard-to-find ingredients. You’ll transform your space into a winter wonderland by combining fresh cranberries, sliced oranges, and aromatic cinnamon sticks in a simmering pot.
Add whole cloves and rosemary sprigs for an authentic holiday fragrance.
For an innovative twist, swap traditional ingredients with creative alternatives. Try pomegranate arils for a jewel-toned effect, or incorporate star anise for a sophisticated licorice note. You can even use apple juice instead of water for a sweeter aroma profile.
Set your stovetop to low heat and let the mixture simmer uncovered for 1-3 hours, checking water levels hourly. For convenience, use your slow cooker on low setting.
Package your mix in quart jars with decorative ribbons and instruction tags; it’s perfect for gifting. Store leftovers in the refrigerator for up to five days, or opt for dried ingredients to extend shelf life.
Rapid Button Tree Decorations
After filling your home with festive aromas, you’ll love making these charming button tree decorations that come together in just a few hours. Grab a styrofoam cone (9″-14″ tall), 250-350 buttons in your chosen colors, and pearl-headed straight pins to get started.
You can mix vintage buttons with new ones or use retired craft buttons to create unique combinations that match your decor.
For a show-stopping display, try these innovative approaches:
- Layer smaller buttons behind larger ones, securing them with multiple pins for a dimensional effect that catches the light
- Incorporate sequins between button clusters to add unexpected sparkle and fill gaps
- Create an ombre pattern by arranging buttons from dark to light, moving from bottom to top
Don’t forget to crown your creation with a statement button or small ornament as a tree topper.
When you’re done, display your button tree on a mantel or table where it’ll become an instant conversation piece.
Simple String Light Mason Jars
Regardless of if you’re hosting a summer gathering or adding sparkle to your indoor decor, string light mason jars offer a magical blend of rustic charm and twinkling elegance.
Transform any mason jar into a luminous centerpiece by carefully feeding warm white or multicolored LED fairy lights through the mouth of the jar. You’ll want to secure the battery pack discreetly to the lid using strong adhesive tape.
For a distinctive Christmas-in-July vibe, incorporate seasonal elements like miniature pinecones or holly sprigs inside the jar alongside the lights.
Create path lighting for your outdoor festivities by hanging these illuminated jars from tree branches or placing them strategically along walkways. You can customize each jar with ribbons, twine, or floral accents to match your theme.
The best part? This craft takes minimal time to assemble, making it perfect for last-minute decorating needs, and you’ll find all supplies readily available at local retailers.
Summary
While winter’s snowy delights seem distant in July’s heat, you’ll find endless joy in creating these quick Christmas crafts. Transform everyday items into festive treasures as you beat the summer swelter with cool winter vibes. Regardless of you’re crafting delicate paper snowflakes or assembling cozy yarn wreaths, these projects bring December’s magic to your sunny days. Don’t wait for winter. Start spreading holiday cheer right now!